

Clip and trim videos
FastPix lets you extract clips from existing on-demand assets for content repurposing and social sharing, pull highlights, promotional snippets, or chaptered segments without re-uploading the source video.
Clips are useful for promotional snippets, social cut-downs, chaptered highlights, and ad-supported segment extraction from longer HLS assets.
This guide explains how to create shorter video clips from media that’s already uploaded to FastPix. You can extract any segment from a video by specifying a start time and end time.
Prerequisites
- A FastPix account with an active workspace (Activate your account).
- Your Access Token ID and Secret Key from the FastPix Dashboard → API Settings. FastPix uses these for HTTP Basic authentication.
- A source
mediaIdin the same workspace. AmediaIdis the unique identifier FastPix assigns to every on-demand asset when you upload or create it. - A decision on
accessPolicy. TheaccessPolicyfield controls who can play the resulting clip:publicmeans anyone with theplaybackIdcan stream it, andprivaterestricts playback to signed URLs.
How clipping works
FastPix treats every clip as a new on-demand asset derived from a parent mediaId. When you create a clip, FastPix transcodes the requested segment, generates its own HLS renditions, and assigns a fresh mediaId and playbackId. The playbackId is a separate, access-controlled identifier used to build the stream URL https://stream.fastpix.com/<playbackId>.m3u8.
Both the source and the clip must live in the same workspace. FastPix cuts on the nearest keyframe (GOP boundary) to your requested startTime and endTime, so the resulting duration can differ from the exact values you send by a few hundred milliseconds depending on the source GOP size.
Create a clip using the API
- You need the media ID of the video you want to clip. You can find it in the FastPix dashboard under Products > Media, or retrieve it programmatically from a previous API response.
A media ID looks like this: 5cfe8b2d-1c3a-4685-bd05-10fbc54c0015
- Send a
POSTtohttps://api.fastpix.com/v1/on-demand. In theinputsarray, settypetovideoandurltofp_mediaId://{Media_ID}. ProvidestartTimeandendTimein seconds. Omit them to clone the full source duration.
Request body:
NOTE
In the request, replace{Media_ID}with your sourcemediaId.
Response:
FastPix returns the new mediaId, the sourceMediaId (your parent asset), and an array of playbackIds with their access configuration.
NOTE
You can create an unlimited number of clips from a single sourcemediaId. Each clip is a new on-demand asset, so on-demand video pricing applies for encoding, storage, and delivery.
Wait for the clip to become ready
Clip encoding happens asynchronously. The clip’s status starts as "Created" and changes to "Ready" when it’s available for playback.
The most reliable way to detect when a clip is ready is with webhooks. Listen for the video.media ready event on your webhook endpoint. See Set up webhooks for instructions.
Alternatively, poll the Get media by ID endpoint and check the status field. Don’t poll more than once per second.
Play the clip
After the clip status is "Ready", create a playback URL using the playback ID from the response:
You can use this URL with any HLS-compatible player, including the FastPix player.
Create a clip using the FastPix dashboard
If you prefer a visual interface, you can create clips directly from the FastPix dashboard without writing any code.
To create a clip from the dashboard, you need to:
Select your video
- Open the FastPix dashboard and go to Products > Media.
- In the media list, select the video you want to clip.
Define the clip segment
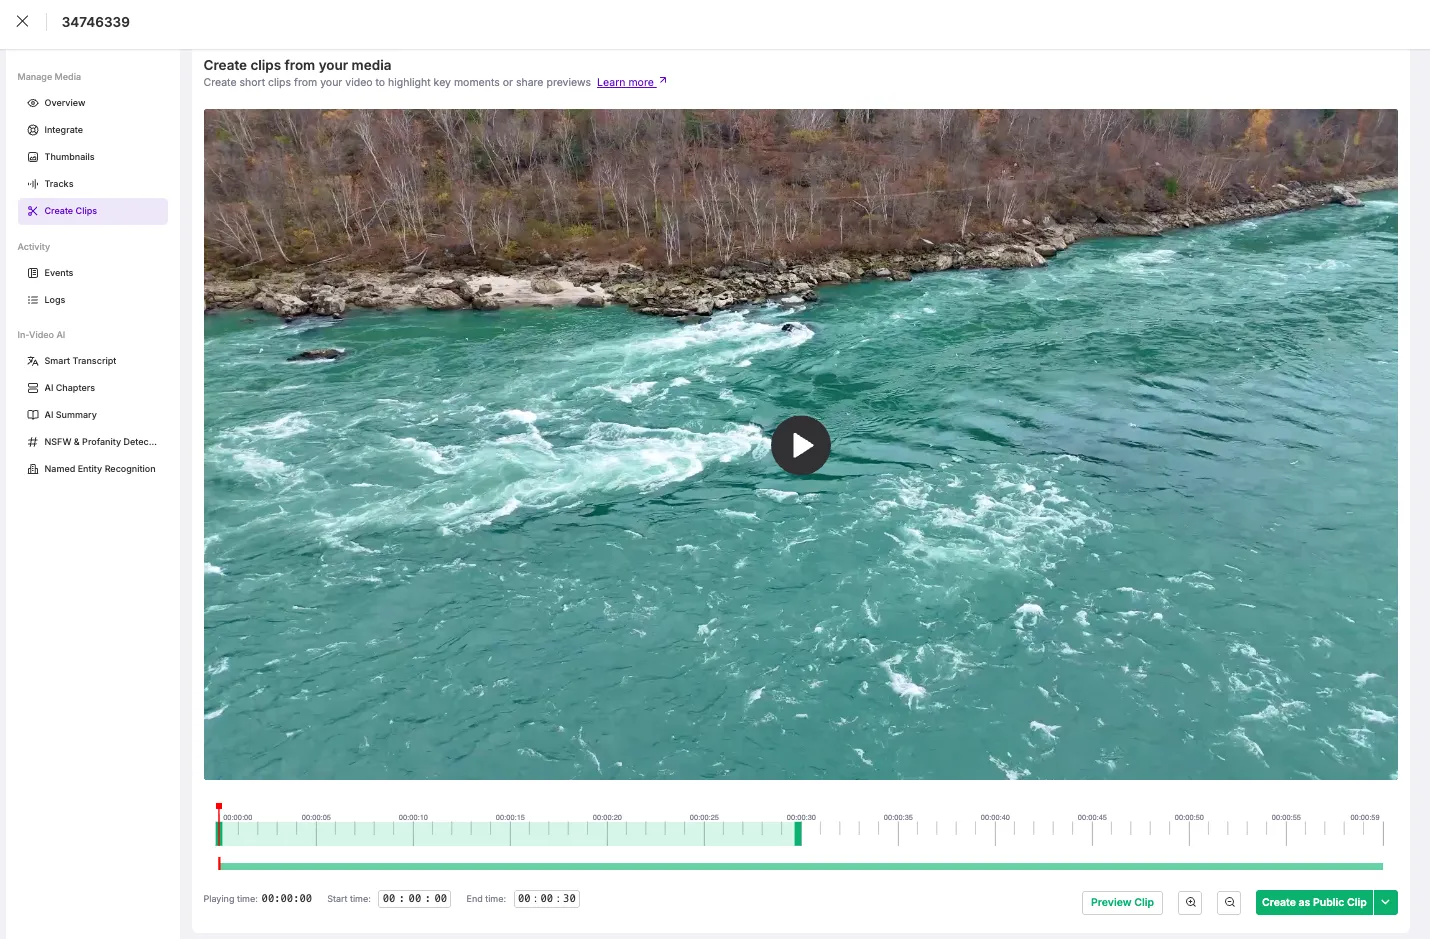
- On the Manage media page, click the Create Clips tab.
- Enter the Start time and End time for your clip in seconds.
- Use the Preview Clip button to watch the exact segment before creating it.
- Drag the red (start) and green (end) timeline handles to fine-tune your selection.
- Use the Zoom In (+) and Zoom Out (–) buttons to adjust the timeline view for more precision.
Choose the access policy
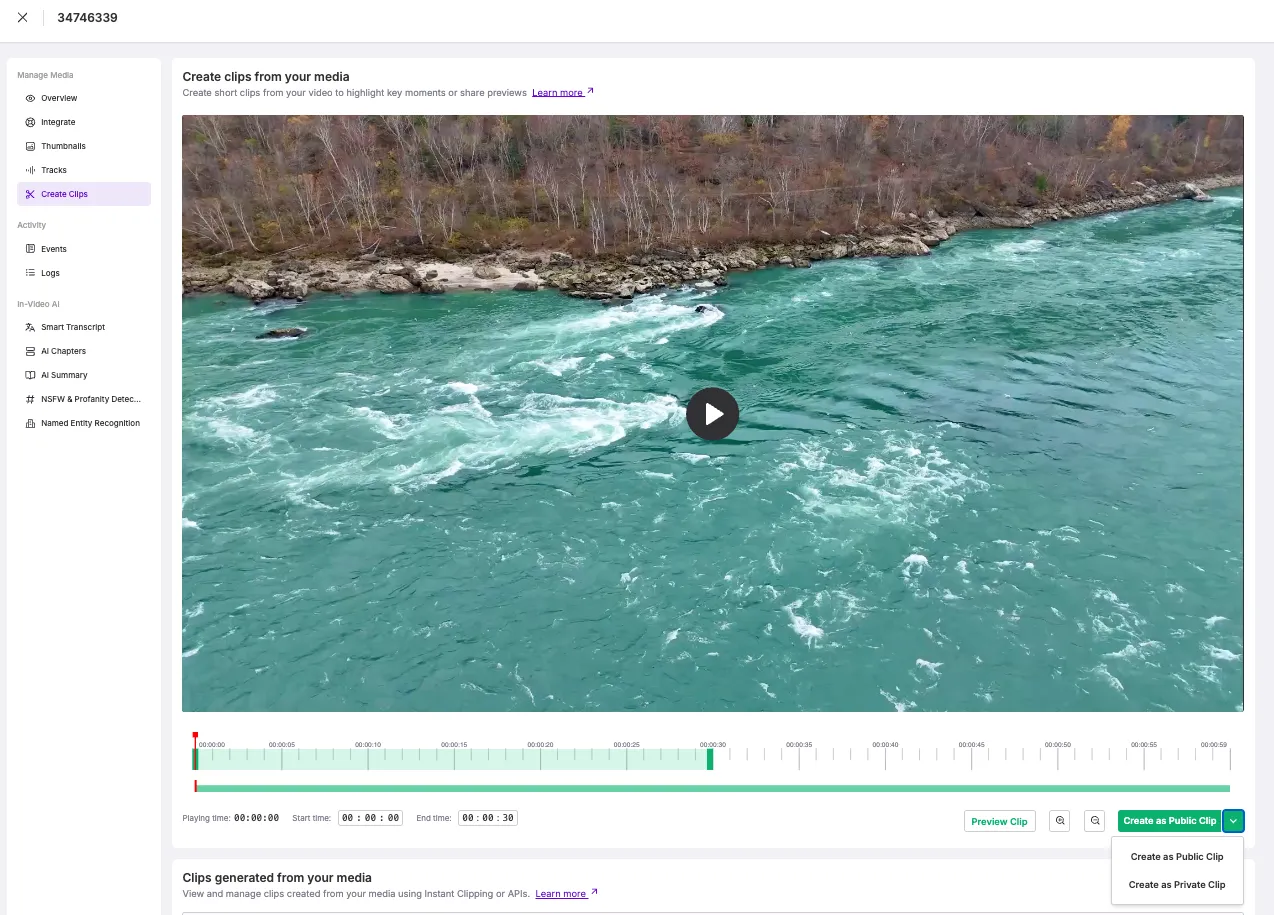
- Choose your access policy from the dropdown next to Create as Public Clip:
- Public: Anyone with the playback URL can stream the clip.
- Private: Access is restricted according to your workspace access policy.
Create and verify the clip
-
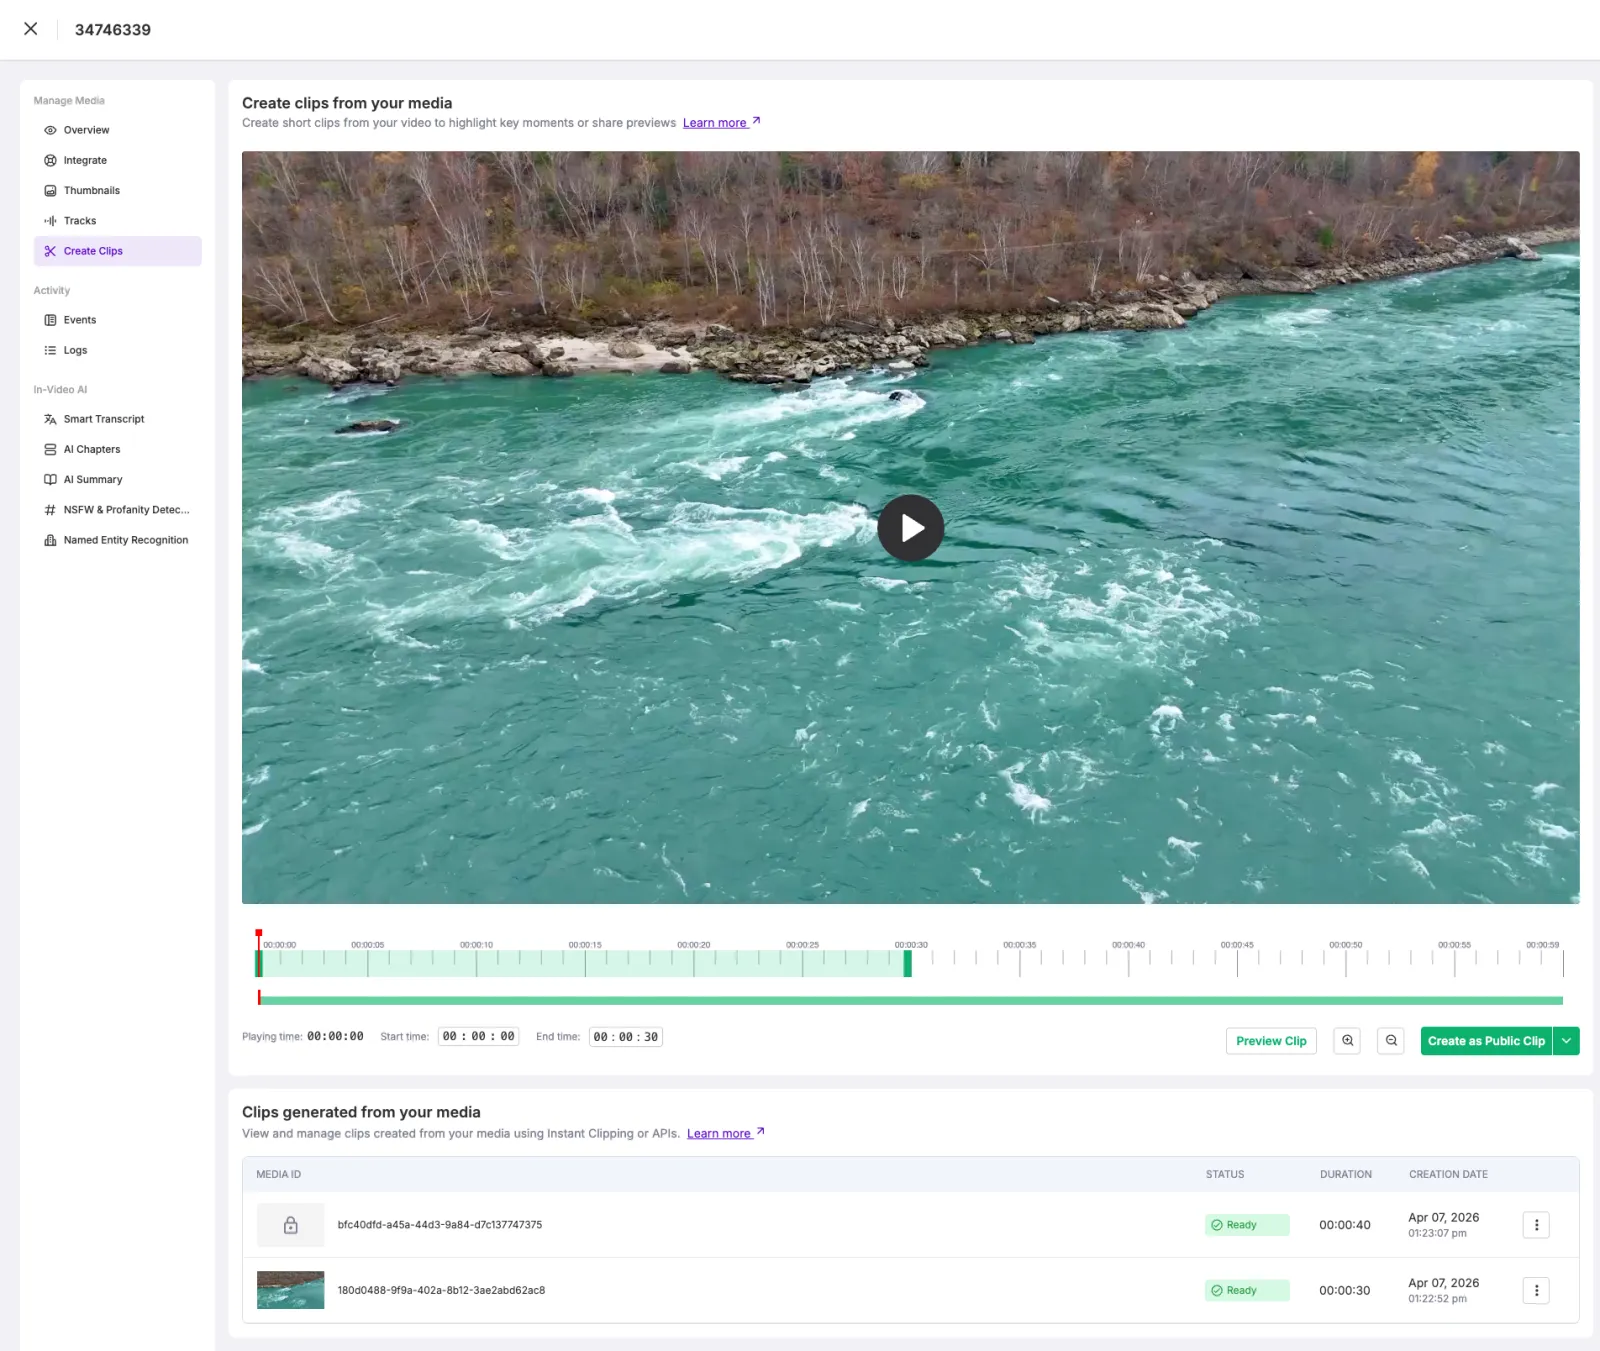
Click Create Clip. FastPix processes and encodes the segment.
-
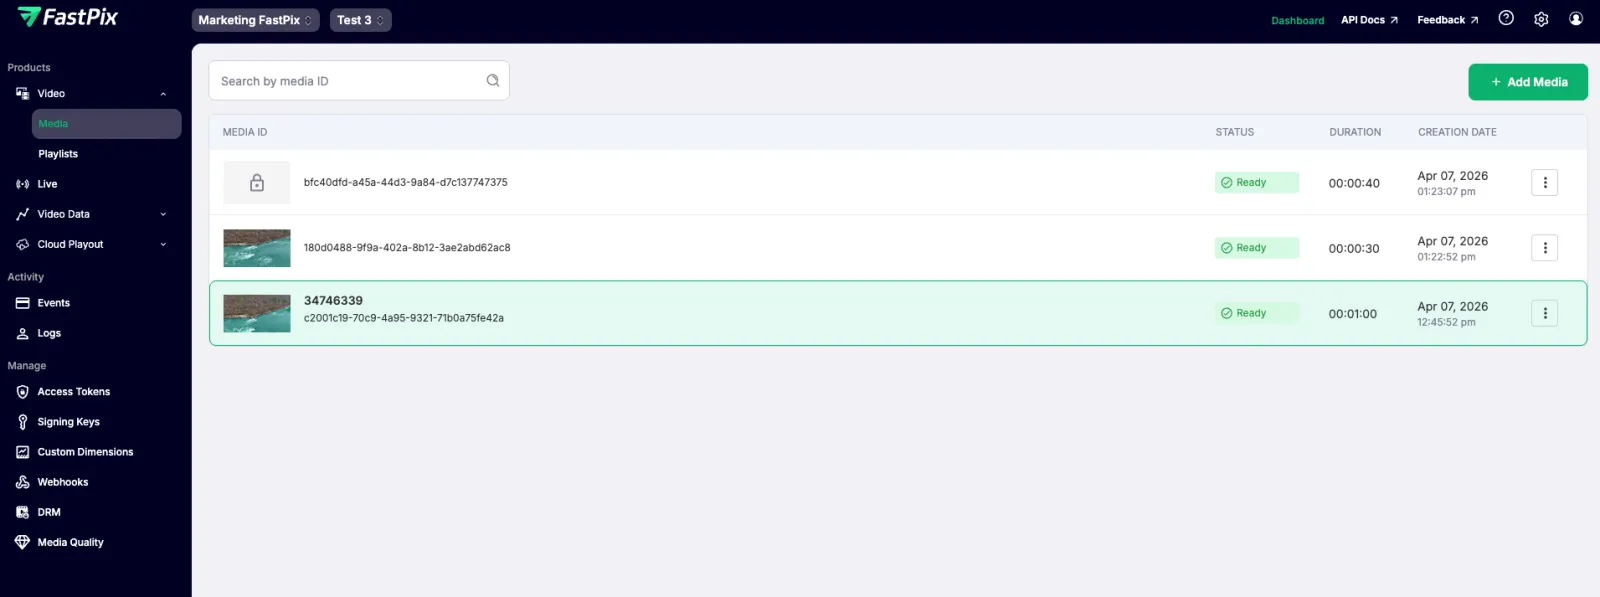
The clip appears in your Media list as a new entry. Select it to view its Playback IDs and confirm its access settings.
Retrieve all clips for a source media
Call the Get all clips of a media endpoint with the source mediaId to list every clip derived from that parent. The response returns each clip’s id, duration, status, thumbnail, and its playbackIds with accessPolicy.
Replace {ACCESS_TOKEN_ID} and {SECRET_KEY} with your actual values.
Request:
Response:
Frequently asked questions
Are FastPix clips frame-accurate?
FastPix cuts on the nearest keyframe (GOP boundary) to the startTime and endTime you provide. The final clip duration can differ from the exact requested values by a few hundred milliseconds depending on the source GOP size. For tighter cuts, re-encode the source with a shorter GOP before clipping.
What happens to a clip if I delete the source media?
Each clip is an independent on-demand asset with its own mediaId, playbackId, and stored renditions. Deleting the source mediaId does not delete existing clips, and deleting a clip does not affect the source.
Can I create multiple clips from one source in a single request?
No. One POST to the create media endpoint produces one clip. To create clips in bulk, issue one request per segment — typically in parallel from your application code. Each clip is billed as a separate on-demand asset.
Does clipping work on live-to-VOD recordings?
Yes. Once a live stream has produced an on-demand recording with a mediaId, you can clip it the same way as any other source asset using fp_mediaId://<mediaId>.