

Set up a workspace
Create organizations
Organizations streamlines operations and team management with a centralised view in the FastPix Dashboard to manage all lines of business or subsidiaries across multiple FastPix accounts.
This guide covers the basics of managing your Organization inside your account. We’ll also show you how to edit your Organization’s details, invite team members, assign them specific roles, and edit or remove members from your Organization.
NOTE
If you are the first in your Organization to create your FastPix account, you will be automatically set to the Role of Admin. As the Admin of the Organization, you will:
- Have access to all actions and functionalities
- Can add, remove, or edit the roles of members in your Organization
Use cases
Operating across multiple FastPix accounts is a common practice for many businesses.
Consider the following scenarios:
Start a team
You can invite members of your team to access your FastPix account. You must assign each team member one role before you can invite them. Roles protect your sensitive information and restrict the actions team members can perform on your account. Before assigning the role to a team member, understand (list of actions) what each role can and can’t perform.
You can invite team members individually or invite multiple users at the same time by separating their email addresses with a comma or space. Either of a role between Admin and Member can be assigned to team members.
NOTE
Invites to your FastPix account expire after 14 days.
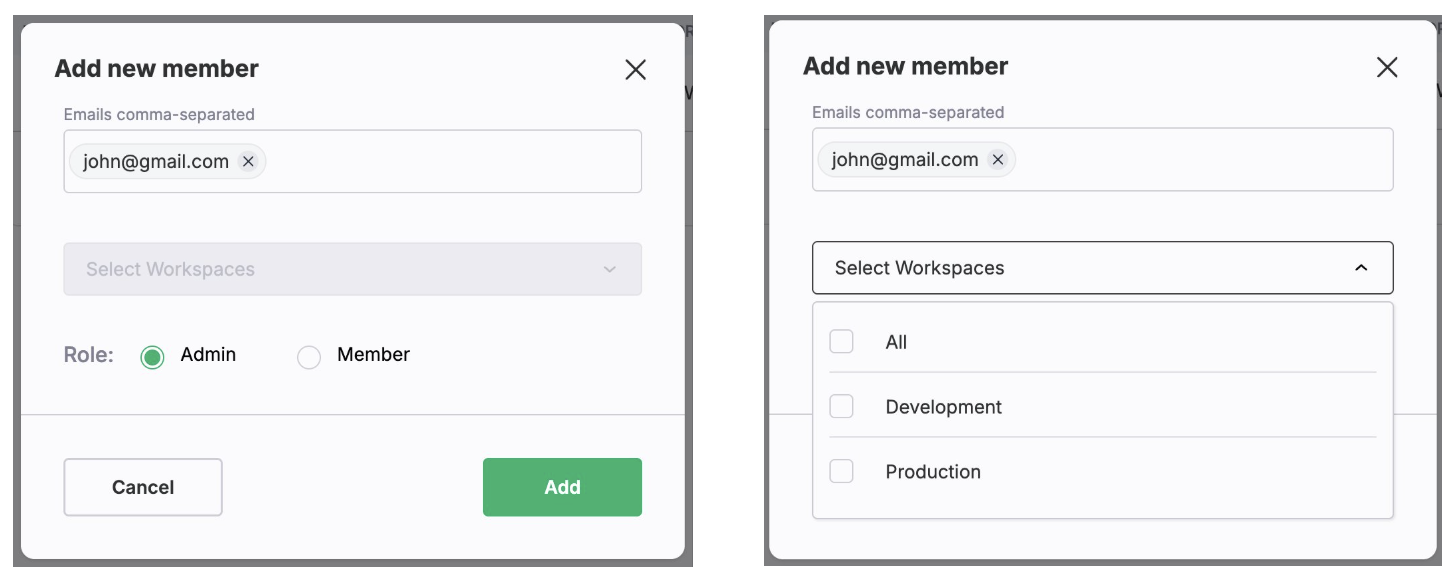
Admin roles by default have access to all the Workspaces in the organization, while Member roles can be assigned Workspace as per requirement. For instance, Production and Development are default workspaces available. However, an admin can create other Workspaces as per need.
Add a new member
To add a new member, go to Account Settings on your FastPix dashboard and click on Manage Organization. This window would show all members having access to a particular organization.
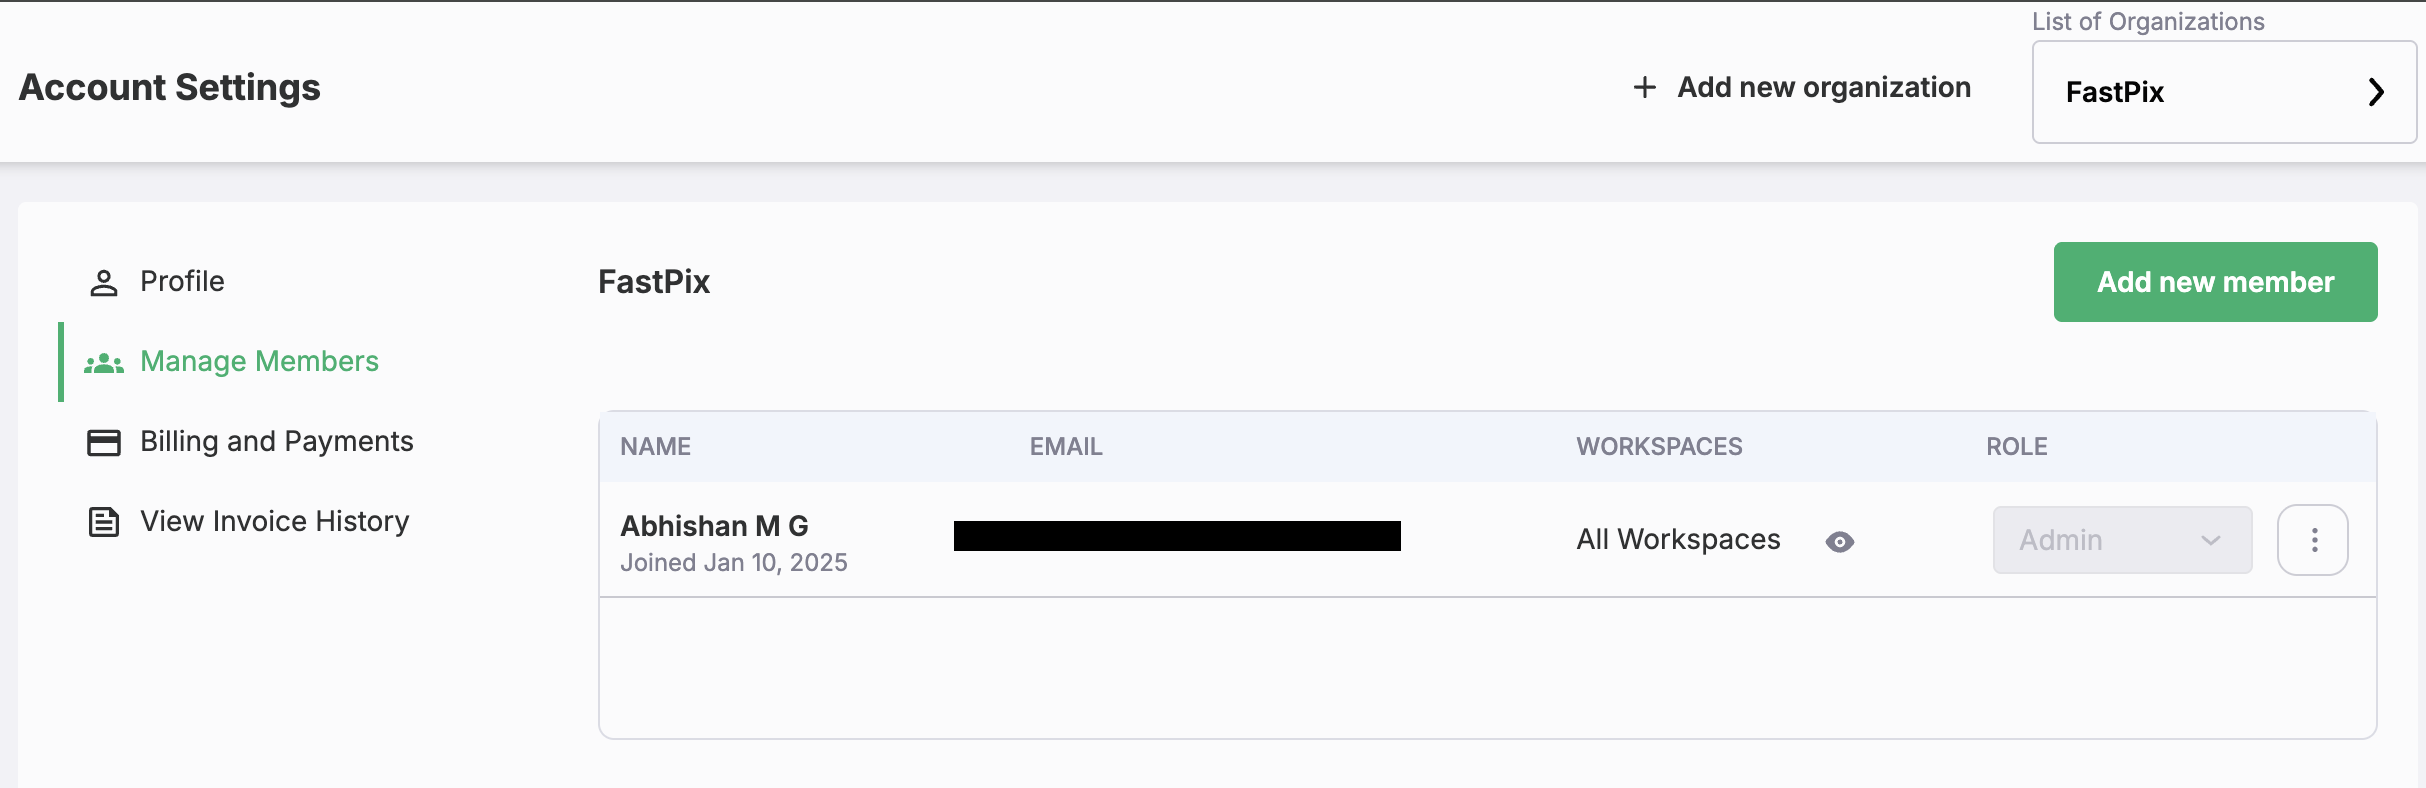
Once clicked on Add new member, you can add team members with their email address. Further, a role needs to be assigned either between Admin or Member.
Admins can access all Workspaces whereas for members you have options to select.
NOTE
While a member is left on accepting the invite, you won’t be able to make changes to the assigned role. You can always delete and remove a member from the organization when required.
After a team member has accepted their invite, you can edit their role at any time from the dropdown. To delete a team member, click the overflow menu, then click Delete.
Organizations for team members
NOTE
As a team member you can have your individual account registered with FastPix where you are the admin. If another account owner/admin wants to add you as a team member, then you can wait for an invite from the admin to get added to their Organization. You will have limited access if assigned a member role.
Step 1: Check your email for the invite link
You will receive an email from FastPix asking to join organization. If you haven’t received the email and your Organization owner has already sent an invite, check your Spam folder for the invite email or double-check that your Organization owner used the correct email address. Invite to an Organization expires after 14 days.

Open the email and click “Accept invite” button.
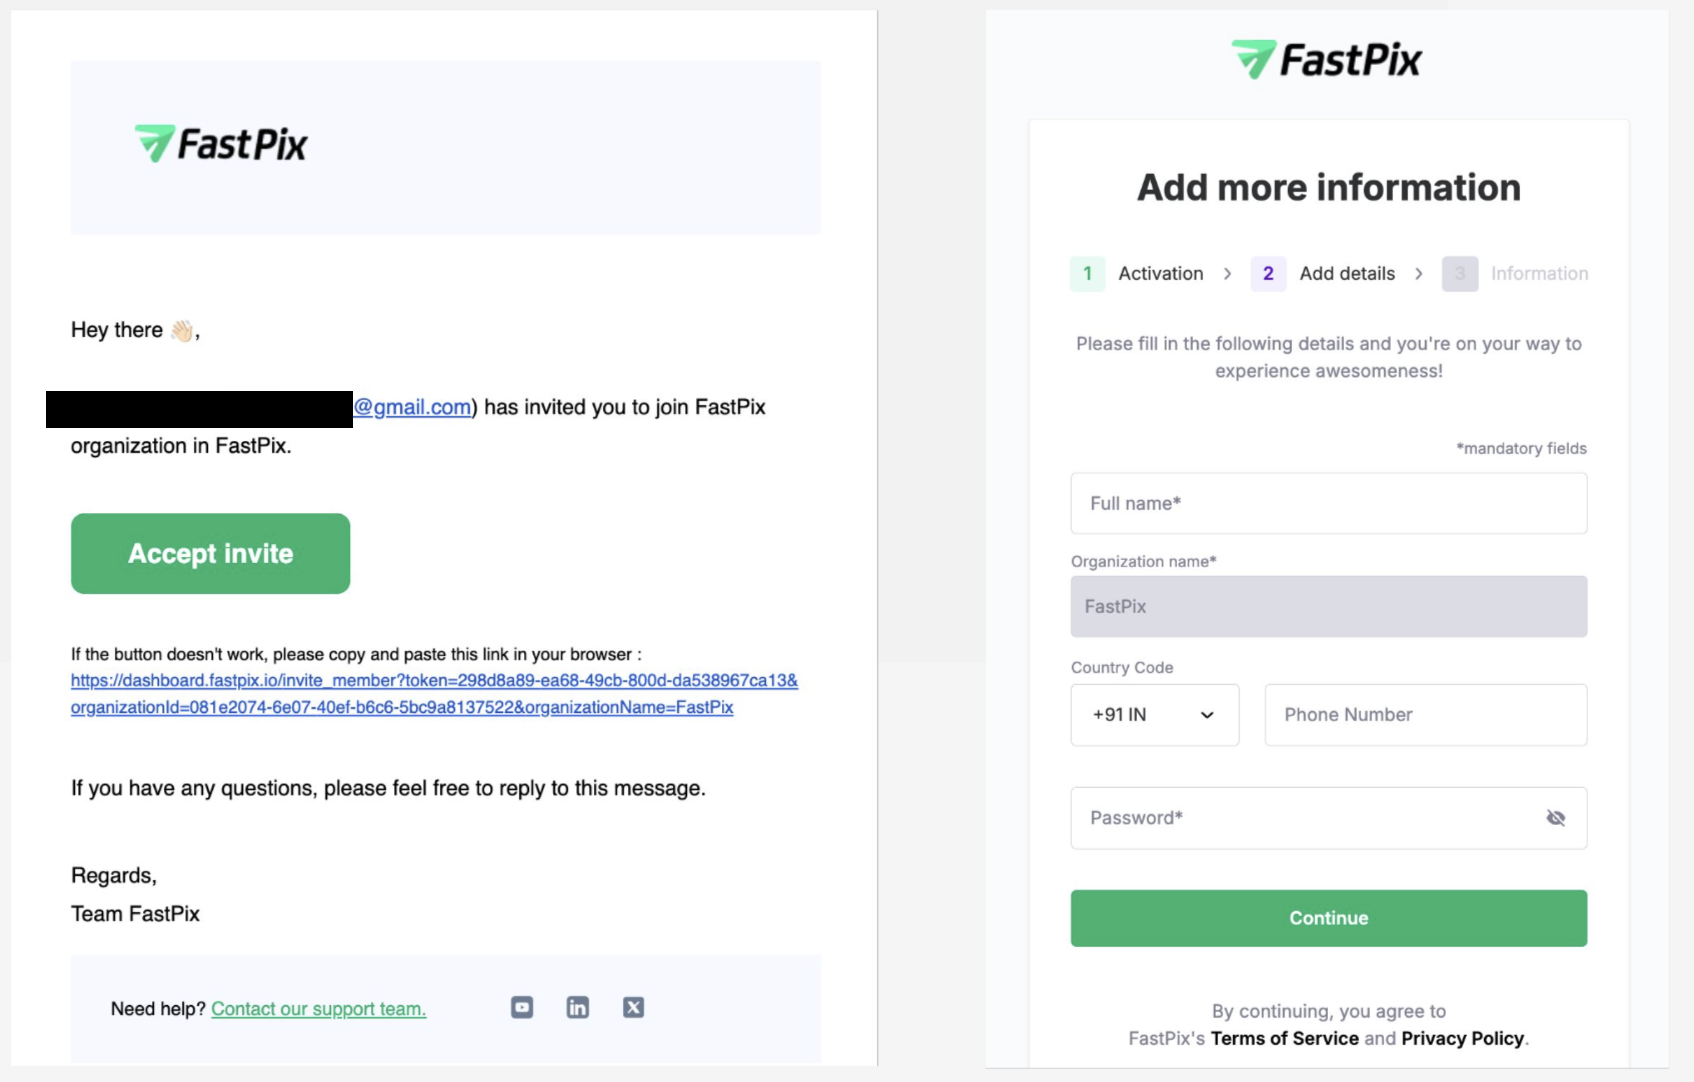
Step 2: Complete account setup
You will be redirected to the FastPix activation dashboard and asked to complete your account setup. Enter your details and click Get Started.
Assign user roles
You can give team members controlled access to your FastPix organization. There are two levels of user roles, admin and member.
Admin: This role is for anyone who needs similar access as the account owner – they can see and manage almost everything.
Member: Anyone who needs restricted or limited access to the organization and the functionalities. Members get only the view access for various functions, they can’t edit or delete.
Below tables lists out the capabilities and restrictions among these two types of users roles:
Admin role
NOTE
Admin roles can invite additional users to your account, and if compromised by an attacker - it would allow them to invite users under their control.
Member role
NOTE
The list of access provided across both the Admin and member user roles stands similar for both API usage and FastPix Dashboard usage.
Workspaces
Workspaces (often also termed as environments) are your deployment targets, such as production, staging, or development. We create development and production workspaces by default for you to configure. Alternatively, an admin can create other workspaces as per need.

Types of Workspaces
- Development Environment: The local setup where developers write and test their code. It includes tools like IDEs, local databases, and other dependencies, creating a sandbox for quick iteration without impacting other environments.
- Production Environment: The live environment where the application is accessible to end-users. This environment must be stable, secure, and highly available, with deployments carefully managed to minimize risk.
- Testing Environment: A dedicated setup for performing functional, performance, and security tests to ensure the application meets all specified requirements and is ready for release.
- Staging Environment: A pre-production environment that replicates the production environment. It is used for final testing and quality assurance to ensure that all code changes work as expected in a production-like setting.
Creating new workspace
Workspaces are created at the organization level, and you need admin access to add one. FastPix provides Development and Production workspaces by default, and an admin can add more as needed.
- Click the settings (gear) icon in the top navigation to open Organization settings. It opens on the General tab, which also shows your Organization ID.

- In the left sidebar, select Workspaces. This lists every workspace in your organization, each with its own workspace key.
-
Click Add workspace in the top-right corner.
-
In the Create Workspace dialog, enter a Name for the workspace.

- Open the Select option dropdown and choose an environment type: Development, Production, Testing, or Staging.

- Click Create.
Your new workspace appears in the list with its own workspace key, ready to use.
Manage a workspace
To manage a workspace, click the overflow menu (the three dots) at the end of its row. From there you can copy the Workspace Key, Edit the workspace name or type, or Delete the workspace.

Using the workspace key
Each workspace has a unique workspace key, which is displayed next to the workspace name in the Workspaces list. To copy it, click the copy icon next to the key, or open the overflow menu and select Workspace Key.
The workspace key identifies the workspace where FastPix should send playback analytics. When integrating a Video Data SDK, provide the workspace key as the workspace_id value. This ensures that all analytics events are associated with the correct workspace and environment.
If you don’t provide a valid workspace_id, FastPix cannot associate the playback data with your workspace, and the data does not appear in your dashboard.
Need more help?
For additional information, references, or support, visit FastPix API Reference page or contact our customer support at support@fastpix.com