

Migrate from Cloudflare Stream to FastPix
Learn how to obtain Cloudflare credentials and migrate videos to FastPix, including API key setup, video selection, and seamless transfer.
This guide provides a detailed walkthrough for generating an API token and locating the Account ID in Cloudflare, both of which are essential requirements for successfully migrating videos from Cloudflare Stream to FastPix.
Evaluating FastPix against Cloudflare Stream? See the FastPix vs Cloudflare Stream comparison for a side-by-side look at features and pricing.
Obtaining Cloudflare credentials
Step 1: Login to Cloudflare
- Open https://dash.cloudflare.com
- Enter your email and password.
- Complete two-factor authentication if enabled.
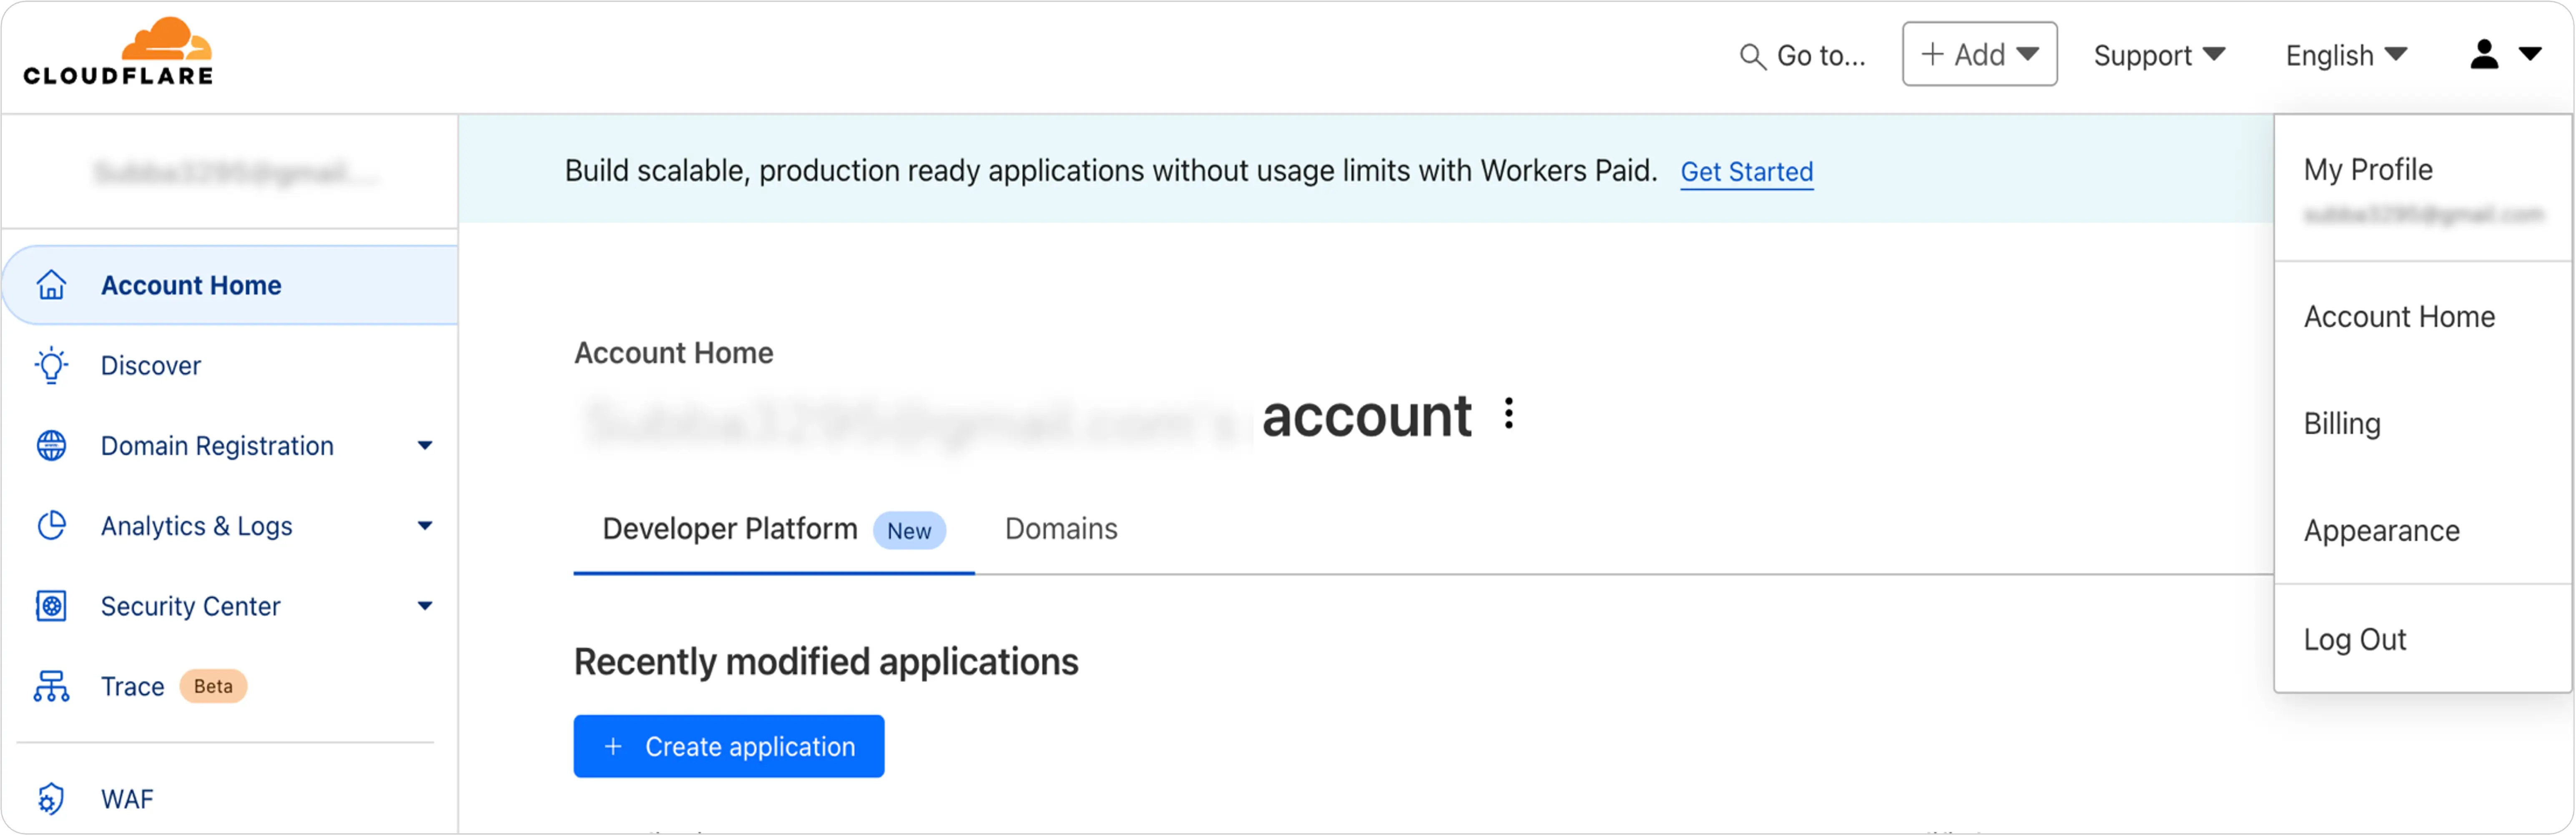
Step 2: Navigate to account
- After logging in, look for your profile icon in the top-right corner.
- Click on the profile icon.
- Select “My Profile” from the dropdown menu.
Step 3: Access API tokens section
- In the left-side navigation menu click on “API Tokens”.
- You’ll see a section titled “User API Tokens”.
- Click on “Create Token” to create and configure token permissions.
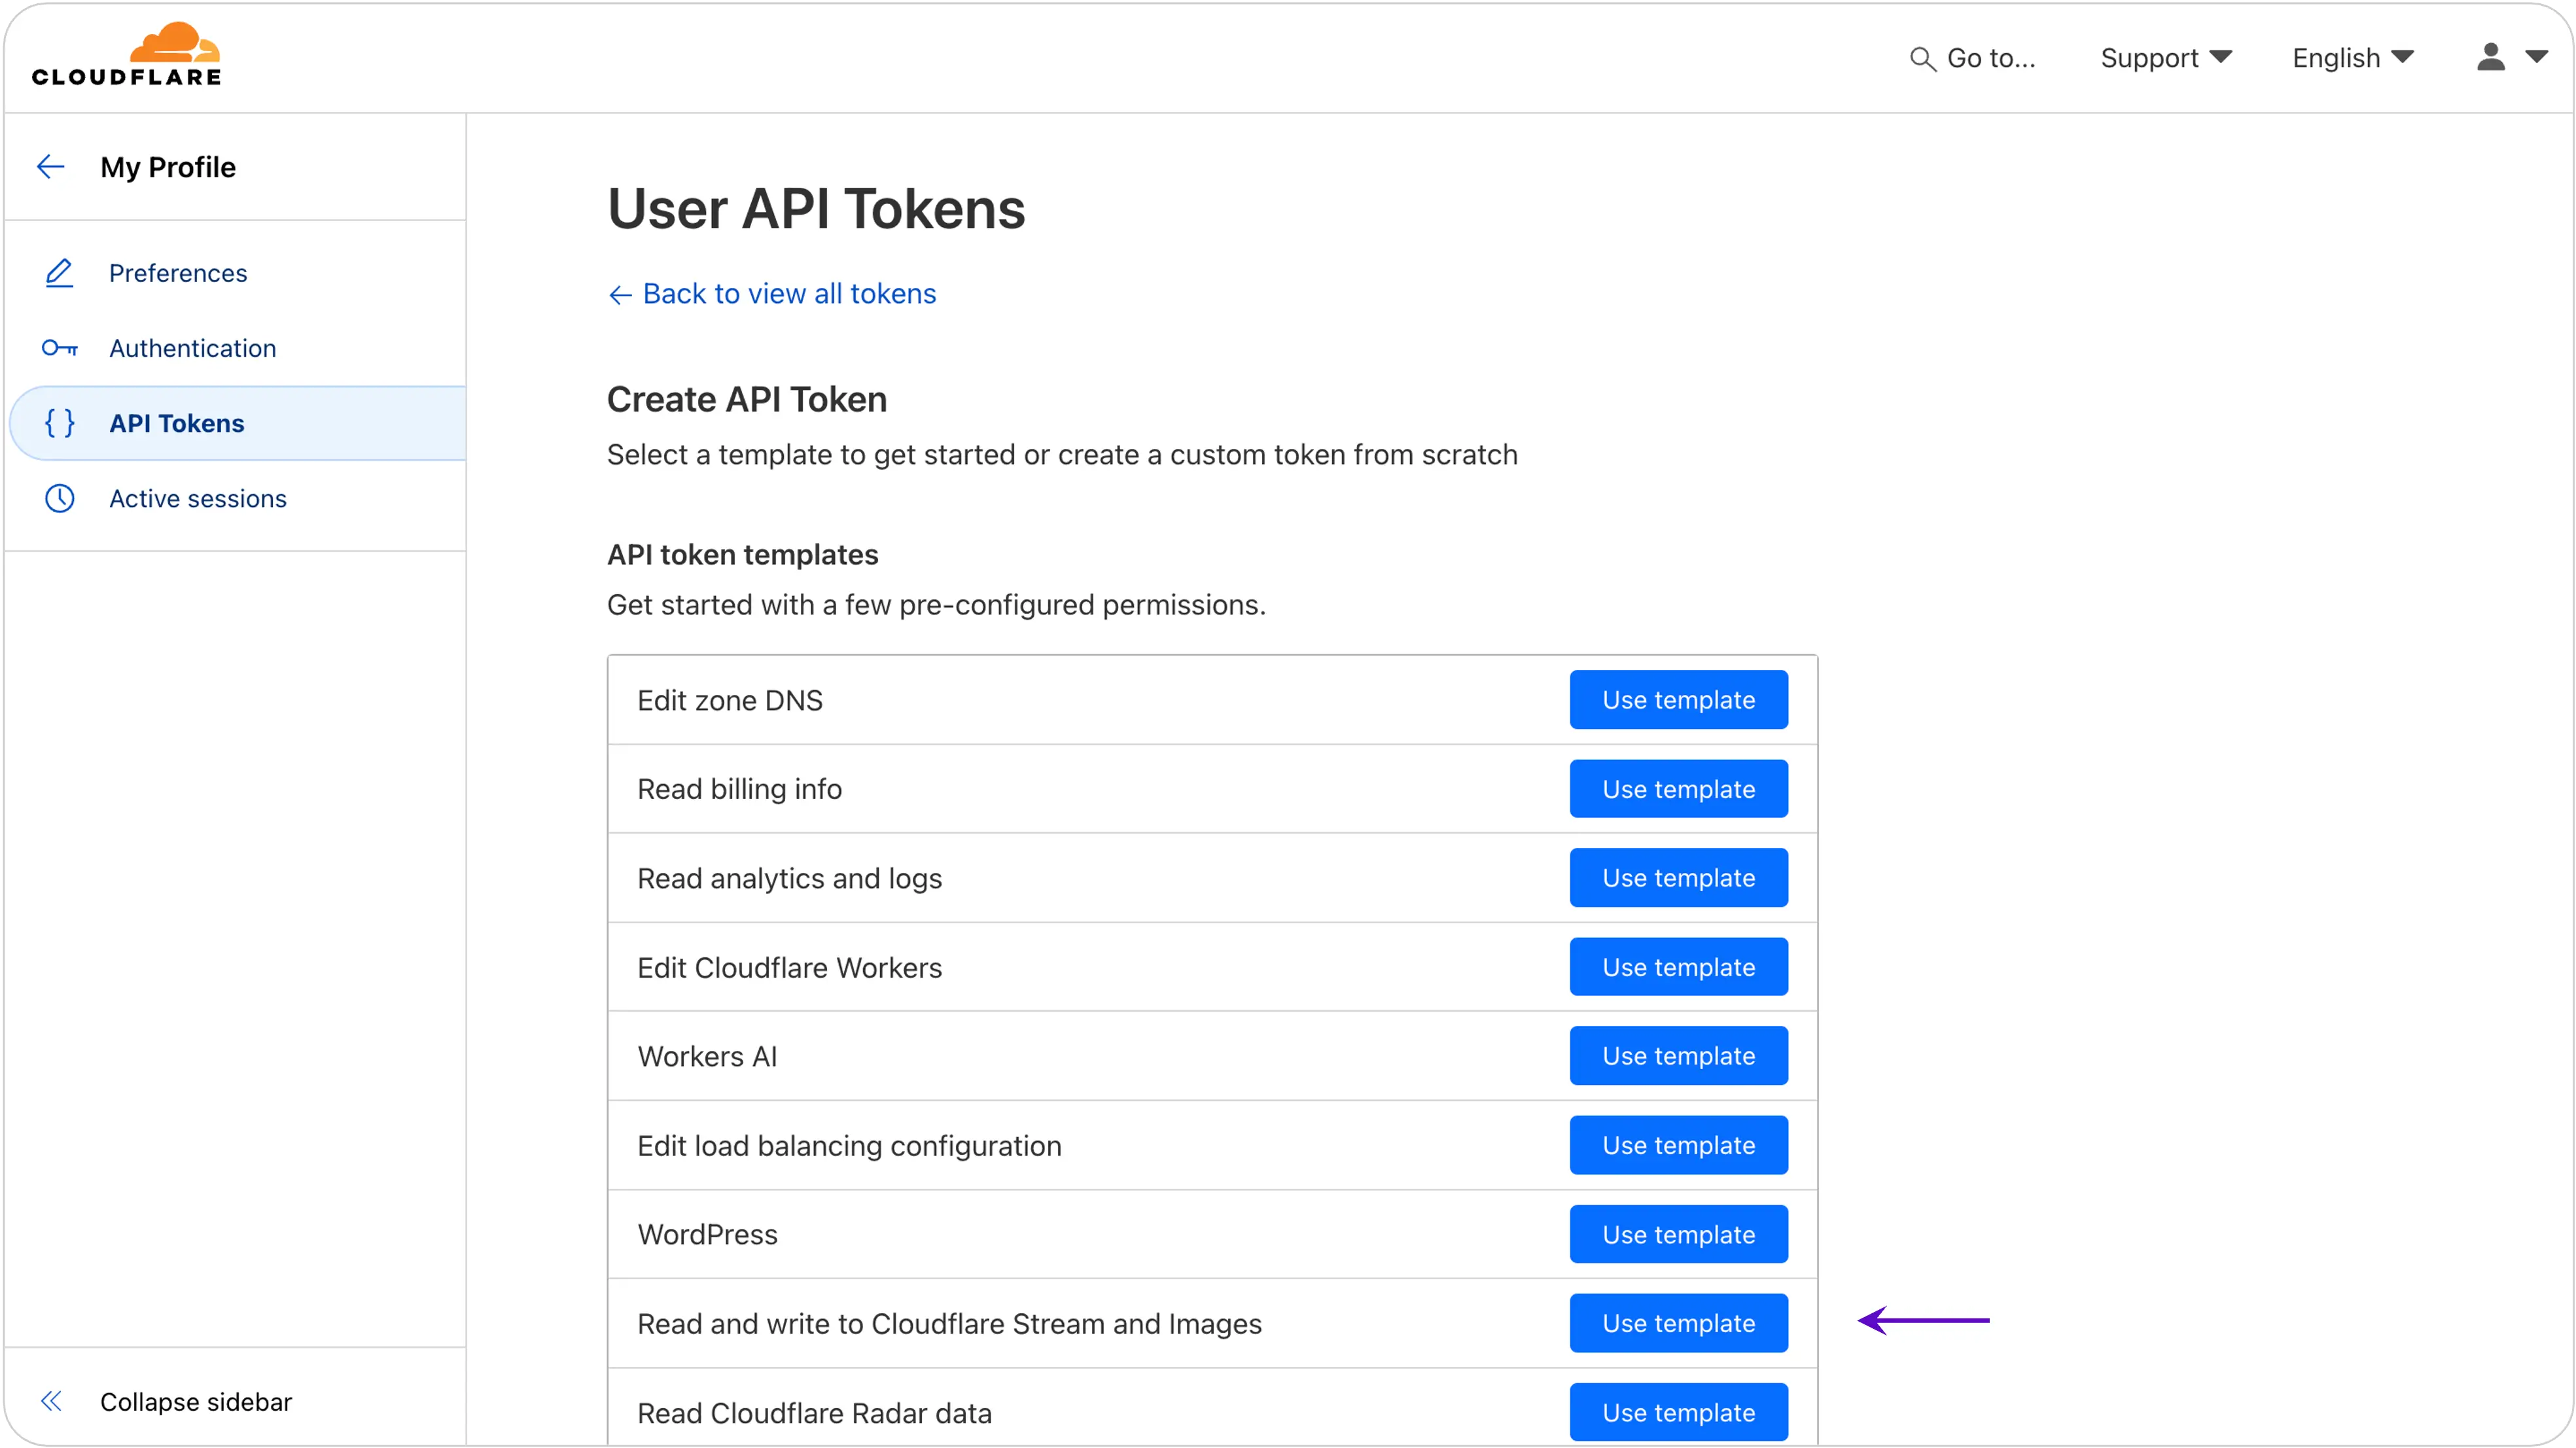
Token template selection
- Click on “Use Template” for Read and write to Cloudflare Stream and Images
- Verify the pre-selected permissions include:
- Stream video access
- Read and write capabilities
- Appropriate account resource scope
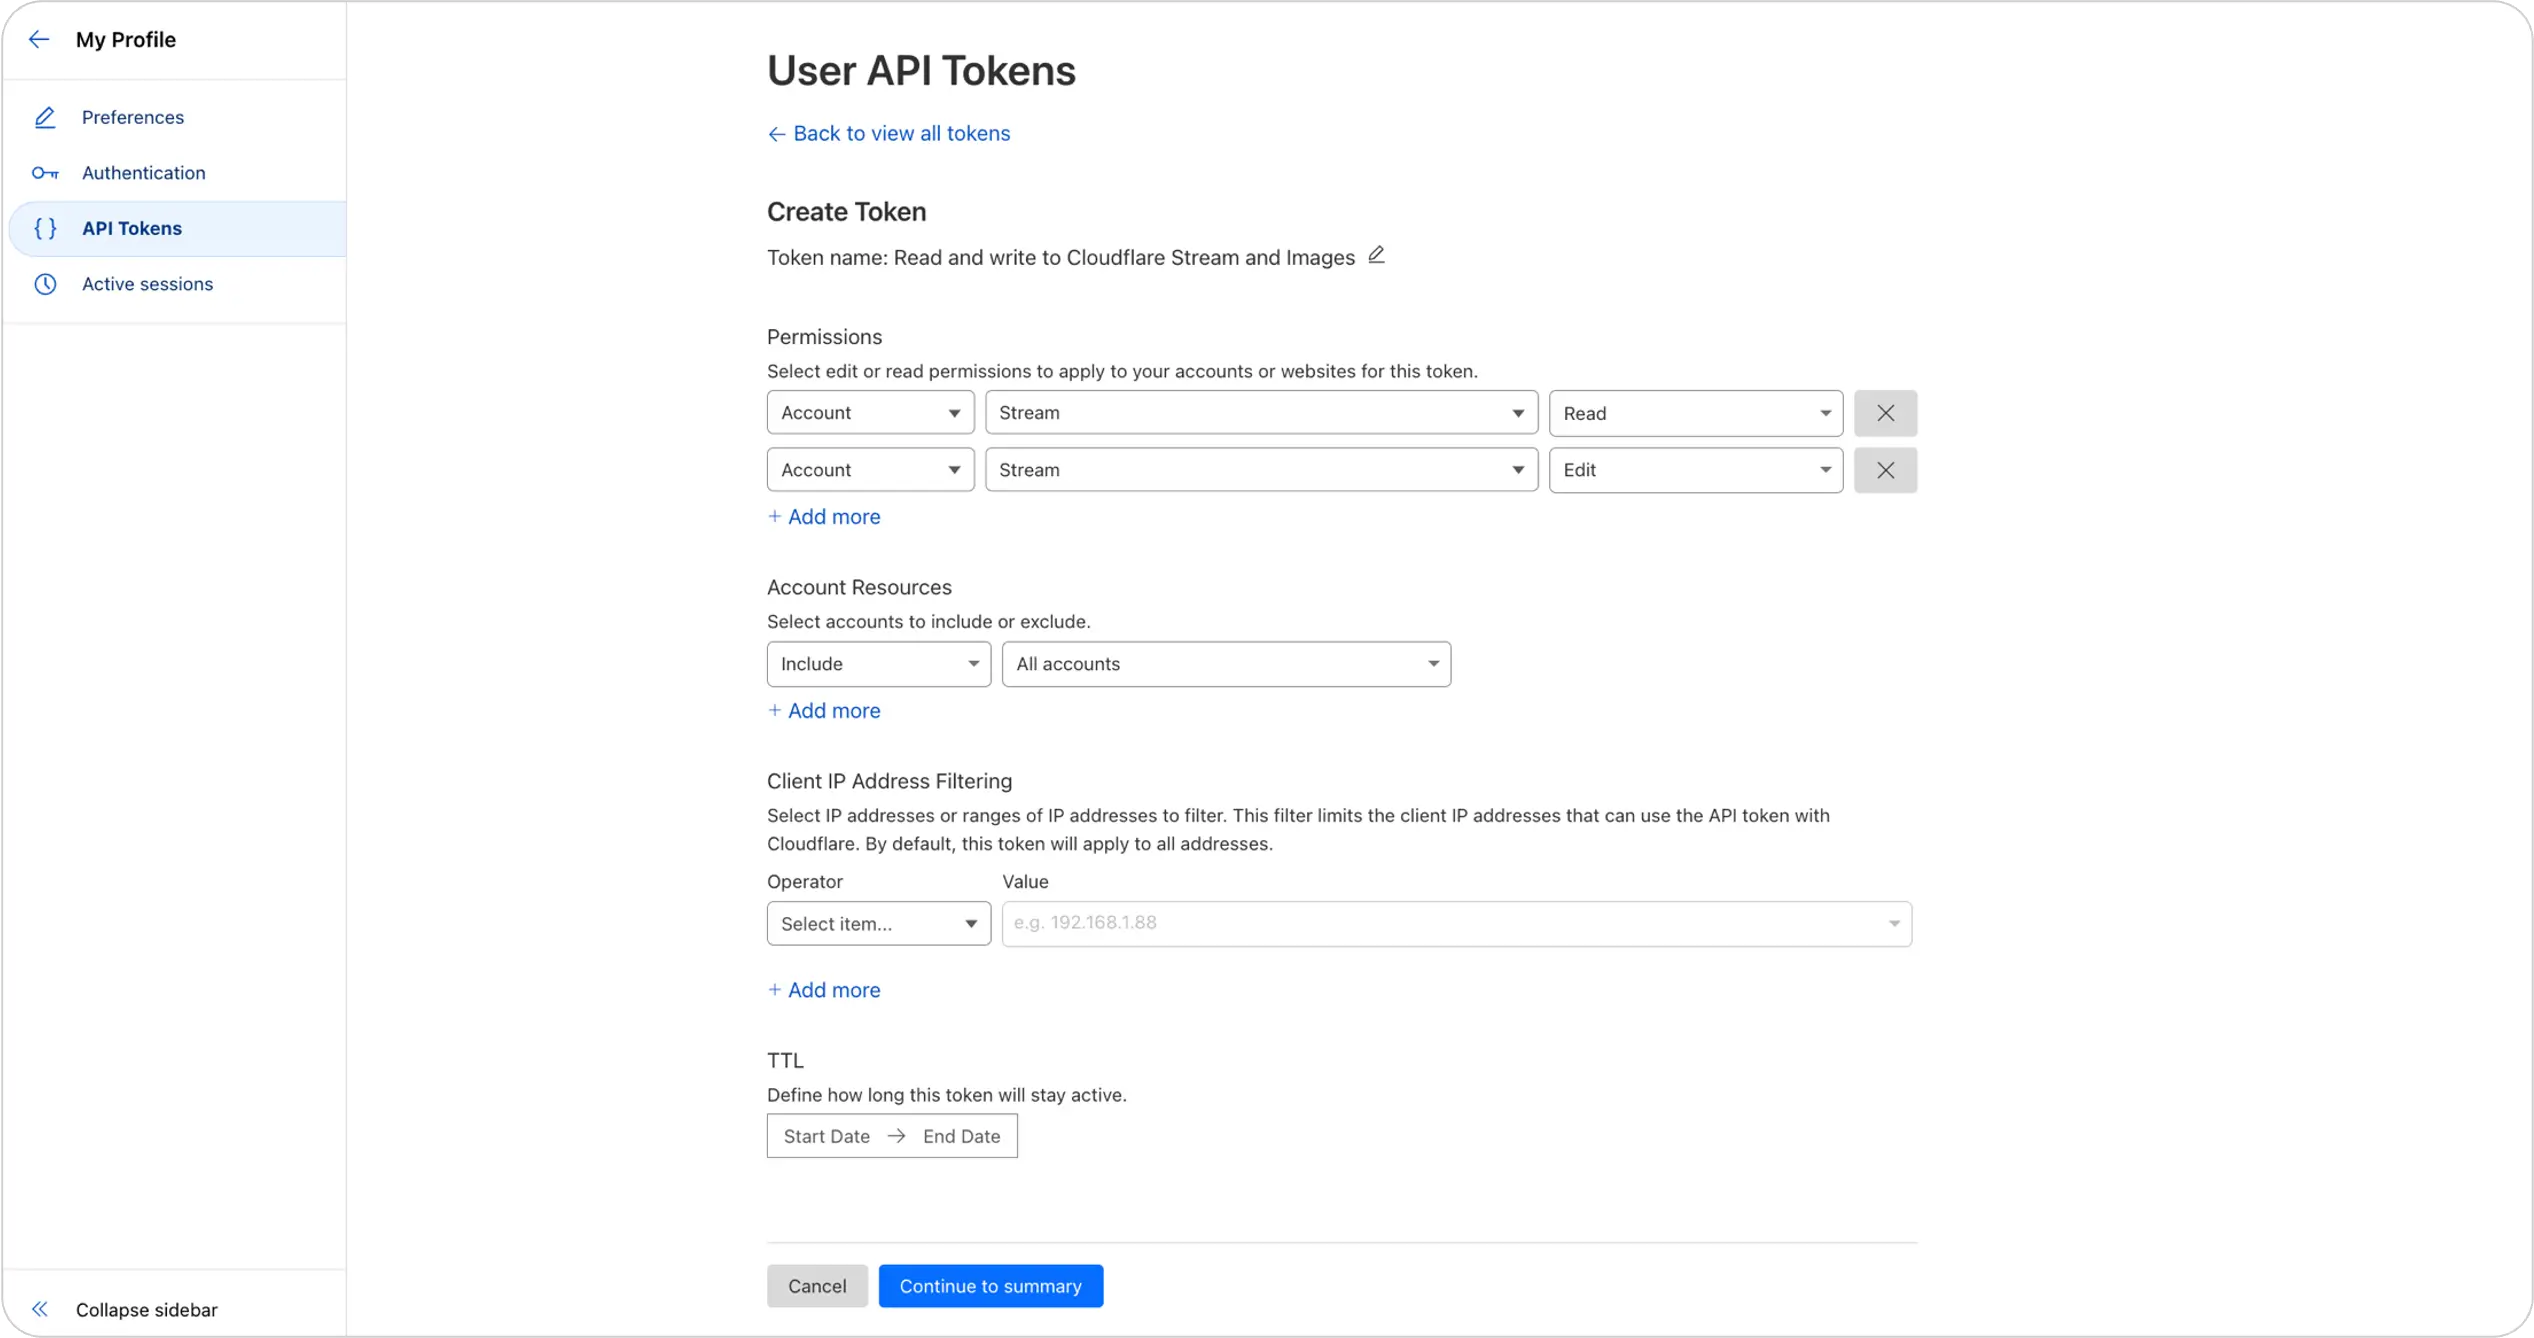
Step 4: Generate and verify token
- Click on “Continue to Summary”
- Click “Create Token”
- Important Verification Steps:
- Confirm all required Stream permissions are enabled
- Check account resource access
- Validate scope of access
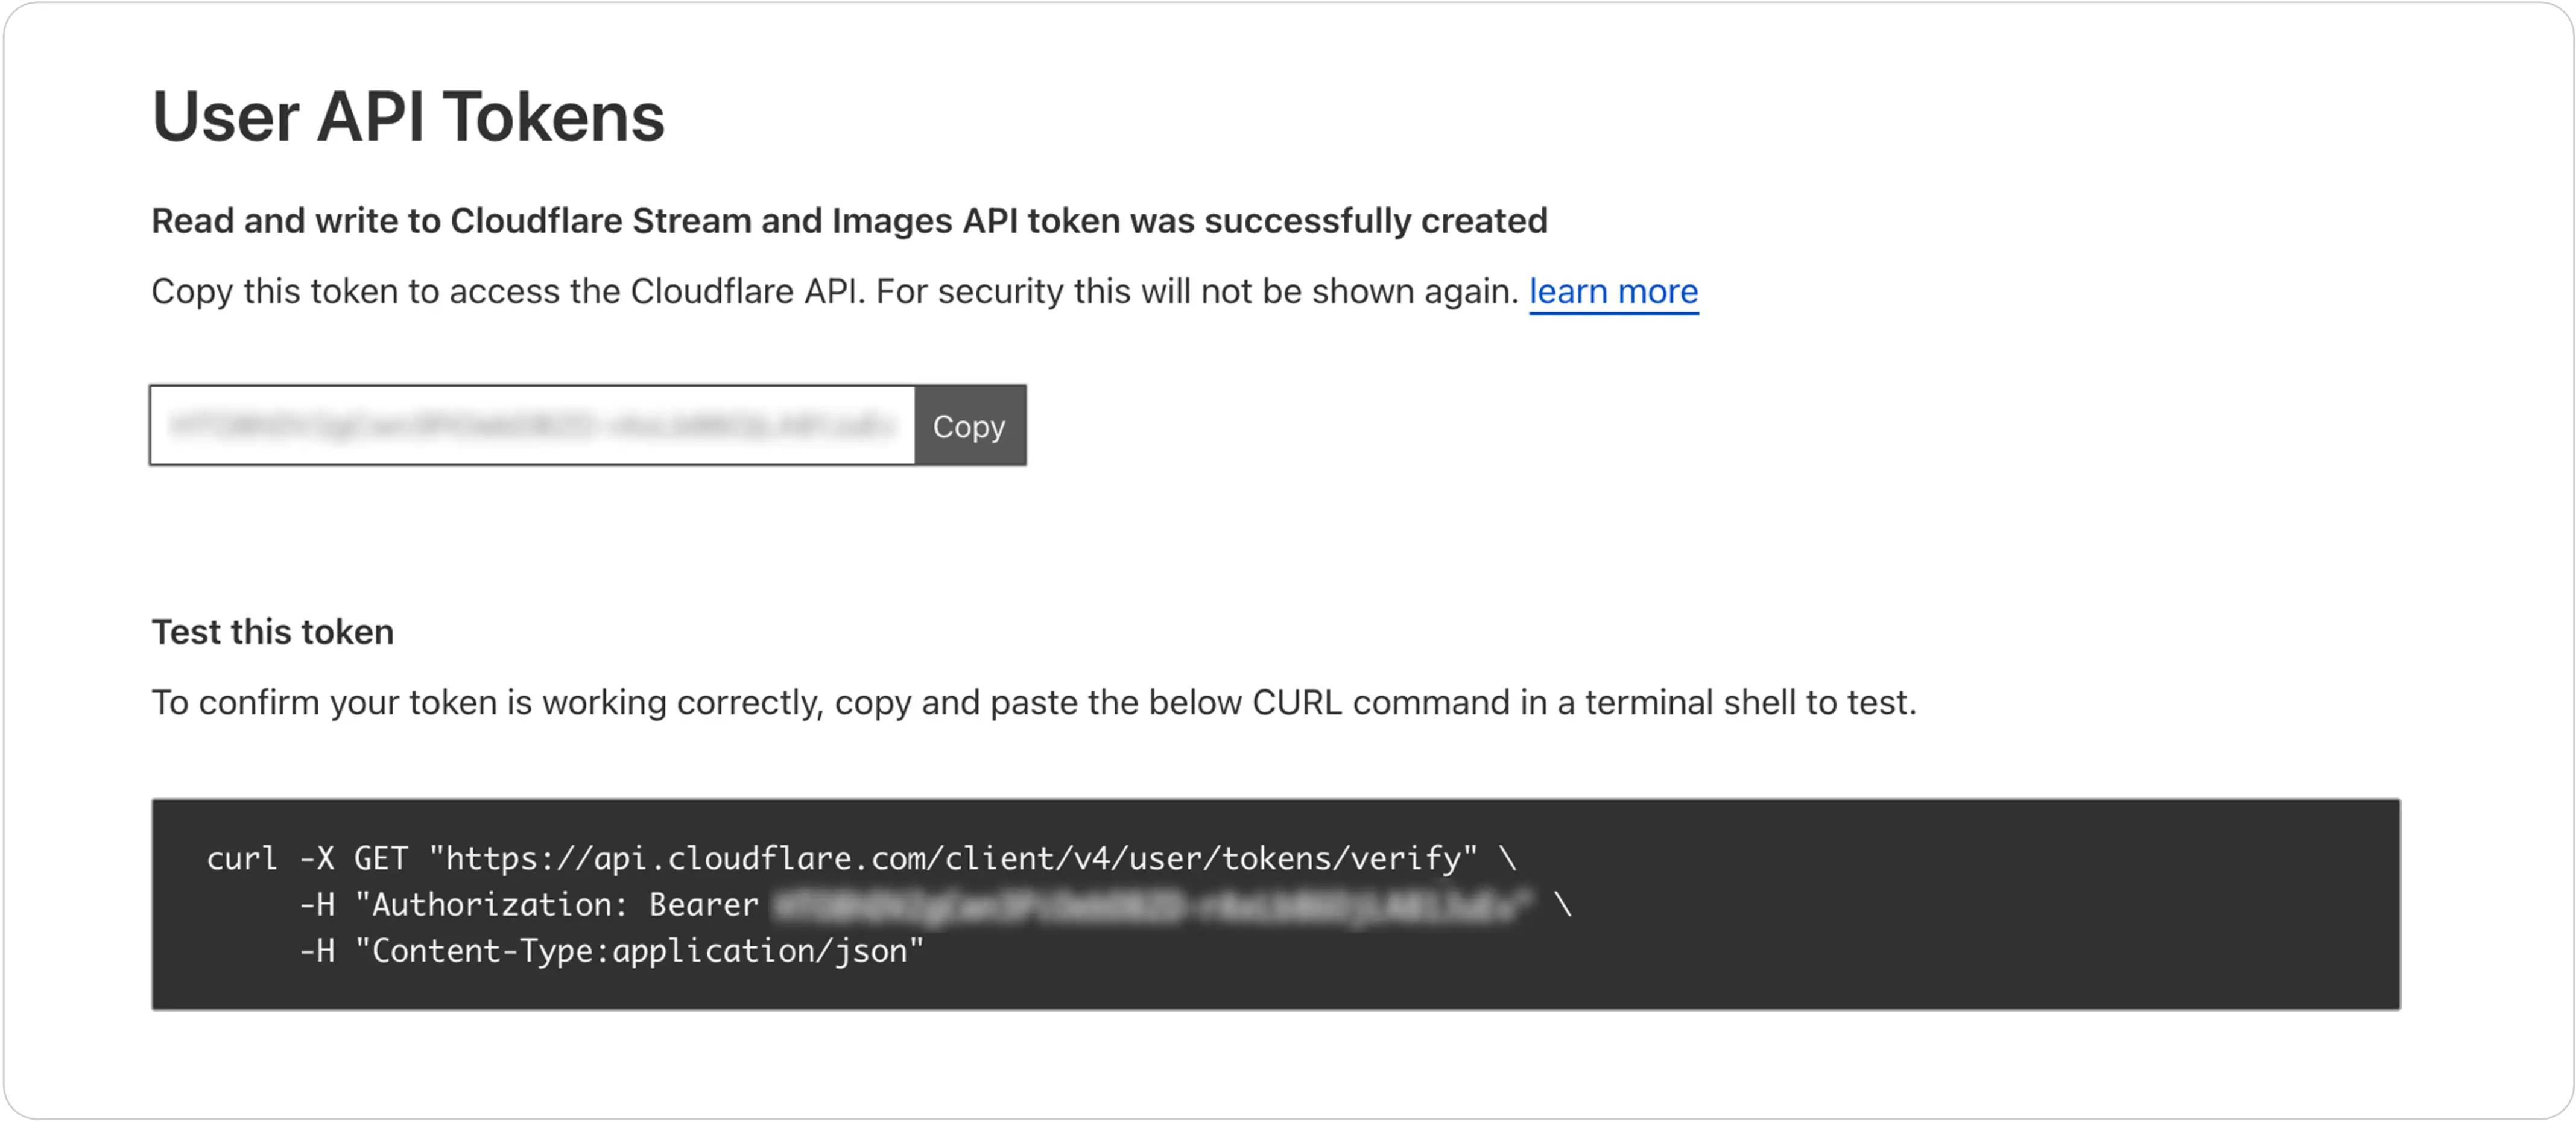
Token generation confirmation
- Your token will be displayed on screen
- Immediate actions:
- Copy the entire token
- Store in a secure password manager
- Do NOT share publicly
- Avoid screenshotting or sending via unsecured channels
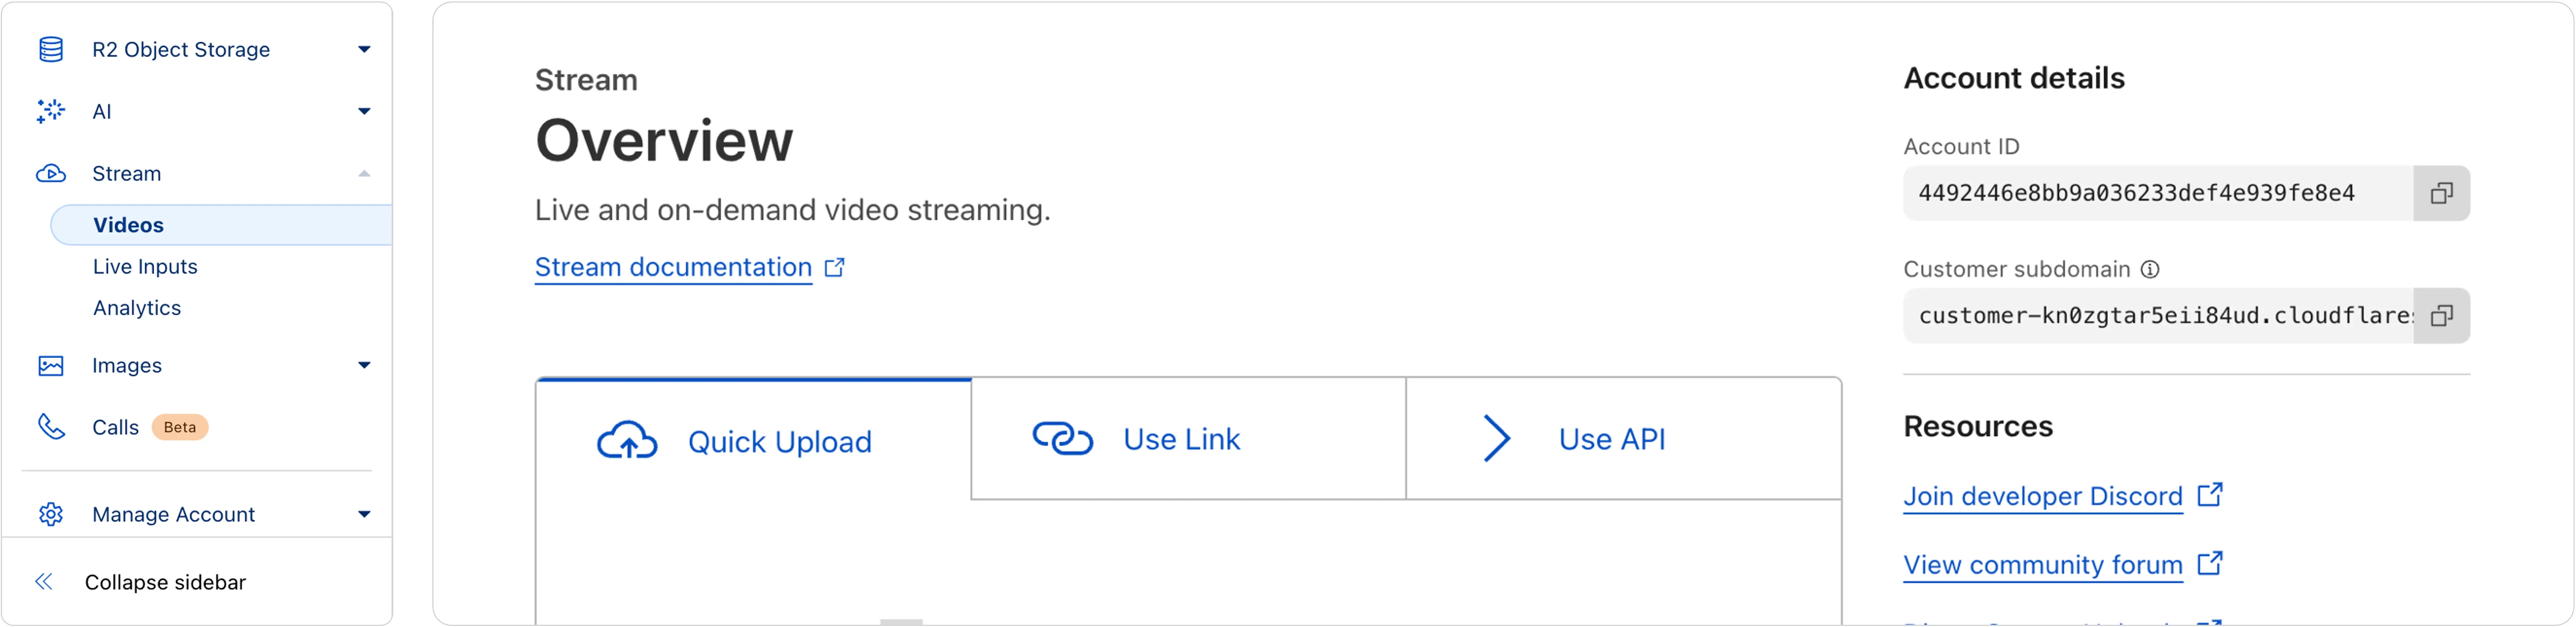
Step 5: Locate Account ID
From the Cloudflare dashboard:
- Click on Stream in the left navigation bar.
- Your Account ID will be displayed at the top right.
From the browser URL
- Look at the URL in your browser’s address bar
- Find the Account ID between the slashes. Example URL Format: https://dash.cloudflare.com/[ACCOUNT_ID]
- Copy the Account ID.
Once you have the Access Token and Account ID from Cloudflare, you can use them in the FastPix Migration Tool to authenticate your Cloudflare account for the import process. Follow the next part of the migrate process below.
Import videos from Cloudflare to FastPix
- Access migration tool by cloning the GitHub repo and run it locally.
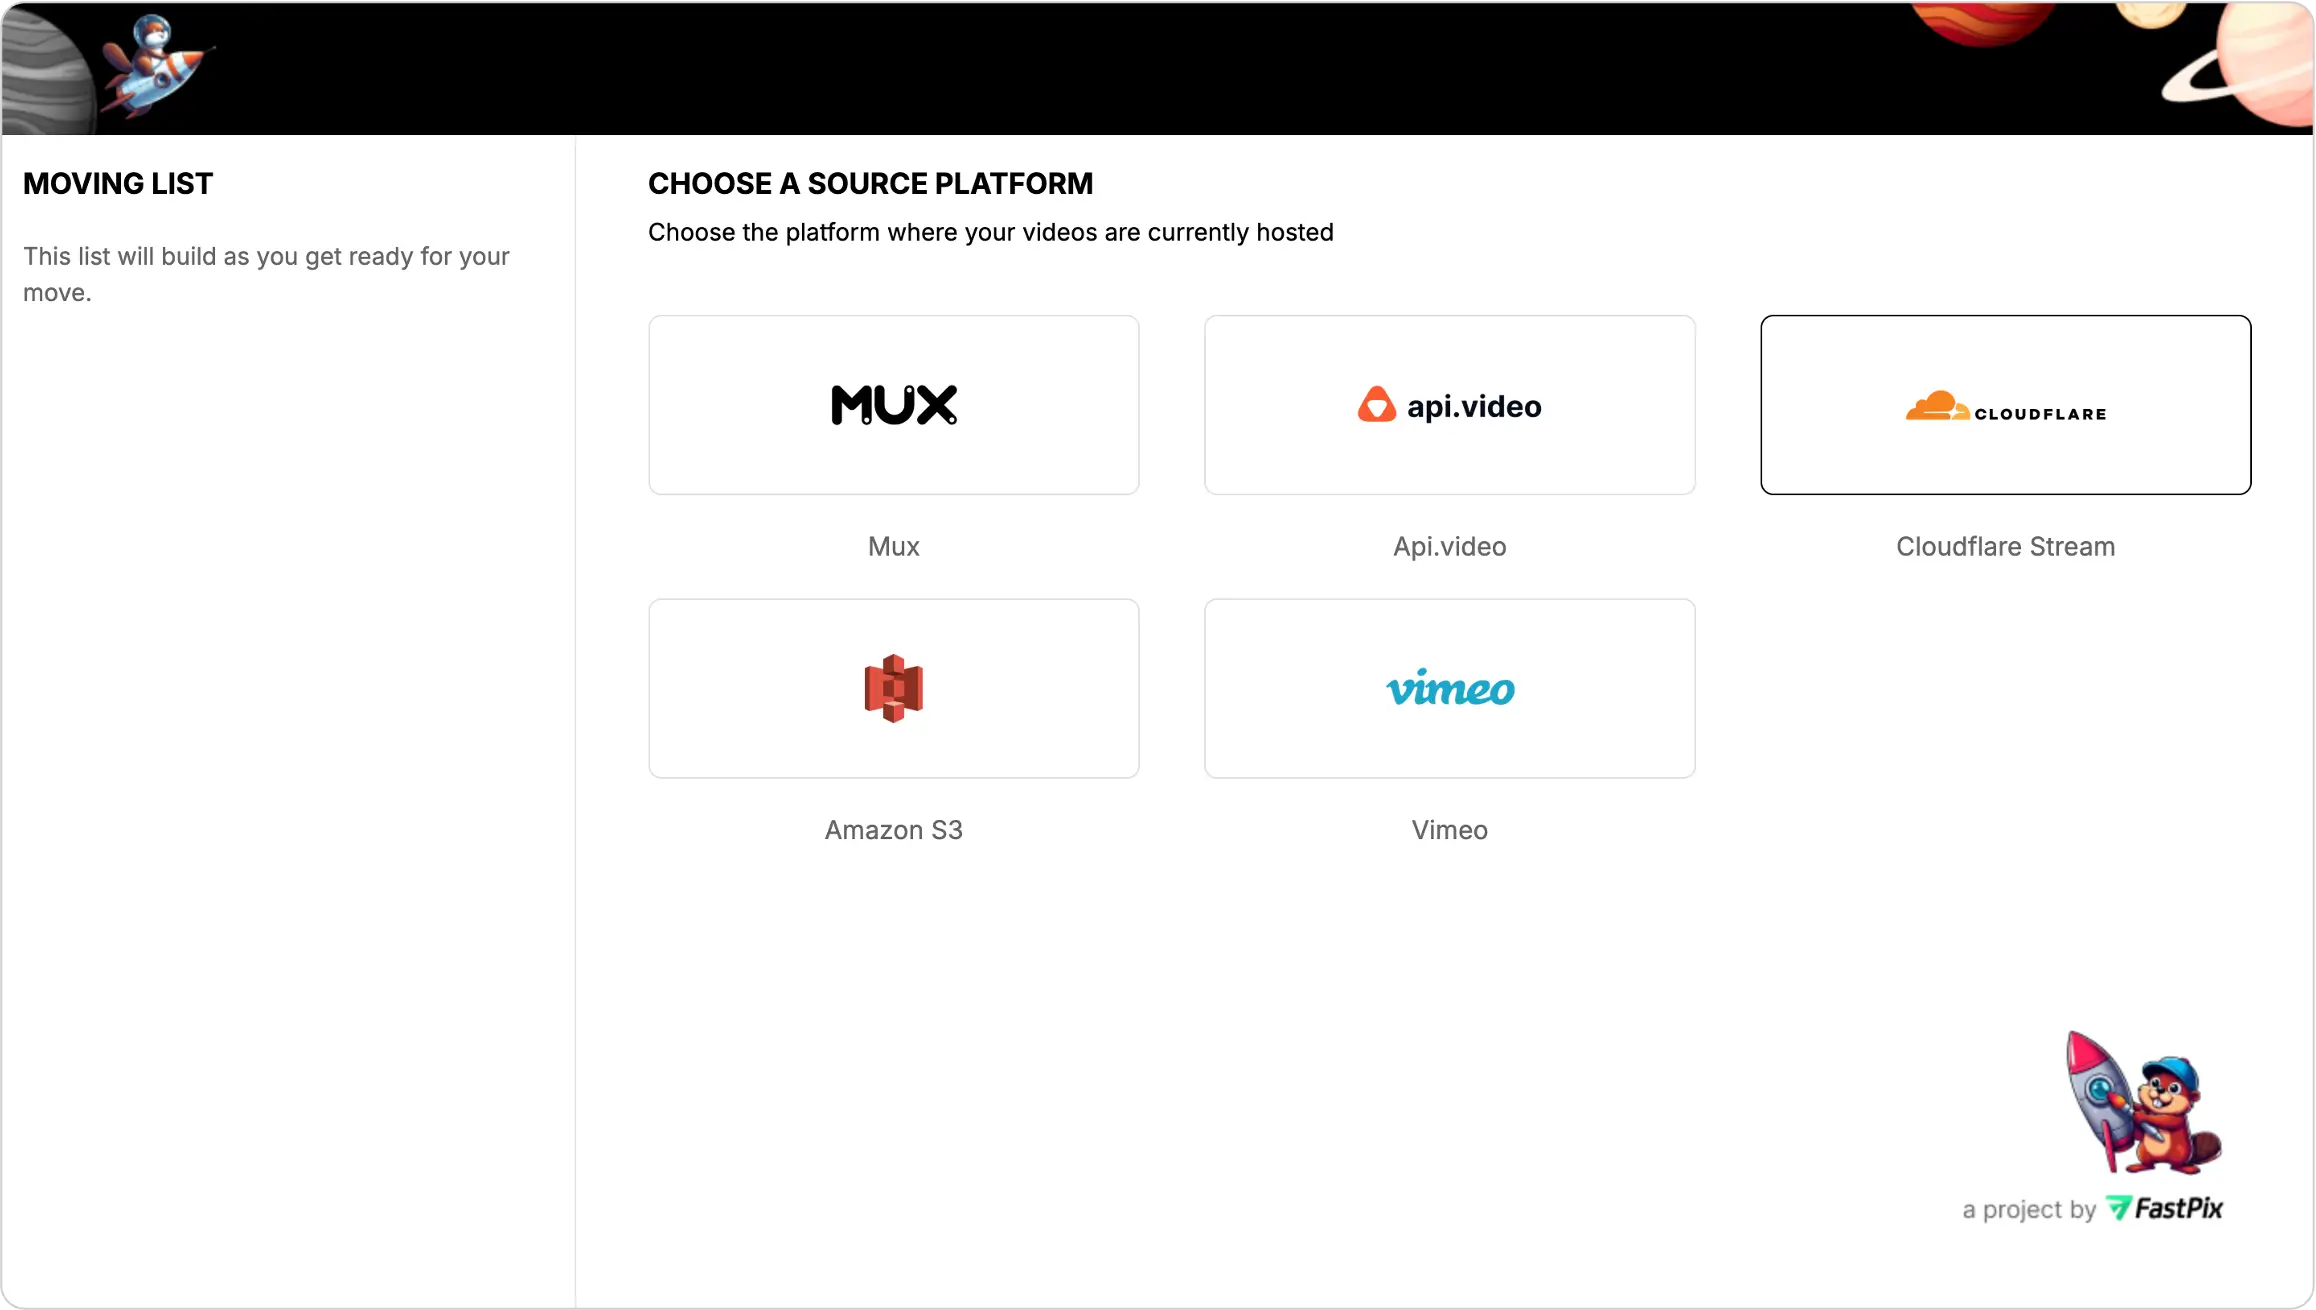
- Source platform selection: Choose Cloudflare as your source platform.
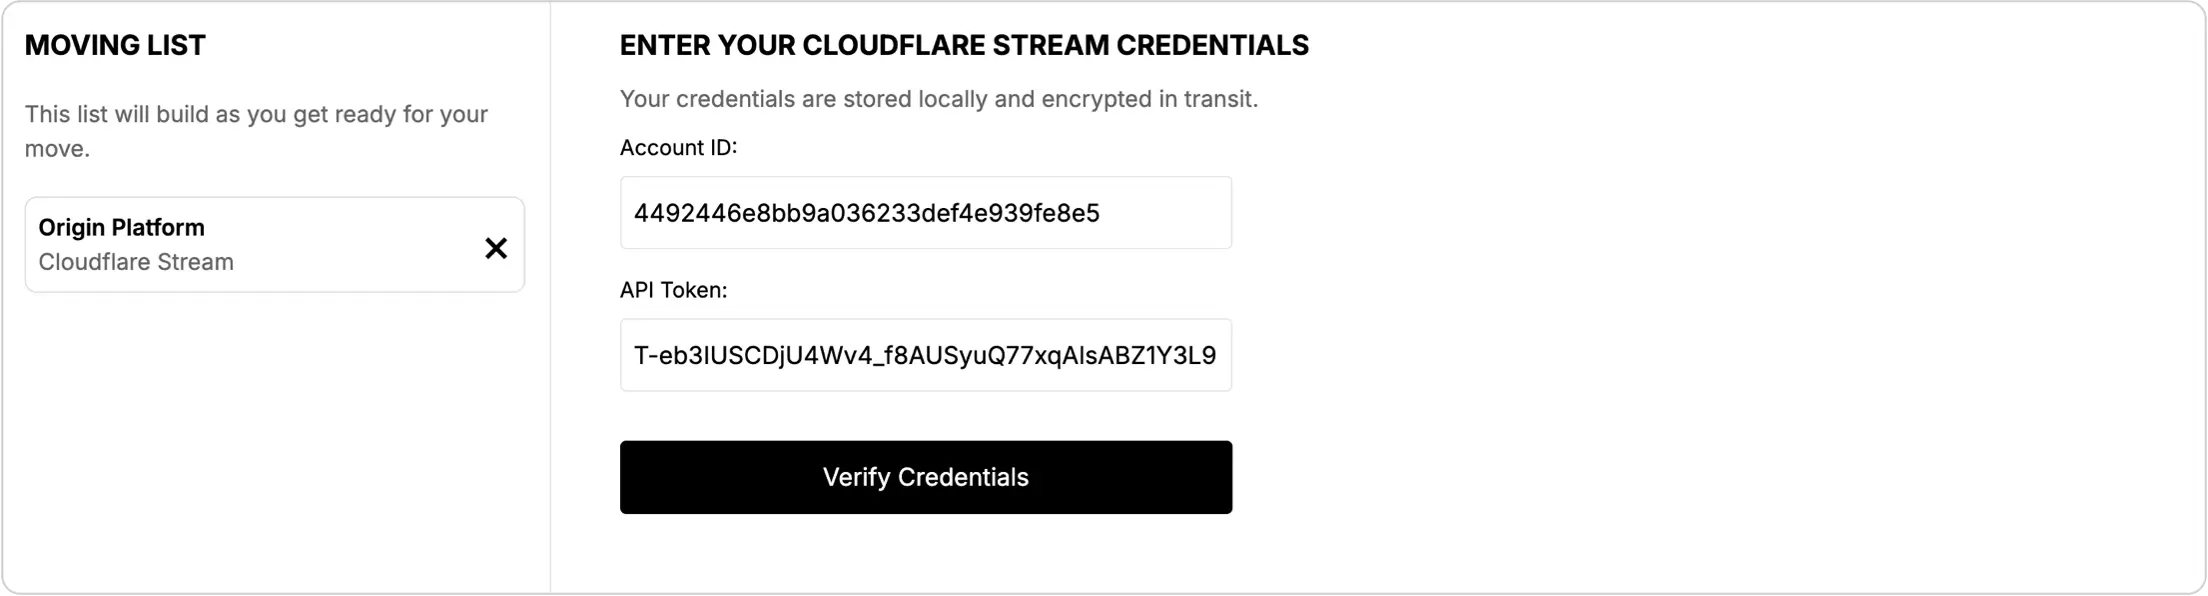
- Source credentials validation
- Enter your Cloudflare credentials from step 4 and 5 above.
- Click “Verify Credentials”.
- Wait for validation confirmation.
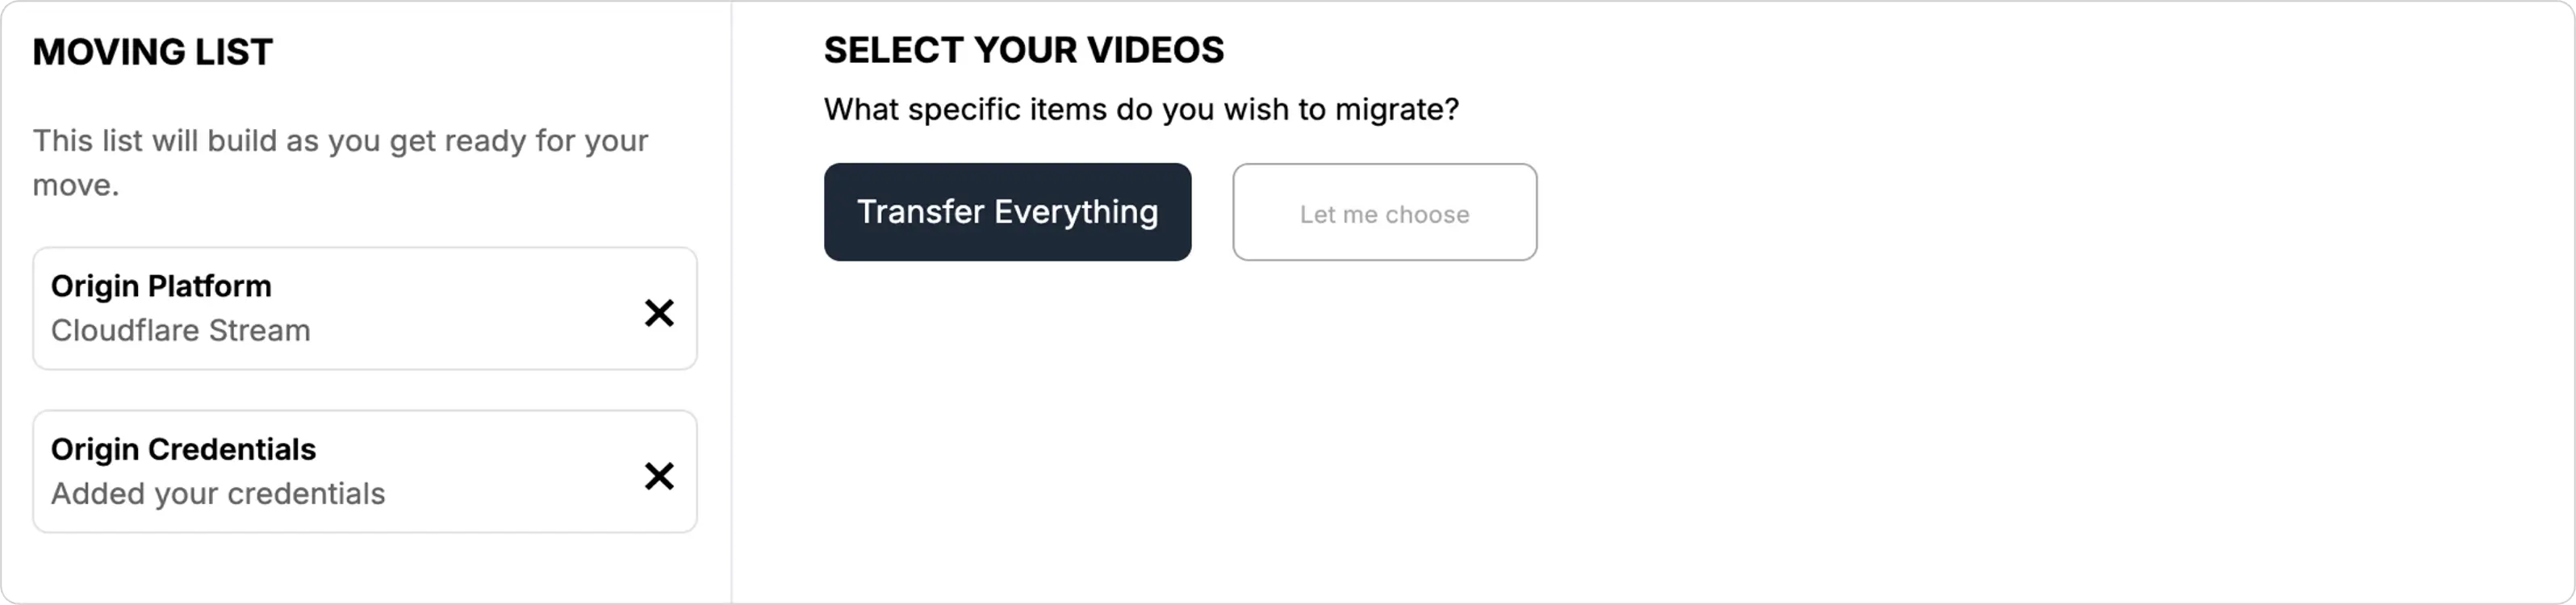
- Video selection for import
- On the “Select your videos” page
- Choose “Transfer Everything” option to migrate all videos
- Destination platform selection: Select FastPix as your destination platform
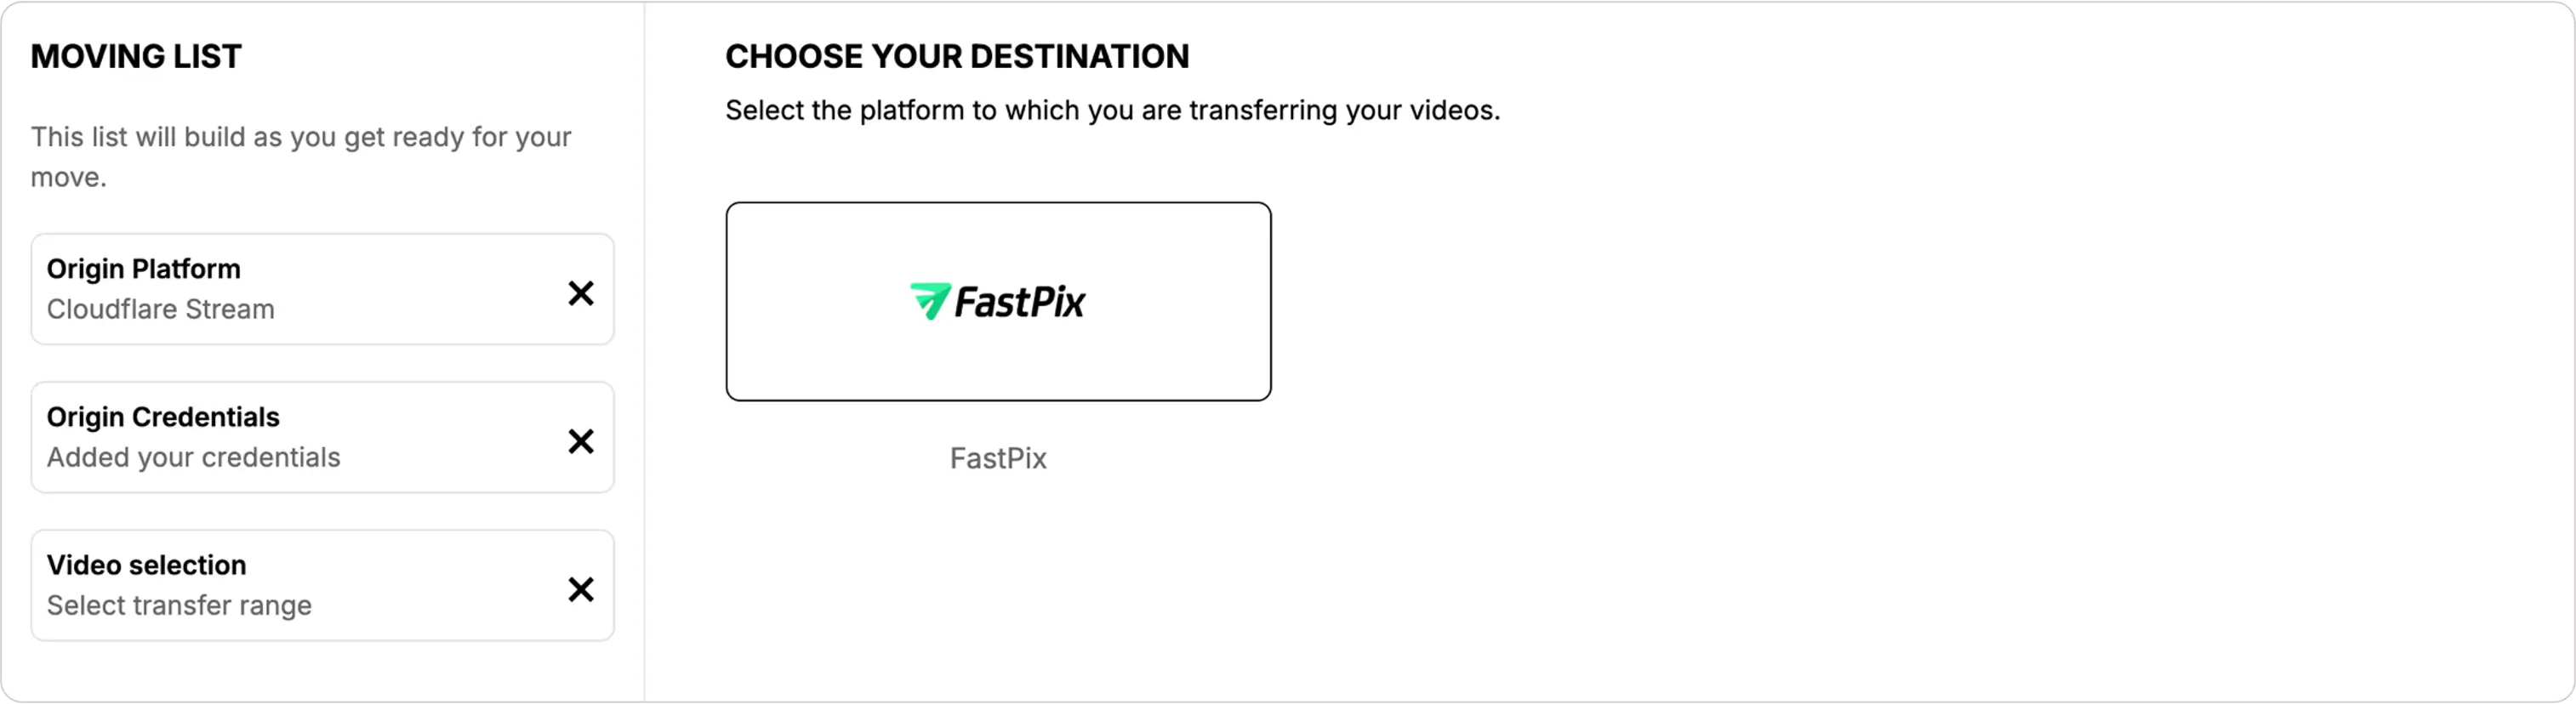
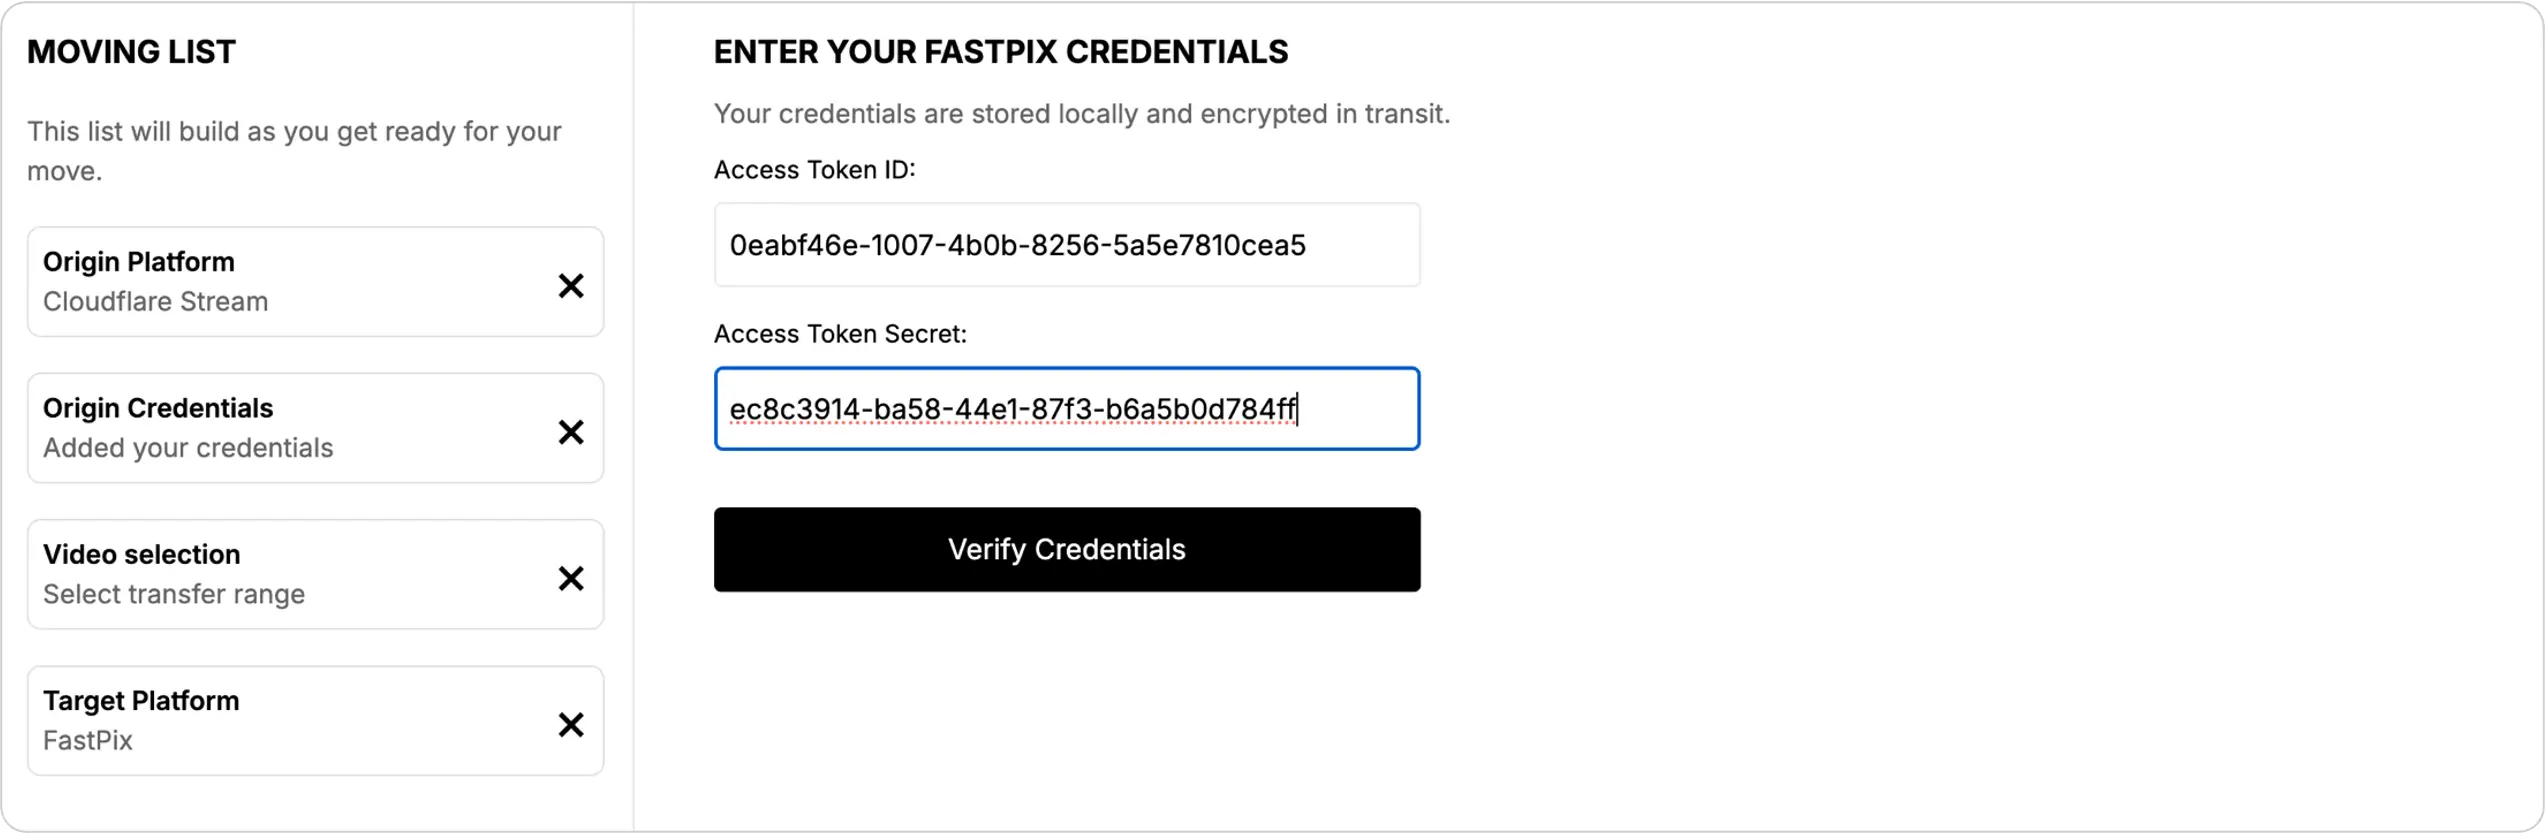
- Destination credentials validation
- Enter your FastPix account credentials
- Click “Verify Credentials”
- Wait for validation confirmation
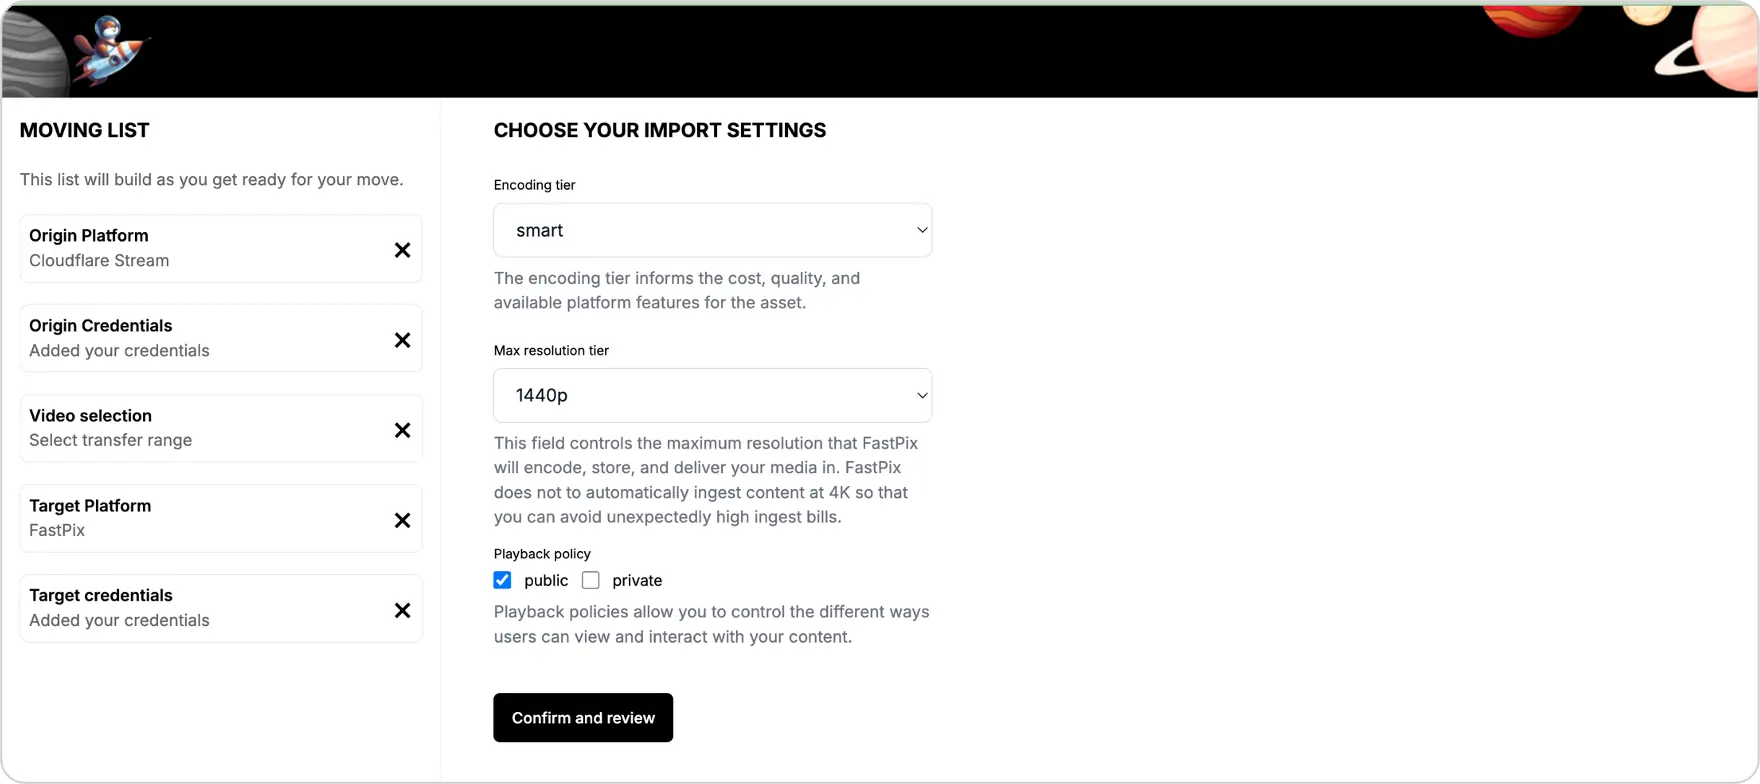
- Import settings configuration
Configure the following video encoding settings:- Encoding tier
- Maximum resolution tier
- Playback policy
- Click “Confirm and Review” to proceed
- Review and start
- Review all selected settings and configurations
- Click “Start Job” to begin the migration process
- Migration tracking
- Monitor the migration progress on the video tracking page
- Wait for the list of migrated videos to appear on the tracking page.
![]()