Migrate from Vimeo to FastPix
This guide provides a detailed walkthrough for generating an access token(secret key), which is essential for successfully migrating videos from Vimeo to FastPix.
Evaluating FastPix against Vimeo? See the FastPix vs Vimeo comparison for a side-by-side look at features and pricing.
PLEASE NOTE
Migrating from Vimeo requires that you have at least a Pro subscription or higher with Vimeo. This limitation is set by Vimeo and is a requirement for video file access.
To access your content on Vimeo, FastPix needs an access token. This access token is used to retrieve the list of your videos, and to access the video source files.
Obtaining Vimeo credentials
You can generate Vimeo access tokens is in two quick steps:
- Create a Vimeo application.
- Create an access token for this application.
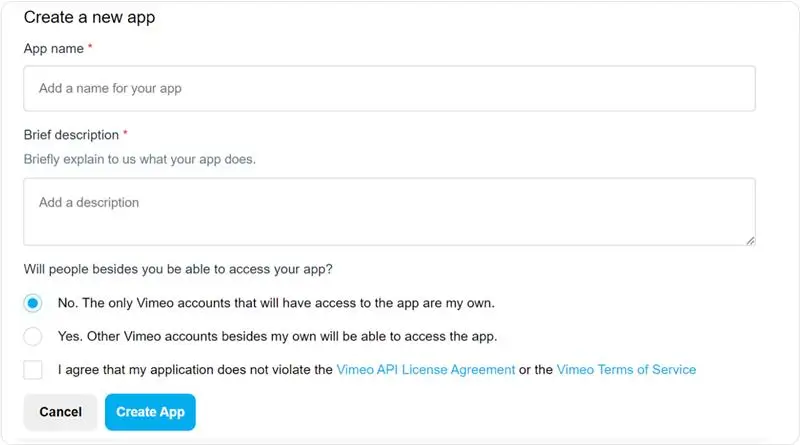
Step 1: Create a Vimeo application
To create an application, go to your Vimeo applications, and click on Create an app.
Step 2: Create an access token
Once your app is ready, Vimeo redirects you to the application settings page. You can generate access tokens on this page.
In the Authentication section:
- select Authenticated (you)
- check the Private and Video Files check boxes, and then click on Generate.
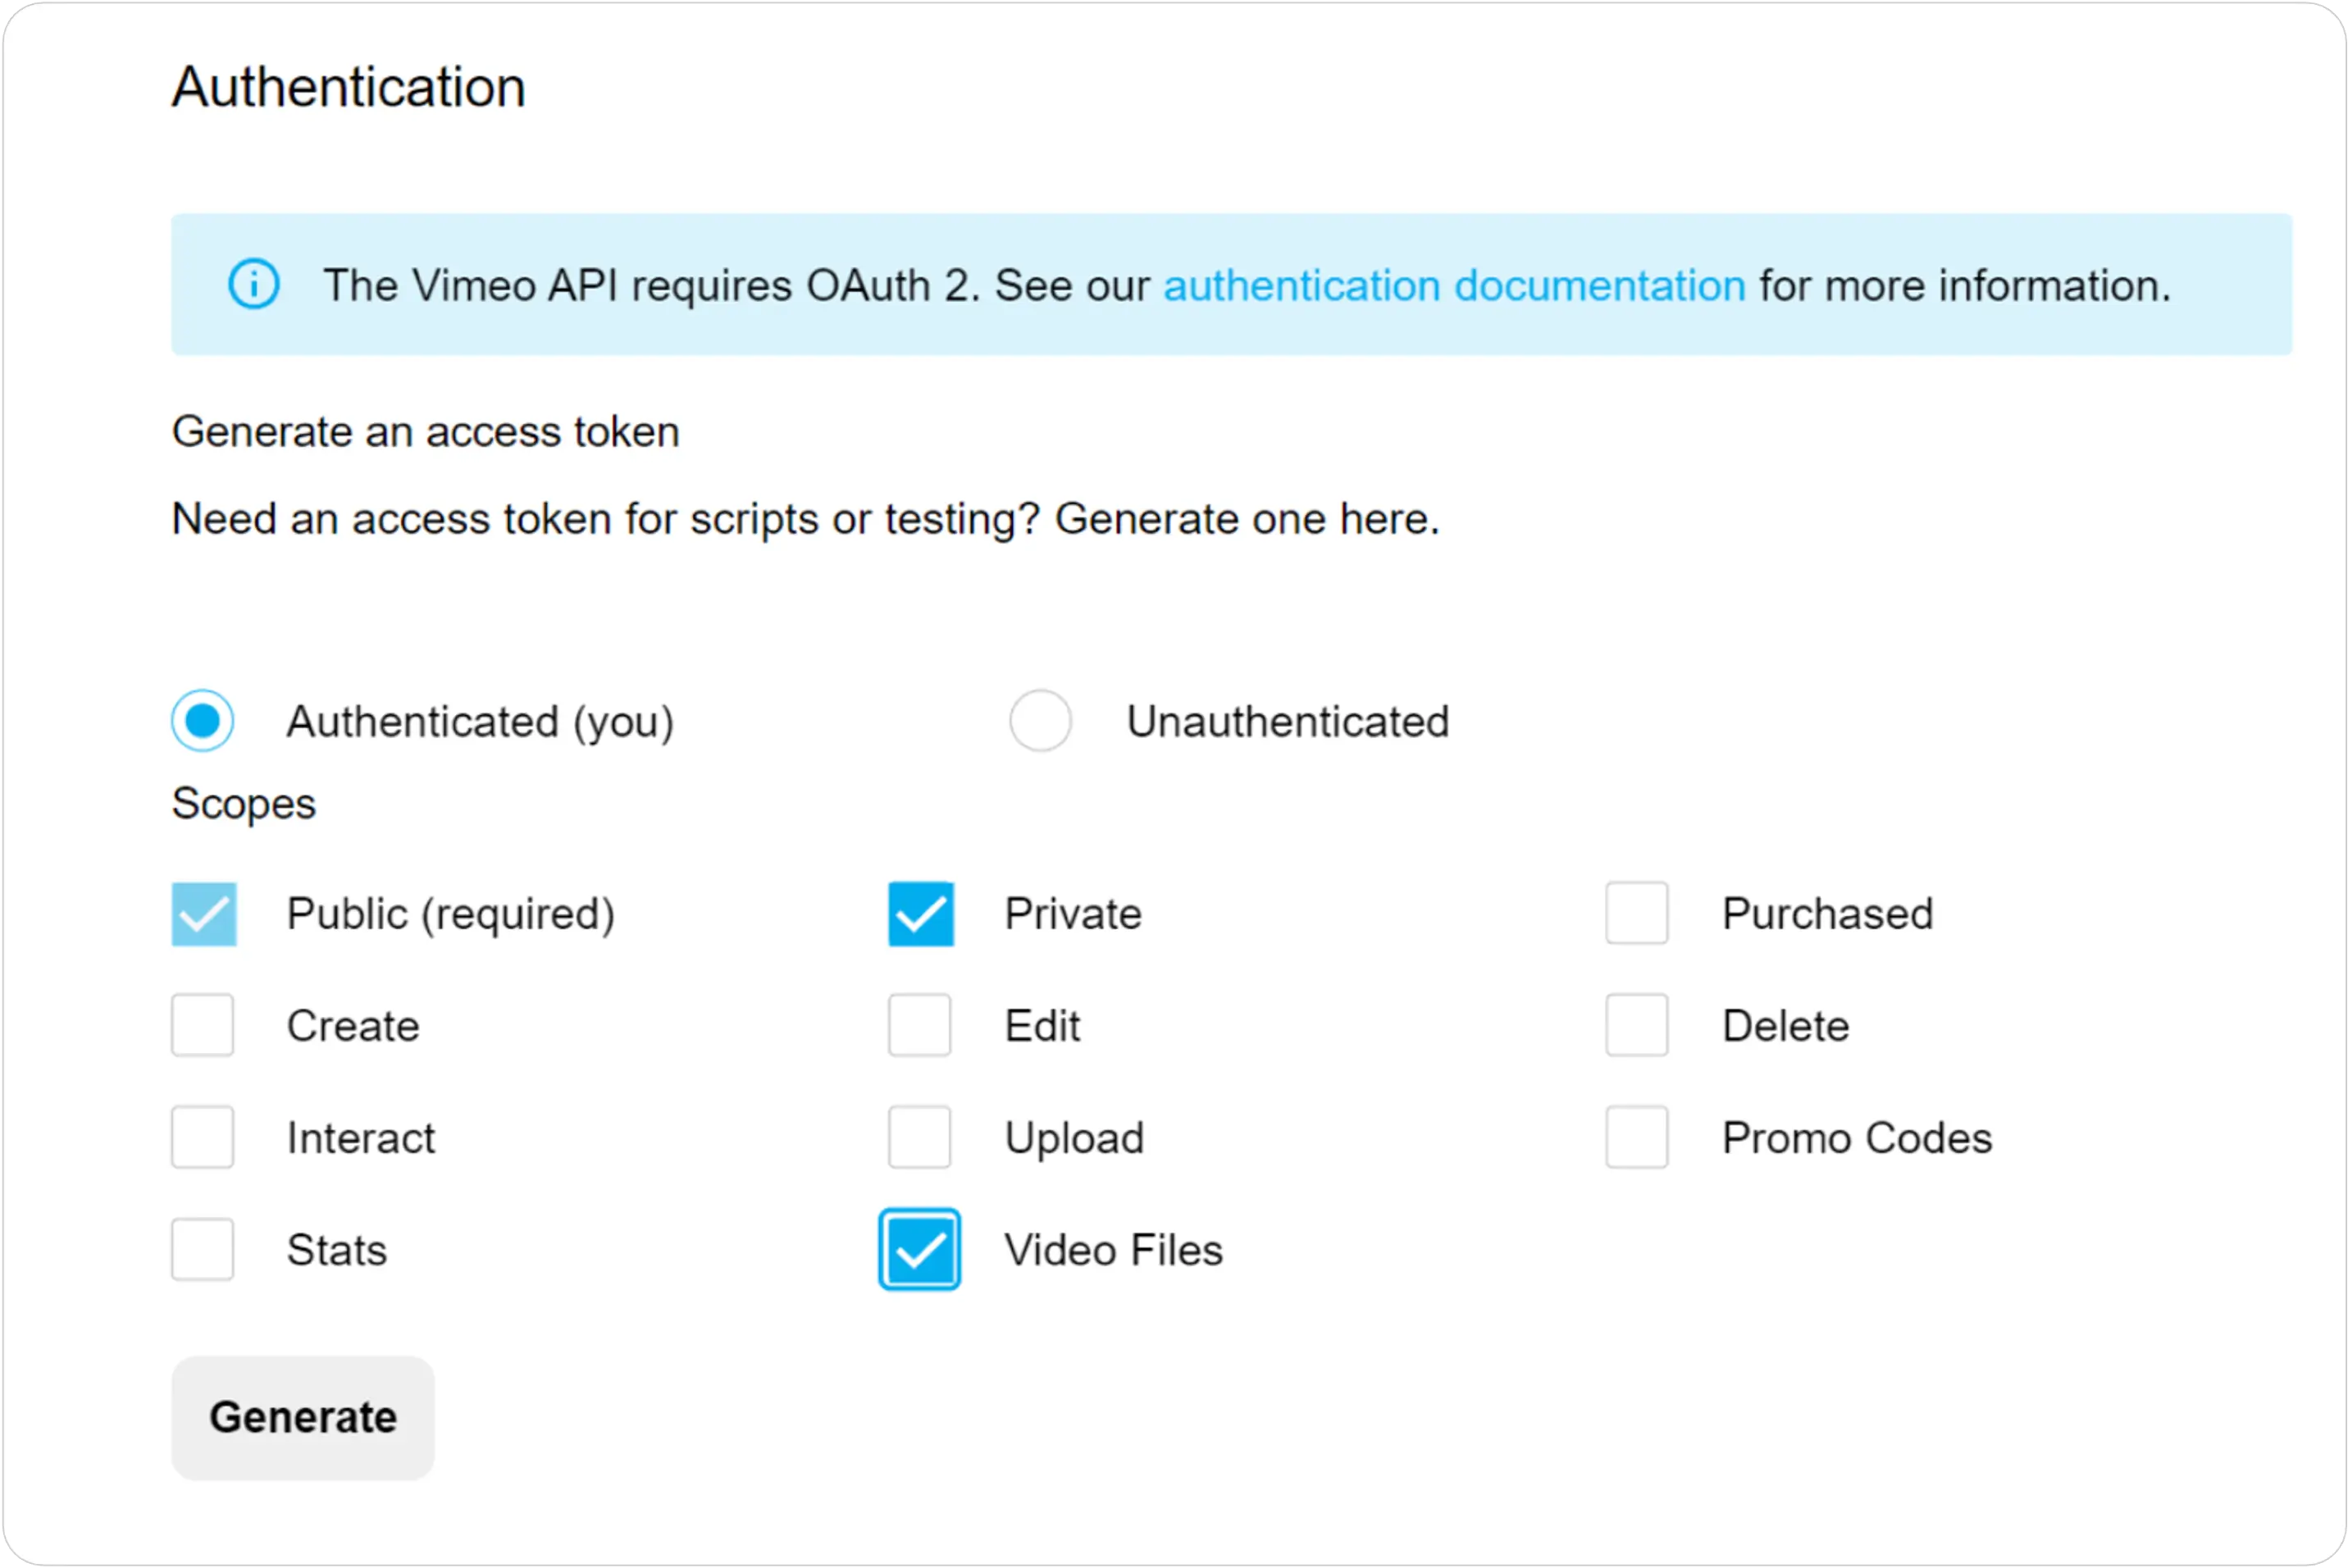
The access token that you generate appears on the page. You can use the Token value in the FastPix Migration Tool to authenticate your Vimeo account for the import process. Follow the next part of the migrate process below.
Importing videos to FastPix from Vimeo
-
Access our migration tool by cloning the GitHub repo and run it locally.
-
Source platform selection: Choose Vimeo as your source platform.

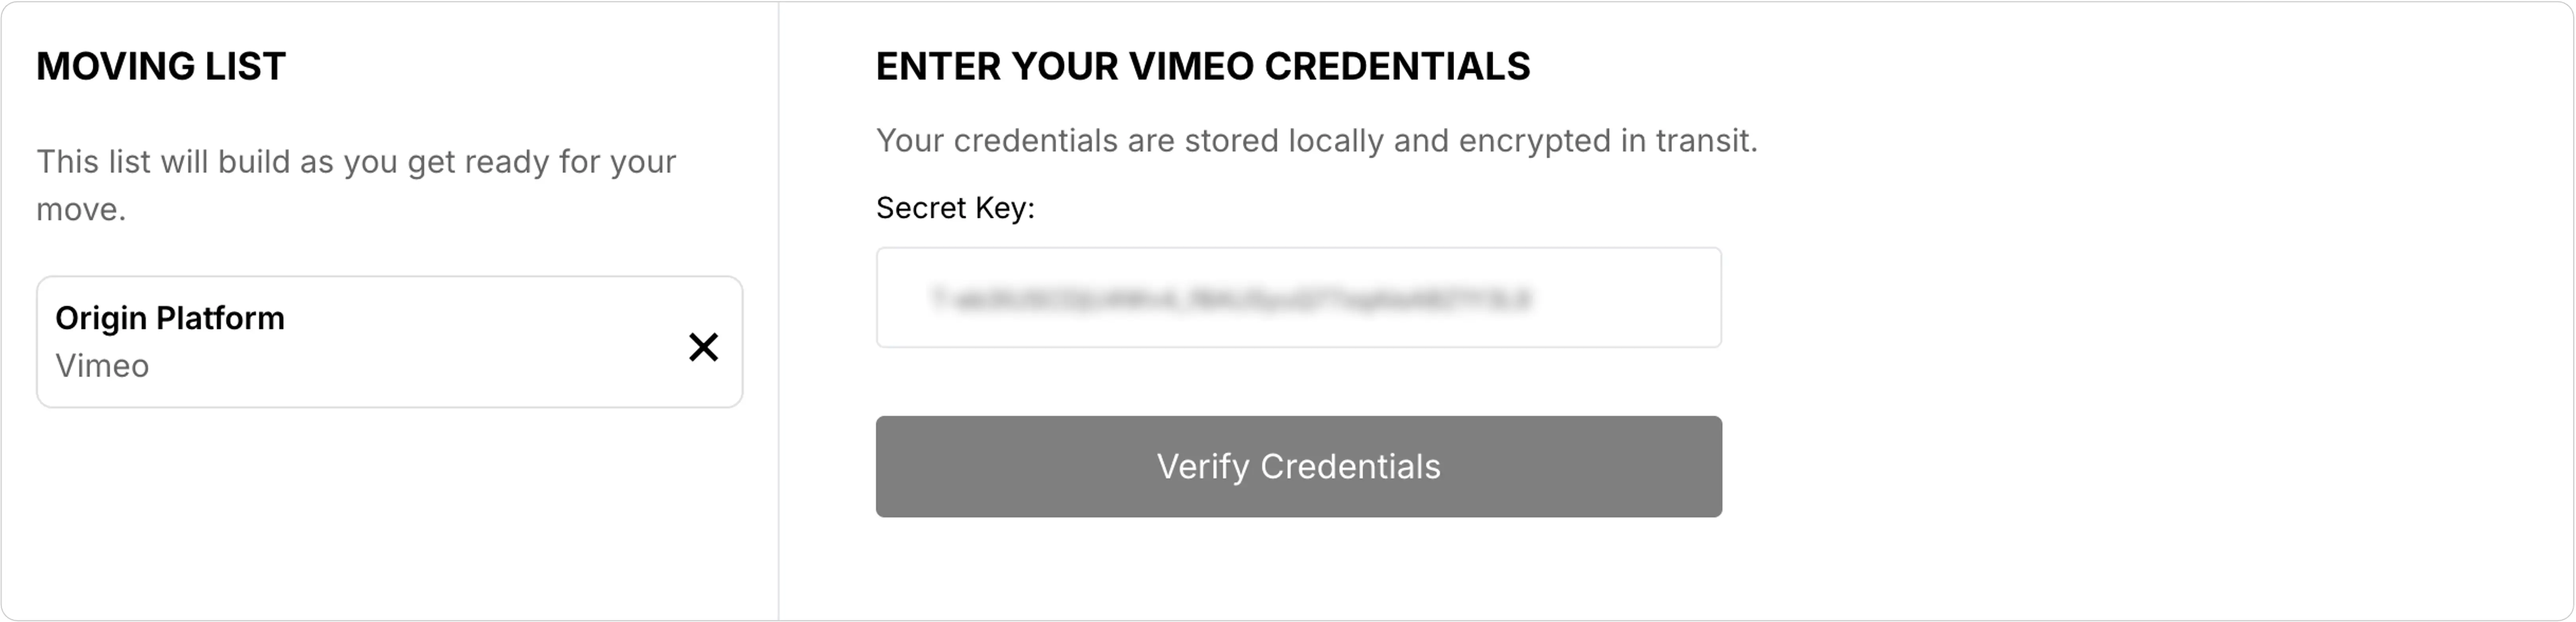
- Source credentials validation\
- Enter your Vimeo credentials from step 2 above.
- Click “Verify Credentials”.
- Wait for validation confirmation.
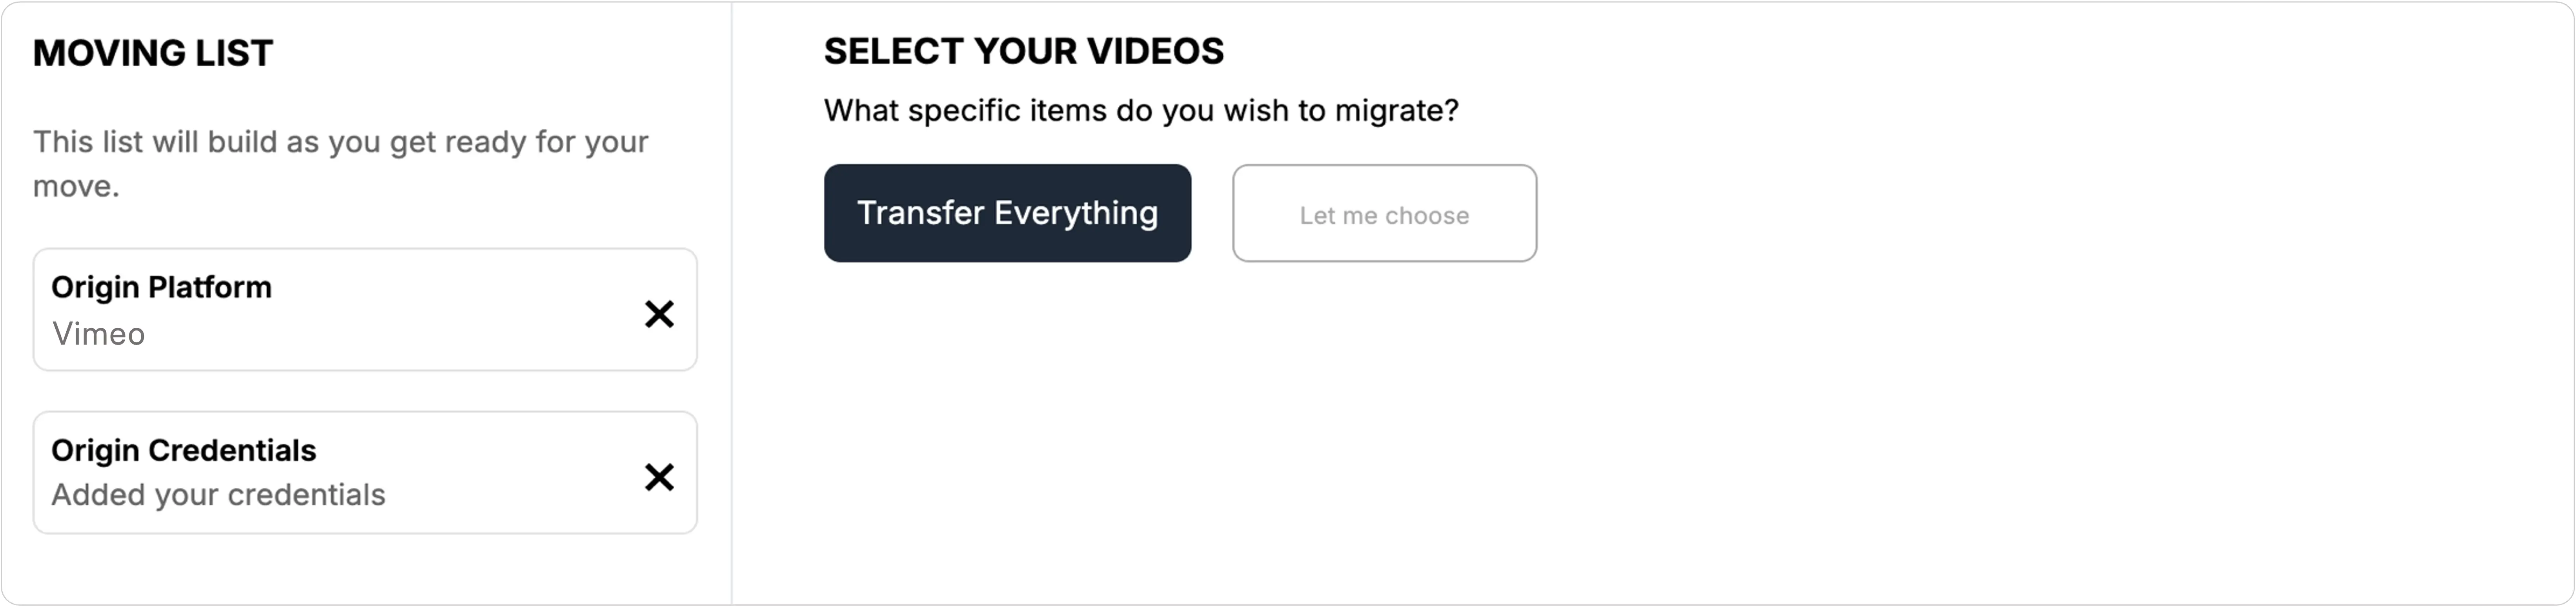
- Video selection for import
- On the “Select your videos” page.
- Choose “Transfer Everything” option to migrate all videos.
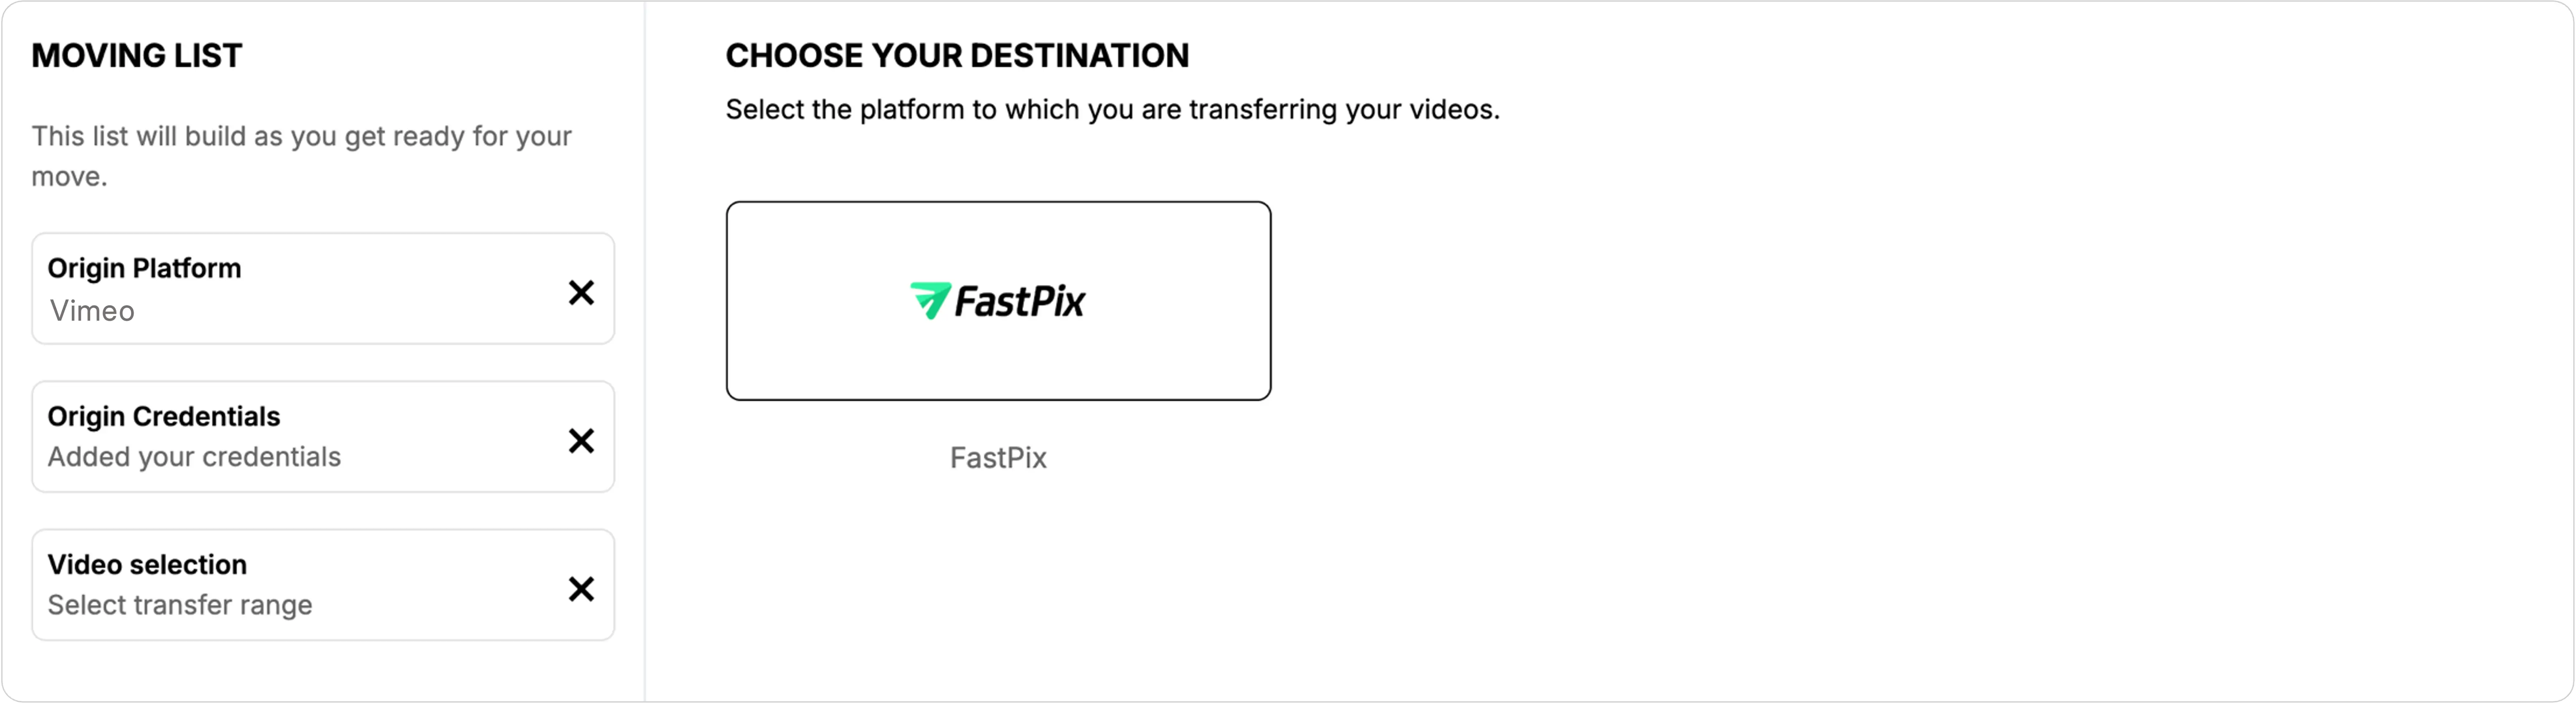
- Destination platform selection: Select FastPix as your destination platform.
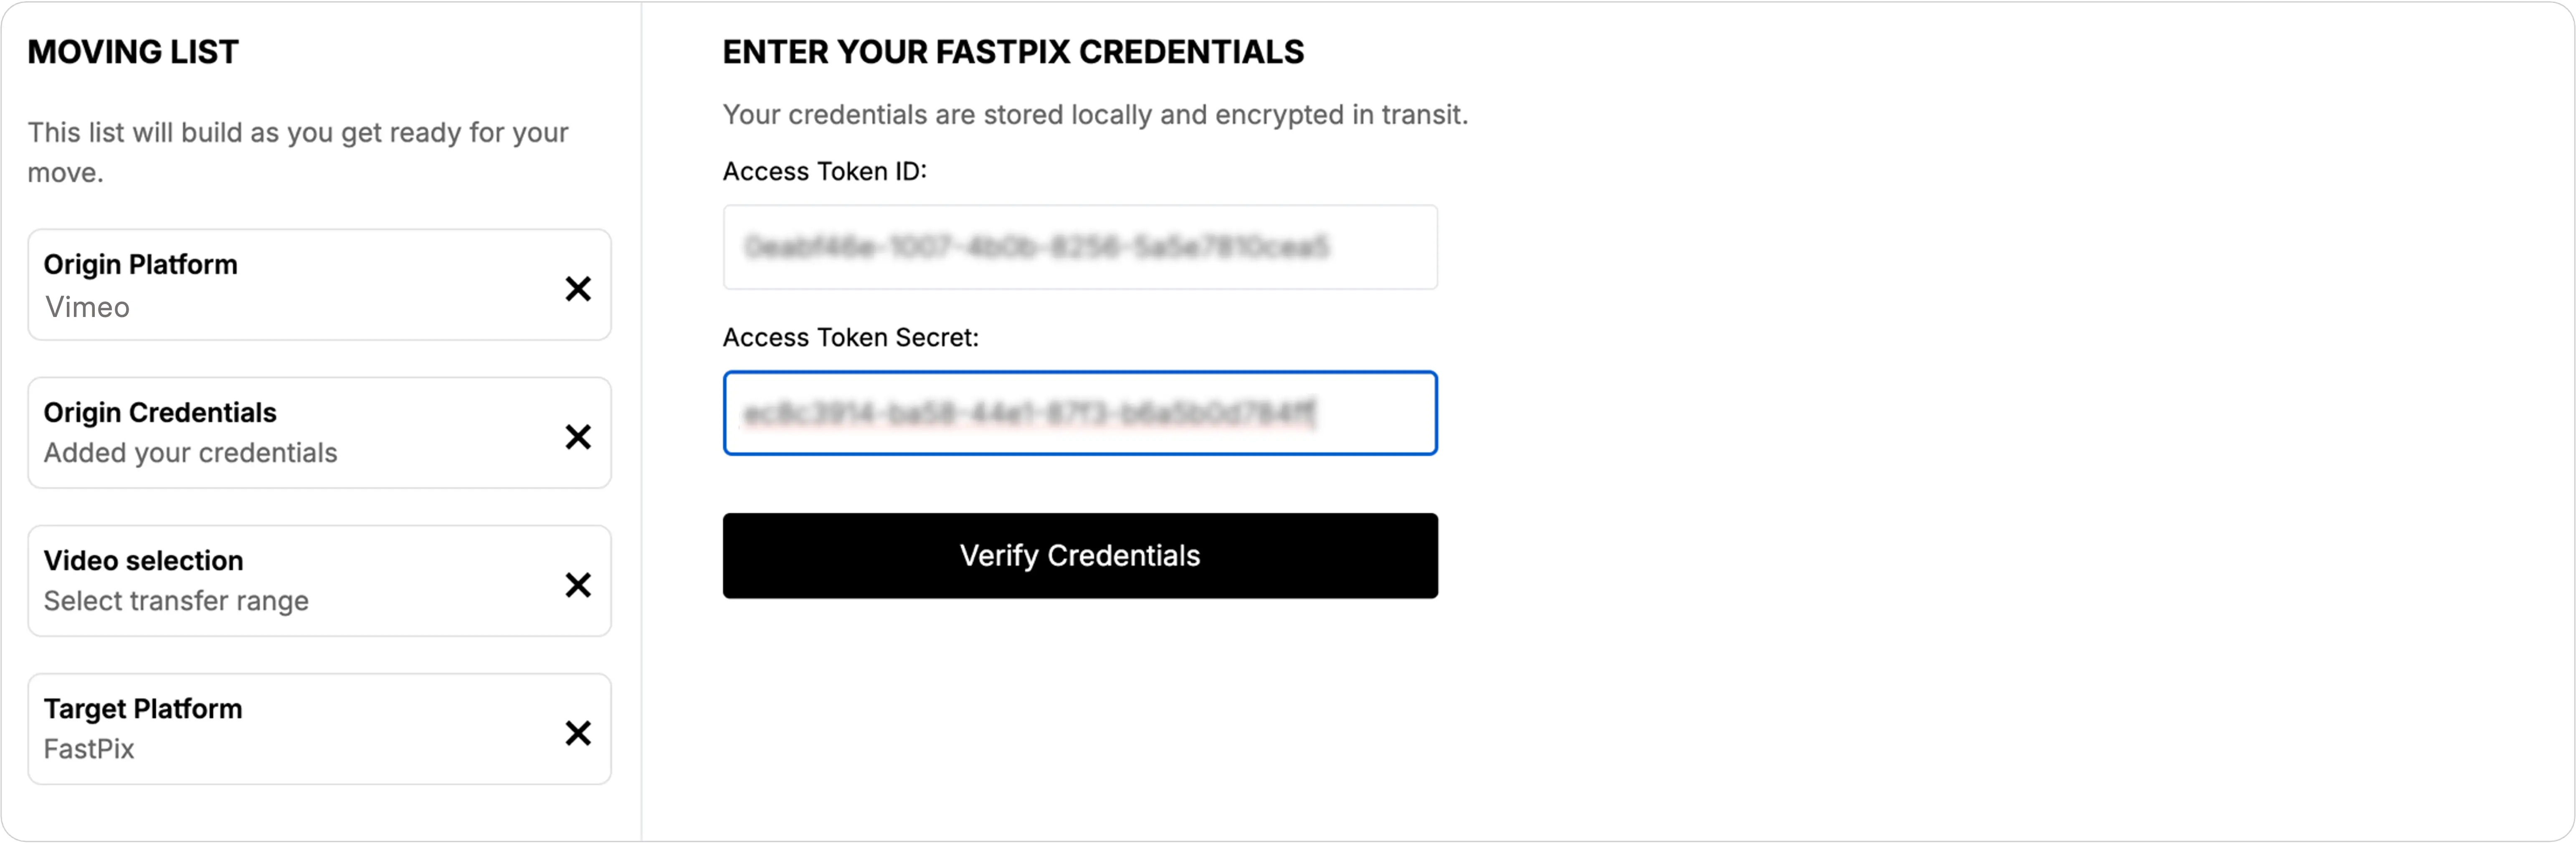
- Destination credentials validation\
- Enter your FastPix account credentials.
- Click “Verify Credentials”.
- Wait for validation confirmation.
- Import settings configuration\
Configure the following video encoding settings:- Encoding tier
- Maximum resolution tier
- Playback policy
- Click “Confirm and Review” to proceed

- Review and start
- Review all selected settings and configurations.
- Click “Start Job” to begin the migration process.\
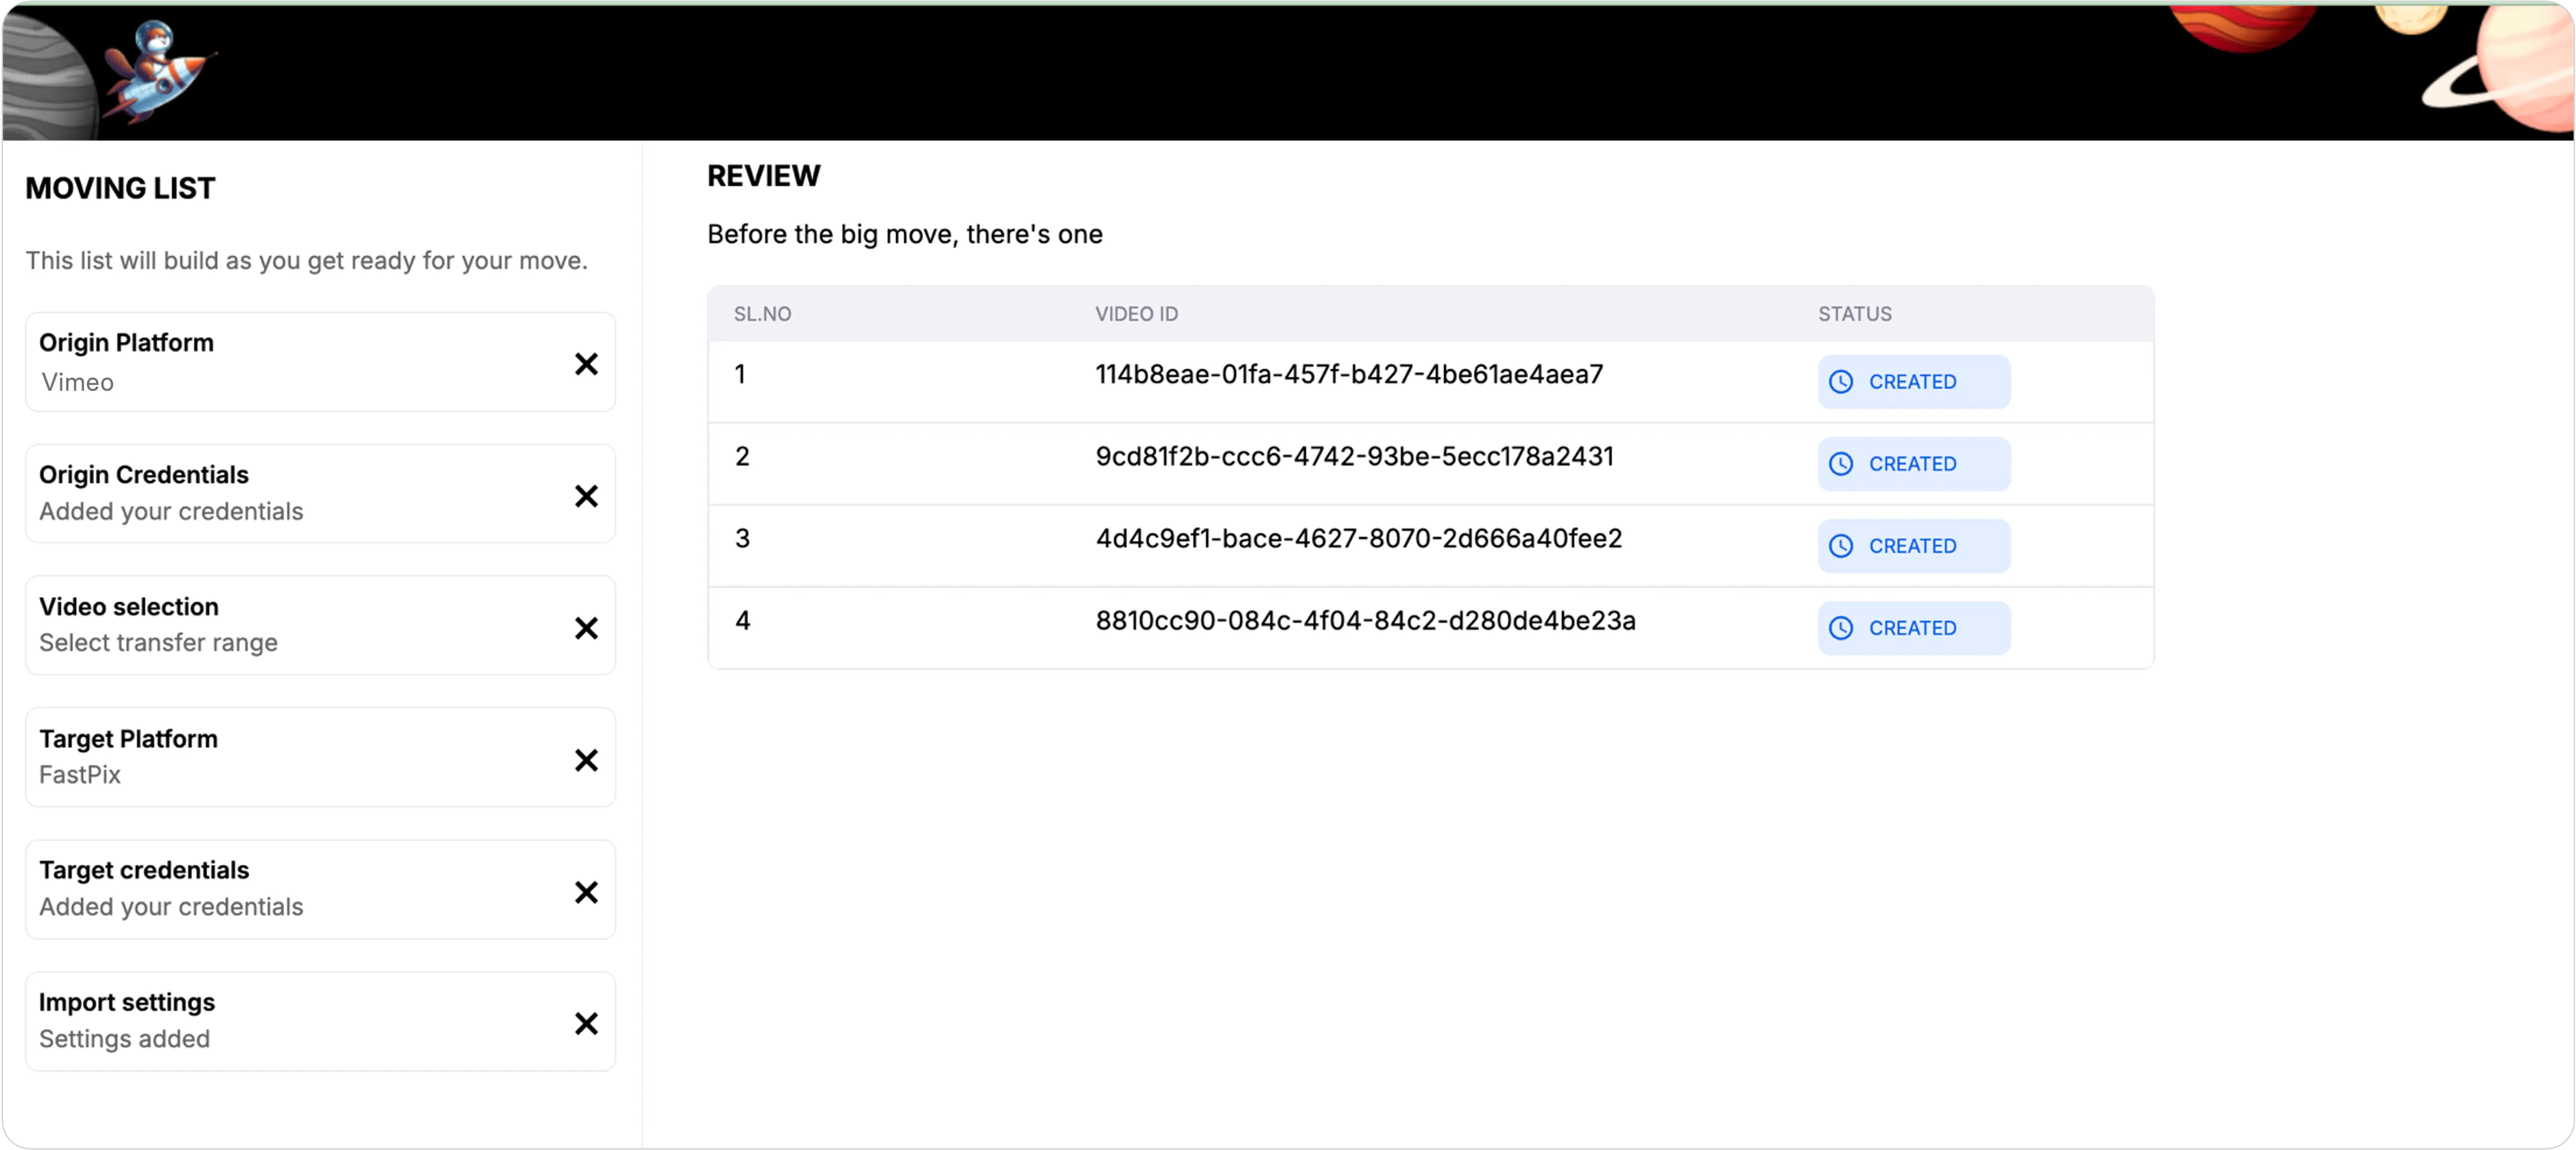
- Migration tracking
- Monitor the migration progress on the video tracking page.
- Wait for the list of migrated videos to appear on the tracking page.