Create a playout channel
Once your media, playlists, and playout elements are ready, create a channel to bring them together for playback.
A channel delivers your content as a continuous, linear stream. Depending on your use case, you can create either a loop channel or a scheduled channel.
What is a channel?
A channel brings together:
- Your scheduled programs (VOD or live)
- Playout elements such as bumpers, slates, and overlays
- A start time and end time
- Output delivery to RTMP, HLS, YouTube, Twitch, and other supported destinations
There are two types of channels you can create:
Loop channel
Runs your content in a continuous cycle. After the playlist ends, it starts again from the beginning. This is ideal for 24/7 streams, evergreen programming, or FAST channels.
Scheduled channel
Plays videos (VOD or live) at specific times. You define the exact start/end time, import playlists, or drop individual media onto a timeline. Great for OTT events, genre programming, or TV-style broadcast blocks.
Creating a loop channel
Let’s start with the simpler one: a loop channel.
- Go to the Cloud Playout → Channels tab.
- In the Channel Type field, ensure that Loop channel is selected.
- Fill in the basic details:
- Channel name: Name for your channel.
- Description: Helps you track the channel purpose later.
- Set the Start Time. The start time must be at least 3 minutes from the current time.
- Set the End Time
- Configure the remaining channel settings based on your requirements, including:
- Live inputs
- Import captions
- Other available channel settings
- Click Create channel.
The channel is created in Draft status until you activate it.
Next steps: Learn how to add programs and videos to your loop channel.
PLEASE NOTE
Encoding tier is based on your subscription plan. Standard supports 1080p resolution whereas Ultra supports encoding up to 4K resolution.
Creating a scheduled channel
Scheduled channels offer precise control. You choose exactly what plays and when — perfect for live programming, VOD scheduling, or time-based ad delivery.
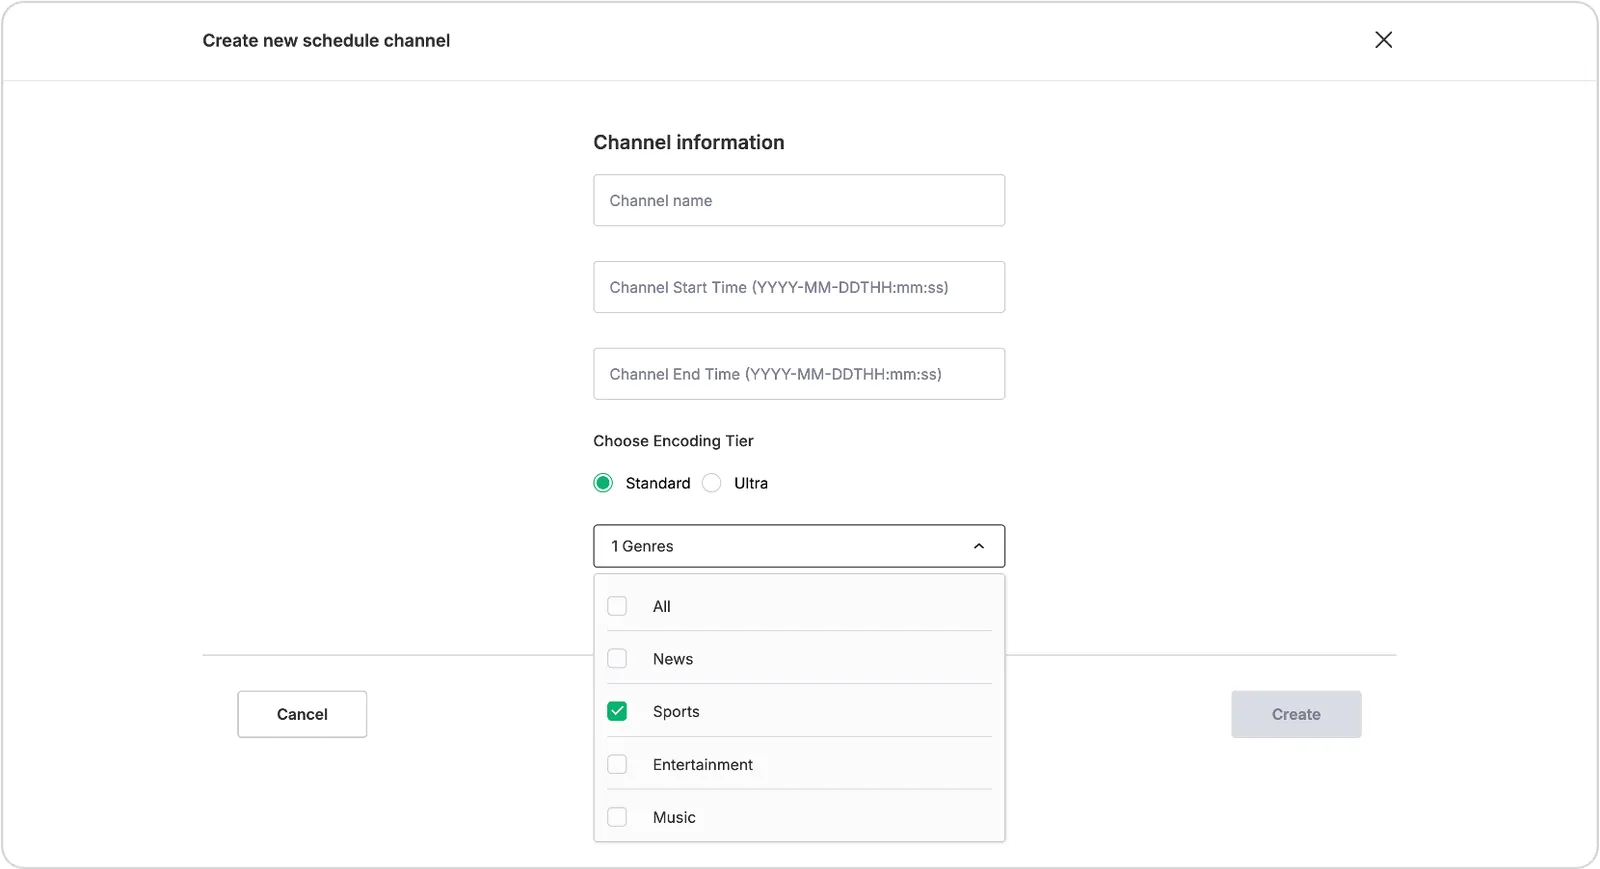
Here’s how to create one:
- From the Channels page, select Schedule Channel.
- Enter the Name, Start Time, and End Time.
- Optionally, select one or more Genres.
- Click Create.
The channel is created in Draft status. From the channel overview page, you can edit the channel settings, update the schedule, or delete the channel.
REMINDER
Activate the channel at least 3 minutes before the start time. The channel must also contain at least one scheduled media item before it can go live.
Check out this guide to move on to the fun part — adding actual programs and videos into this channel so there’s something to stream.
Continue to Create a scheduled channel to add programs and media to your channel.