

Configure a loop channel
Once you’ve created a loop channel, the next step is to configure it.
This guide explains how to add programs, media, playlists, live events, bumpers, and overlays to build your playout schedule.
NOTE
We assume you’ve already created a Loop Channel in FastPix Cloud Playout. If not, you’ll want to start there first - since programs can only be added to an existing channel.
Follow this guide to create a Loop Channel before continuing.
After your Loop Channel is set up and visible in the dashboard, come back here to start programming it with media, live streams, bumpers, and overlays.
Step 1: Create programs
Programs are modular blocks of scheduled content. It serves as a container that defines a sequence of events to be played during each loop of the cycle.
You can create any number of programs in a channel, as long as the total media duration across all programs stays within the channel’s start and end time.
To add a program:
- Open your Loop Channel from the dashboard
- Click Add new Program
- Give it a meaningful name - this helps when managing multiple blocks later.
- Click Create to save
After creating multiple programs, your Loop Channel will display a structured list of all added programs - each acting as a placeholder for content. At this stage, no media, live streams, or bumpers have been added to the programs yet.
This structure allows you to clearly see the order in which programs will play during the loop cycle. You can continue to manage the list - renaming, reordering, or removing programs as needed.
NOTE
You can reorder programs any time (as long as the channel is in Draft or Idle). The channel will loop through programs from top to bottom - and then repeat.
In the next section, we’ll focus on populating these programs with content to define what the channel will actually broadcast.
Step 2: Add content to a program
Now let’s add some action to your program. You’ve got a few options.
1. Add media
You can add one or more media files to a program. These files are typically pre-recorded videos and are inserted in the order they are added.
- Click inside your program
- Select Add Media
- Search or add from your library using media IDs.
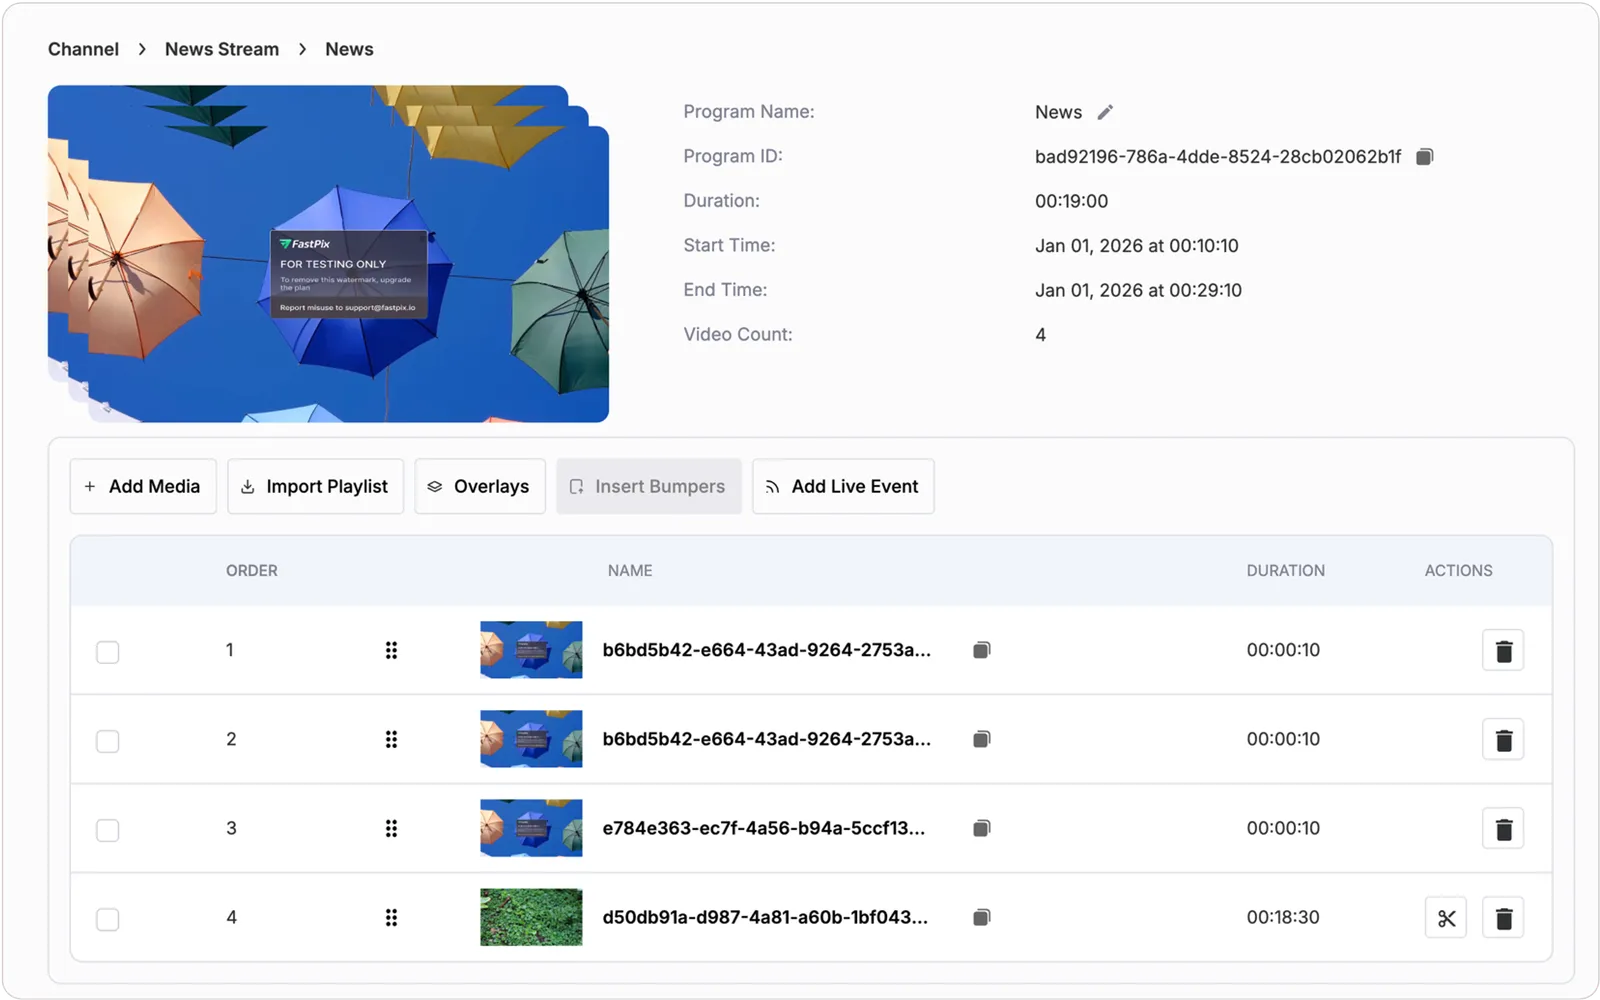
FastPix will play them in the order you add them. The program’s total duration updates automatically based on the combined durations of all media.
After populating a Program with media, the program would look like this:
2. Import a Playlist
If you already have a curated playlist within the same workspace, you can use this option. You can import the playlist directly into a program. When a playlist is imported, it is automatically broken down into individual media items. These media files are added to the program’s timeline as standalone entries - meaning the original playlist structure is no longer retained.
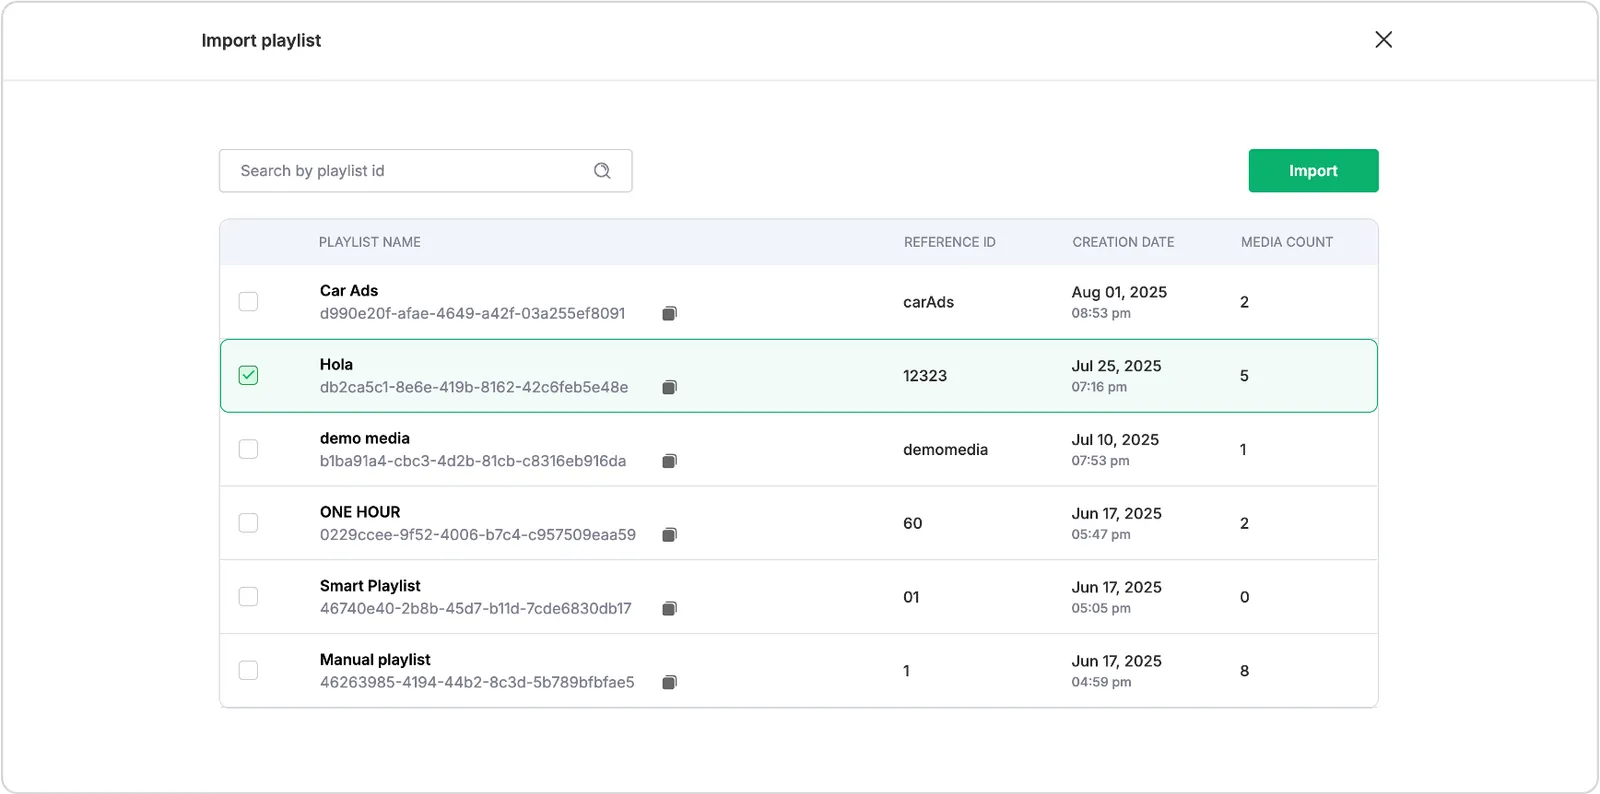
- Click Import Playlist
- Select a playlist from your workspace
- FastPix will break it down into individual media entries inside the program
After import, each video acts like a standalone item - you can reorder, delete, or insert bumpers between them.
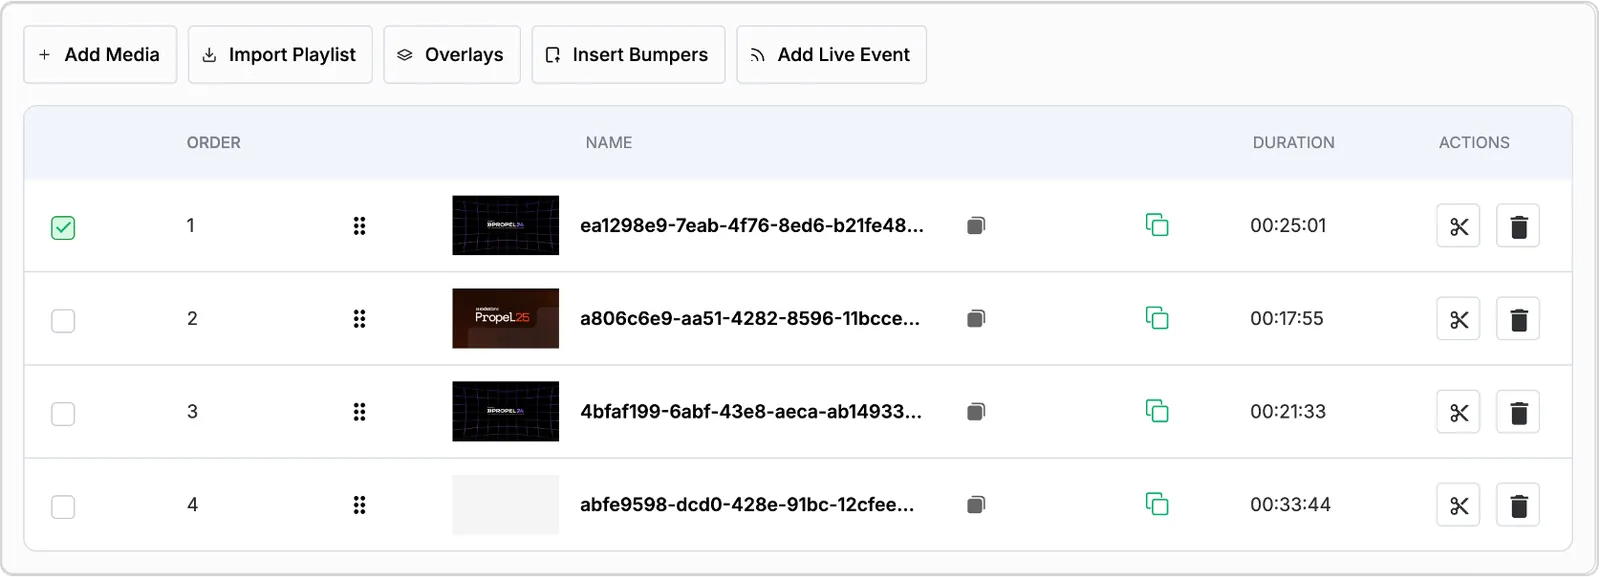
3. Add a live event
Live events can be added to a program to insert real-time content into your playout schedule. This is useful for integrating live shows, broadcasts, or external feeds into an otherwise pre-recorded lineup.
- Click Add Live Event
- Enter a name and duration
- Create
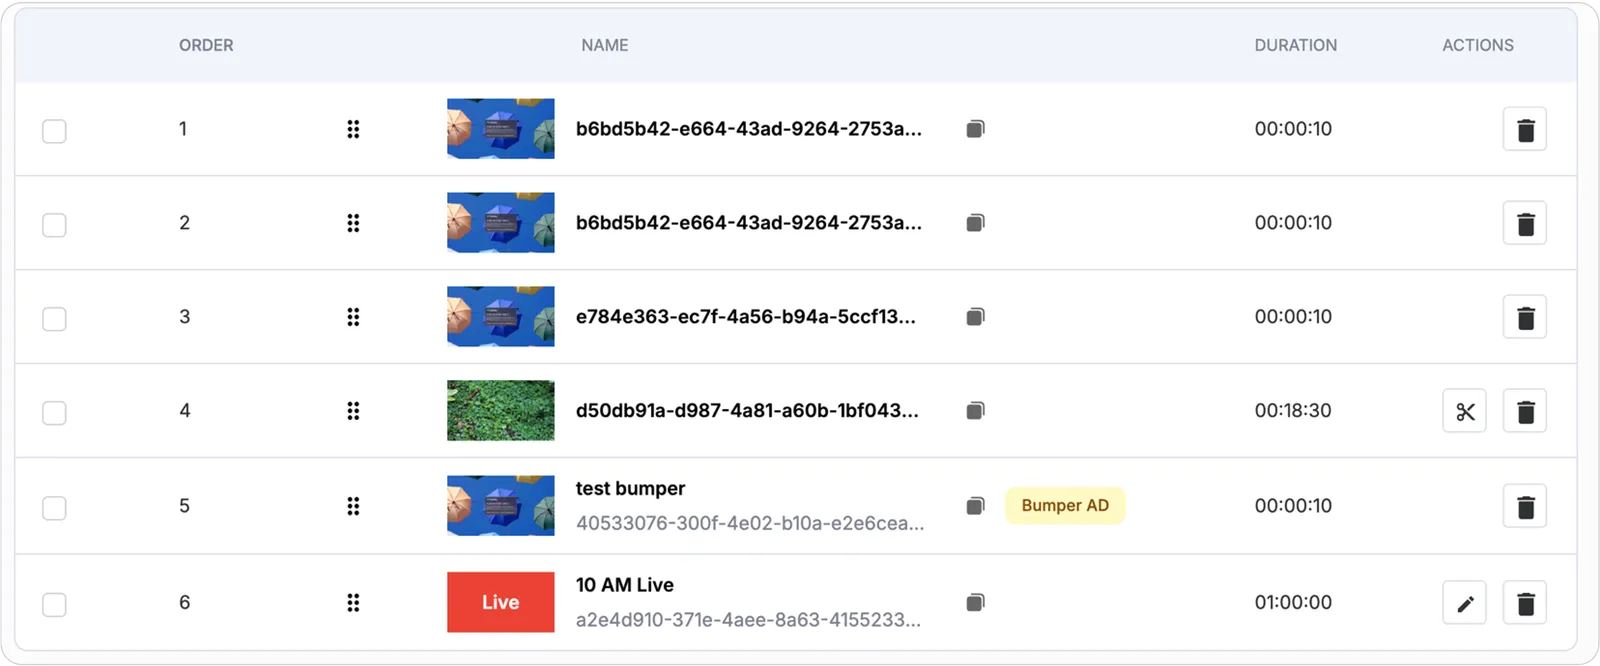
Once added to a program, live events behave like any other timeline item and can be placed before or after media and bumpers or reordered as needed to fit the intended flow.
IMPORTANT
To use live events, enable Live inputs when you create the loop channel. Also select a slate to play if no live input is detected.
Start the live input at least 5 minutes before the scheduled start time to ensure uninterrupted playback.
Step 3: Insert bumpers (Pre-roll/Post-roll)
Bumpers are short video clips - typically used for advertisements, promos, or transitions - that can be placed between media files, live events, or other bumpers within a program timeline. They help create smooth transitions or insert monetized ad breaks between major content blocks.
Once added, bumpers behave just like media files. They can be reordered, deleted, segmented, or have other operations applied - just as you would with any standard media item. This flexibility allows you to treat bumpers as fully manageable elements within the program’s structure.
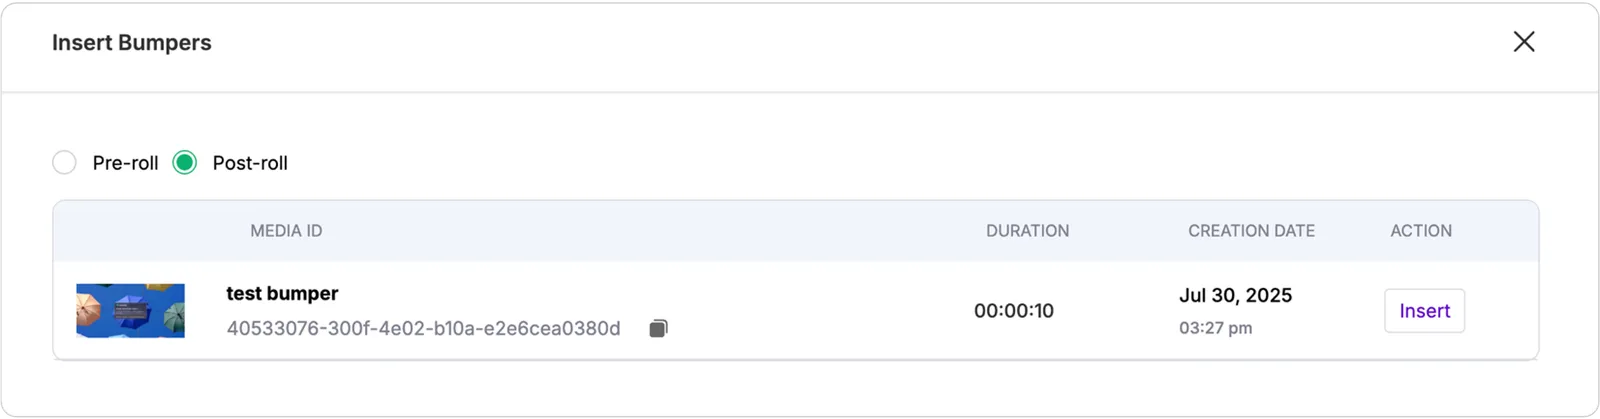
To add a bumper to an event in the program:
-
Select the event and click Insert Bumpers.
-
On the bumper selection page, choose:
- Pre-roll – plays before the content
- Post-roll – plays after it
-
Click Insert
You’ll now see the bumper appear above or below the target item. Make sure there’s enough gap between events for bumpers to be inserted properly.
Step 4: Reorder or delete events
You can rearrange items inside a program anytime:
- Just drag and drop them to update playback order
- If you want to remove something, click the trash icon
Note: If an event is scheduled to start within the next 3 minutes, you won’t be able to:
- Add new media/live events/playlists
- Add or remove bumpers
- Reorder events
- Delete anything that’s about to start
FastPix blocks these edits to ensure stable playout behavior.
Step 5: Segment media for mid-rolls
If you want to simulate mid-roll ad breaks inside a long video, you can segment the media.
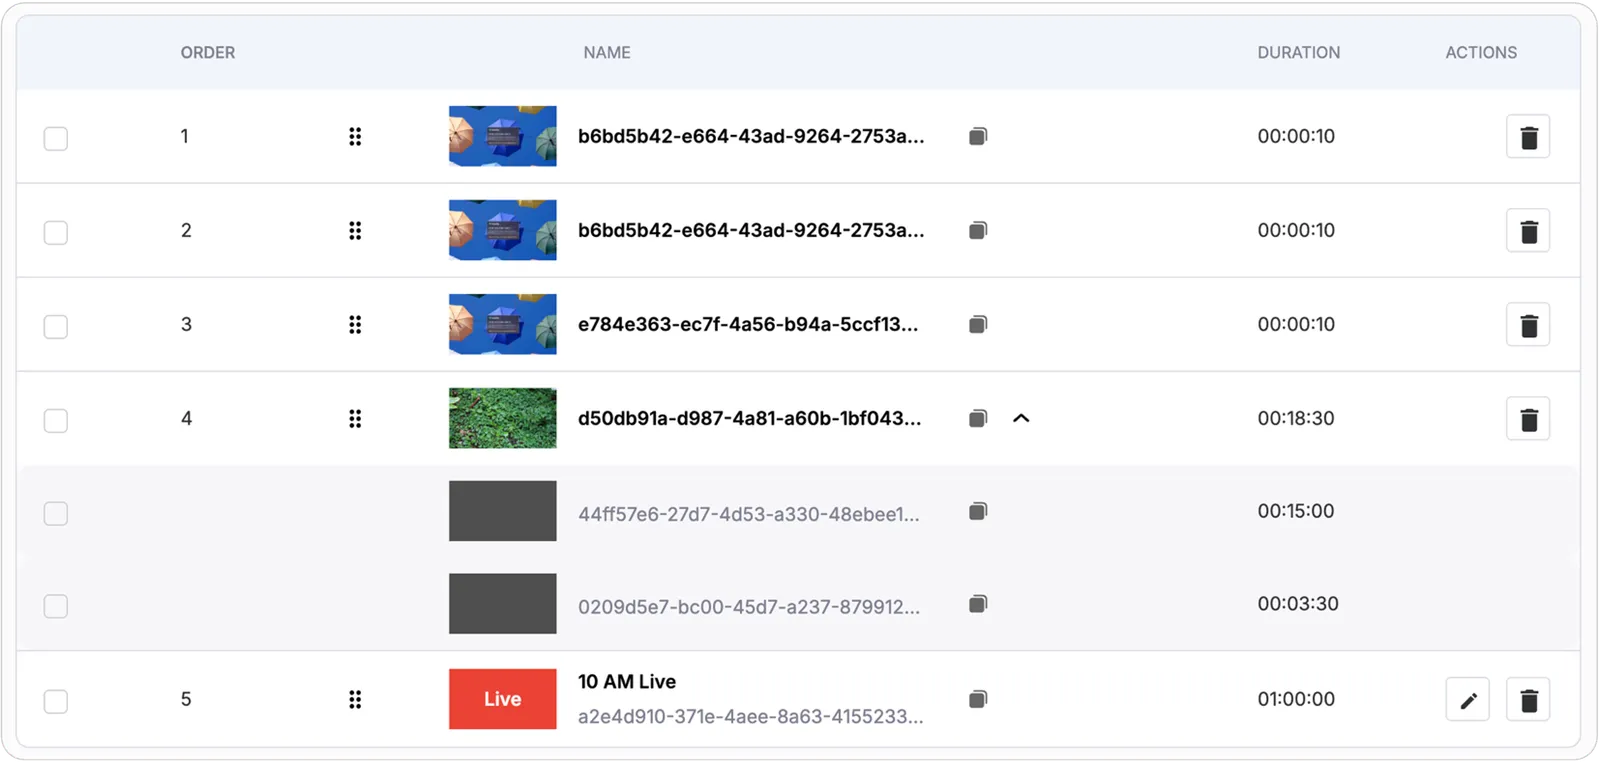
Here’s how:
- Click the scissor icon on a video (must be at least 15 minutes long)
- Enter the start time of the segment and the duration
- Click Add
Once segmented, the media is treated as separate parts, giving you more control over ad placement without altering the original video file.
Now you can insert bumpers between the segments to simulate mid-roll ads. Segment bumpers can be added or deleted as needed, but their position is fixed to the defined segment boundaries.
Segment rules:
- Max 10 segments per media.
- Segments can’t have bumpers already attached.
- Segment creation only works in Draft or if the segment is scheduled 30+ minutes ahead of the current playback time.
Step 6: Add overlays
You can make your stream feel like a real broadcast. Overlays let you add logos, banners, tickers, or promotional elements on top of the video - like what you see on TV.
FastPix supports two types:
- Static overlays - Display logos, Aston graphics, or L-band graphics during playback. They do not change during playback.
- Dynamic overlays - Display real-time HTML content, such as news tickers or live announcements. This allows updates without changing the channel configuration.
To configure overlays for your Loop Channel:
- Go to Overlay Configurations
- Choose an Overlay ID (you must have one already created)
- Set:
- Start and End Time – controls when the overlay shows
- Position (X/Y) – optional pixel placement
- Height/Width – optional sizing
- Opacity – optional transparency level
Click Create. Once saved, the overlay will automatically appear on top of the stream during the scheduled time window. You can update or delete overlay configurations at any point.
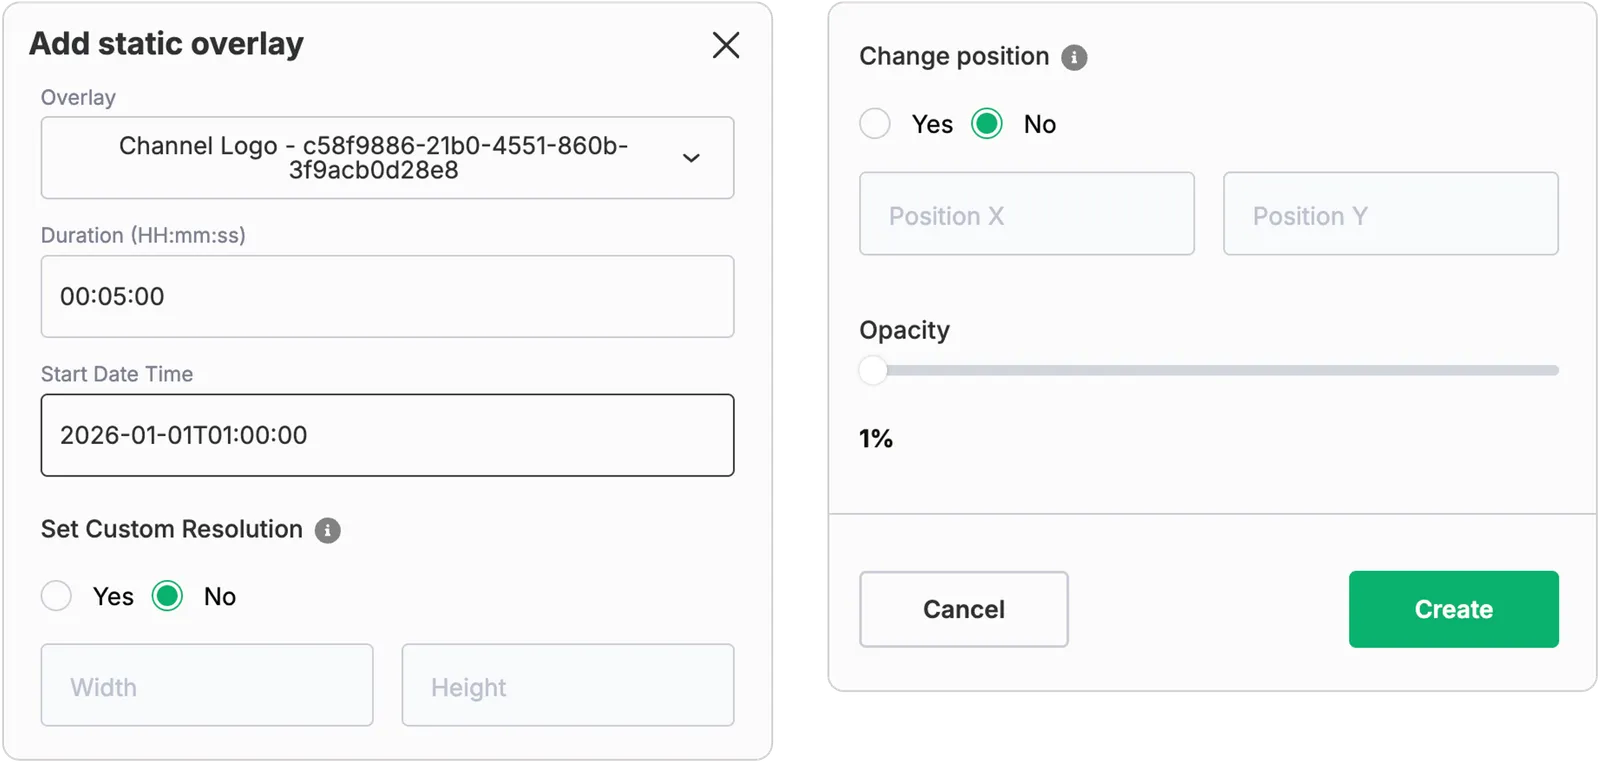
Add a dynamic overlay
To configure a dynamic overlay for your Loop Channel:
- Go to Overlay Configurations.
- Click Add dynamic overlay.
- Set the following:
- Overlay - Select an overlay ID from the dropdown. You must have a dynamic overlay already created in the Overlays section.
- Duration (HH:mm:ss) - Enter how long the overlay should display.
- Start Date Time - Enter when the overlay should begin.
Click Create. Once saved, the dynamic overlay will appear on top of the stream at the scheduled time and can be updated in real time without changing the channel configuration.
After adding an overlay configuration, you can see the events which have the overlay configuration based on the overlay timings.
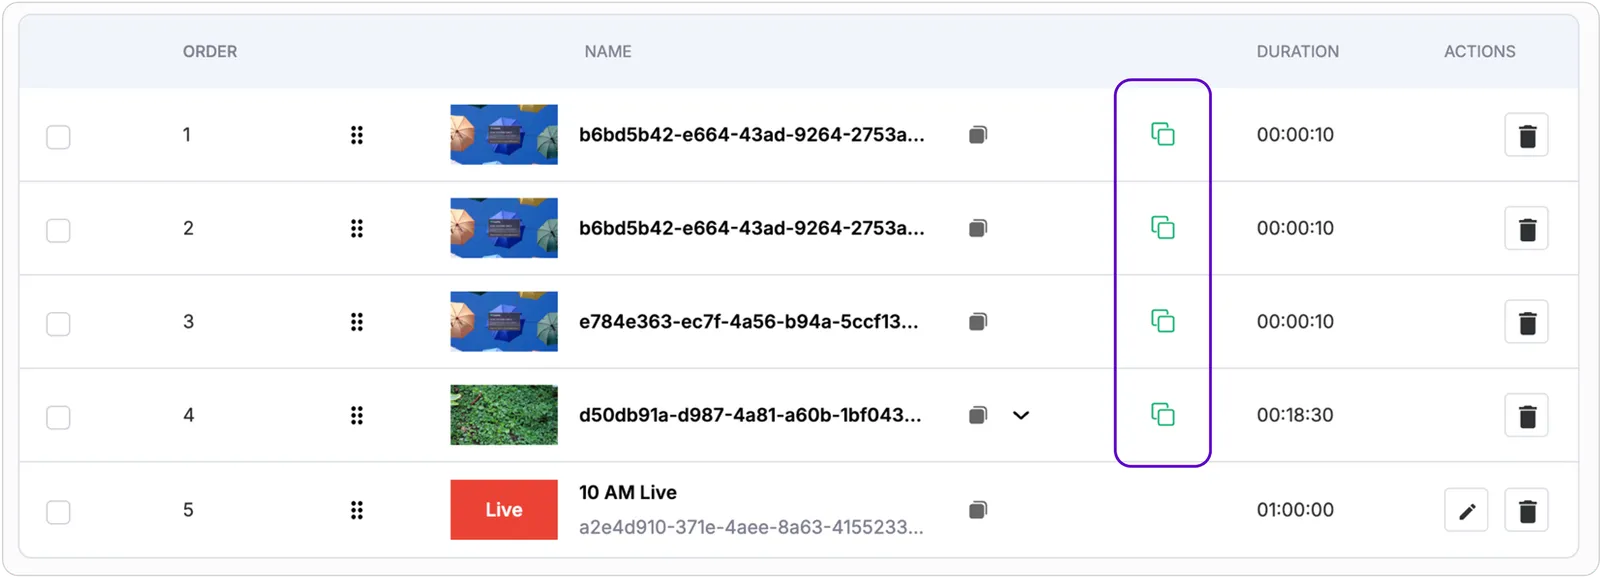
What’s next?
Once everything is in place:
- Activate your channel at least 10 minutes before the start time
- Monitor live playback, stream health, and destination delivery from the Channel Control Room
This will give you a fully automated, broadcast-ready Loop Channel - no encoders, no manual intervention, just continuous, professional-grade streaming.