

Enable DVR and rewind for live streams
Activate DVR mode on live streams to allow viewers to pause, rewind, and fast-forward through content.
Live time-shifting, also known as DVR (Digital Video Recorder) mode, allows viewers to interact dynamically with live streams by enabling features like pausing, rewinding, and fast-forwarding. This functionality is similar to traditional DVR systems and is especially useful for scenarios where viewers may want to revisit specific moments or catch up after interruptions.
FastPix’s live time-shifting feature ensures a seamless viewing experience while offering broadcasters flexibility to enable or disable these capabilities based on the type of content being streamed.
Why implement live time-shifting?
Live time-shifting elevates the user experience, giving viewers more control over live content.
Here’s why it’s worth enabling:
Benefits to viewers
- Pause and resume: Viewers can step away from the stream without missing anything.
- Rewind moments: Replay specific sections to catch missed details or relive important highlights.
- Fast-forward: Skip ahead after pausing or rewinding to rejoin the current live broadcast.
Ideal use cases
- Live sports: Replay pivotal moments like goals, touchdowns, or critical plays.
- Webinars and conferences: Allow participants to revisit sections for better understanding.
- Breaking news: Ensure no key updates or critical segments are missed.
Modes of operation
FastPix supports two operational modes for time-shifting. These modes are configurable based on the nature of the live stream and the level of interactivity desired:
DVR mode (enableDvrMode: true)
- Time-shifting controls are enabled: Viewers can pause, rewind, and fast-forward live streams.
- Use case: Ideal for interactive streams like sports events, educational sessions, and news broadcasts where viewer control enhances engagement.
Non-DVR mode (enableDvrMode: false)
- Time-shifting controls are disabled: The stream runs in real-time, and viewers cannot pause, rewind, or fast-forward.
- Use case: Best suited for live scenarios where immediacy is critical, such as live auctions or interactive gaming streams.
Enable DVR playback for live streams
FastPix lets you turn any live stream into a DVR-enabled stream, so viewers can pause, rewind, and replay while the event is still live. You enable a single setting at stream creation, either from the FastPix dashboard or with the live stream creation API.
Enable DVR from the dashboard
-
In the FastPix dashboard, open Live and select Create new live stream.
-
Turn on DVR mode. Under Default settings, use the Enable DVR mode toggle. Under Custom settings, set
"enableDvrMode": truein the request body.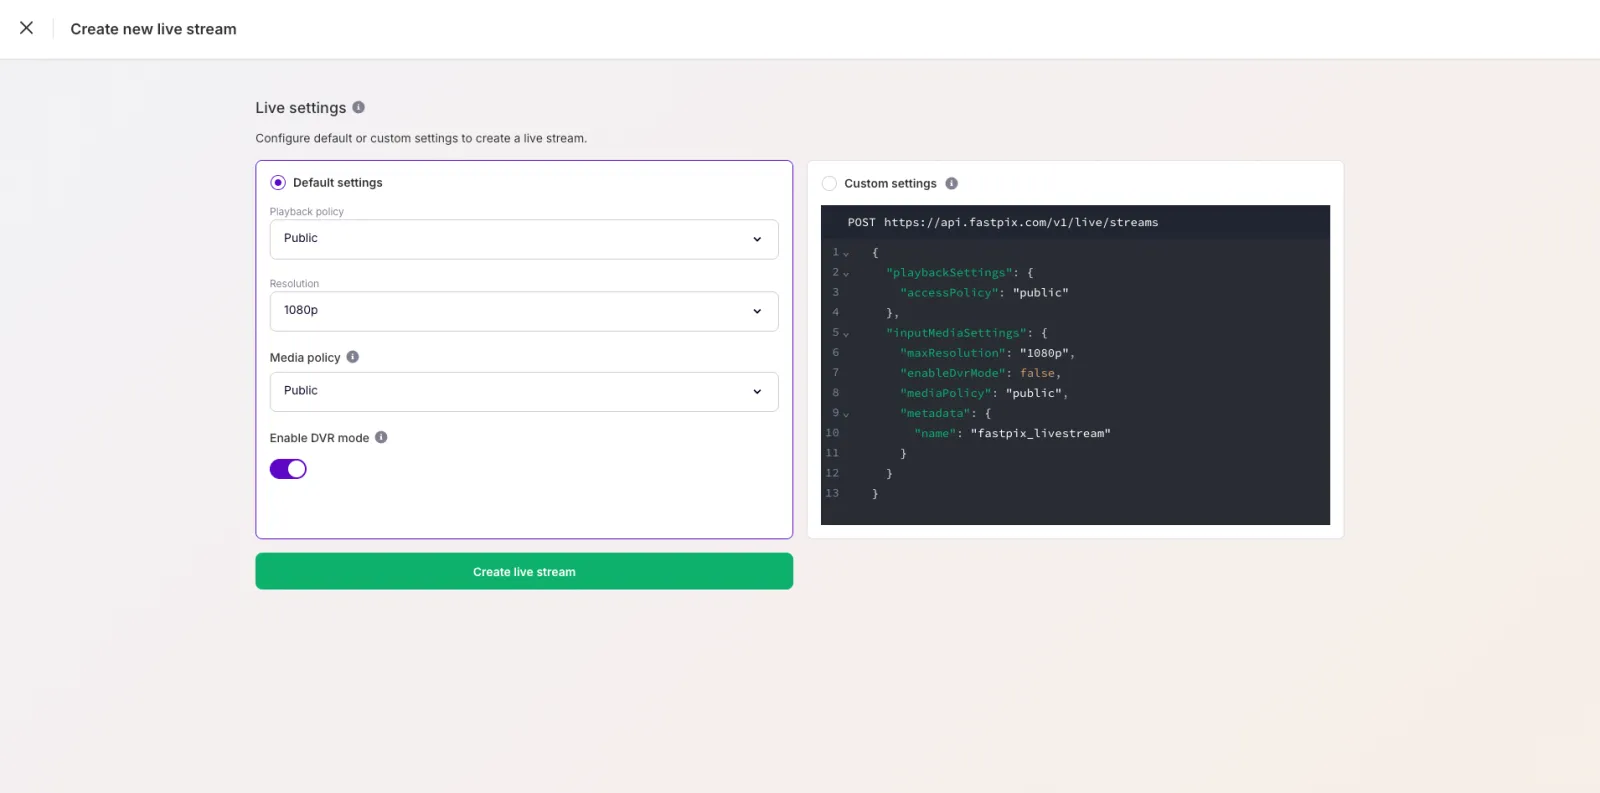
-
Select Create live stream. Your stream is created with DVR enabled. To watch it with time-shifting controls, append
?dvrMode=trueto the playback URL, as described in View DVR-enabled livestreams.
Enable DVR with the API
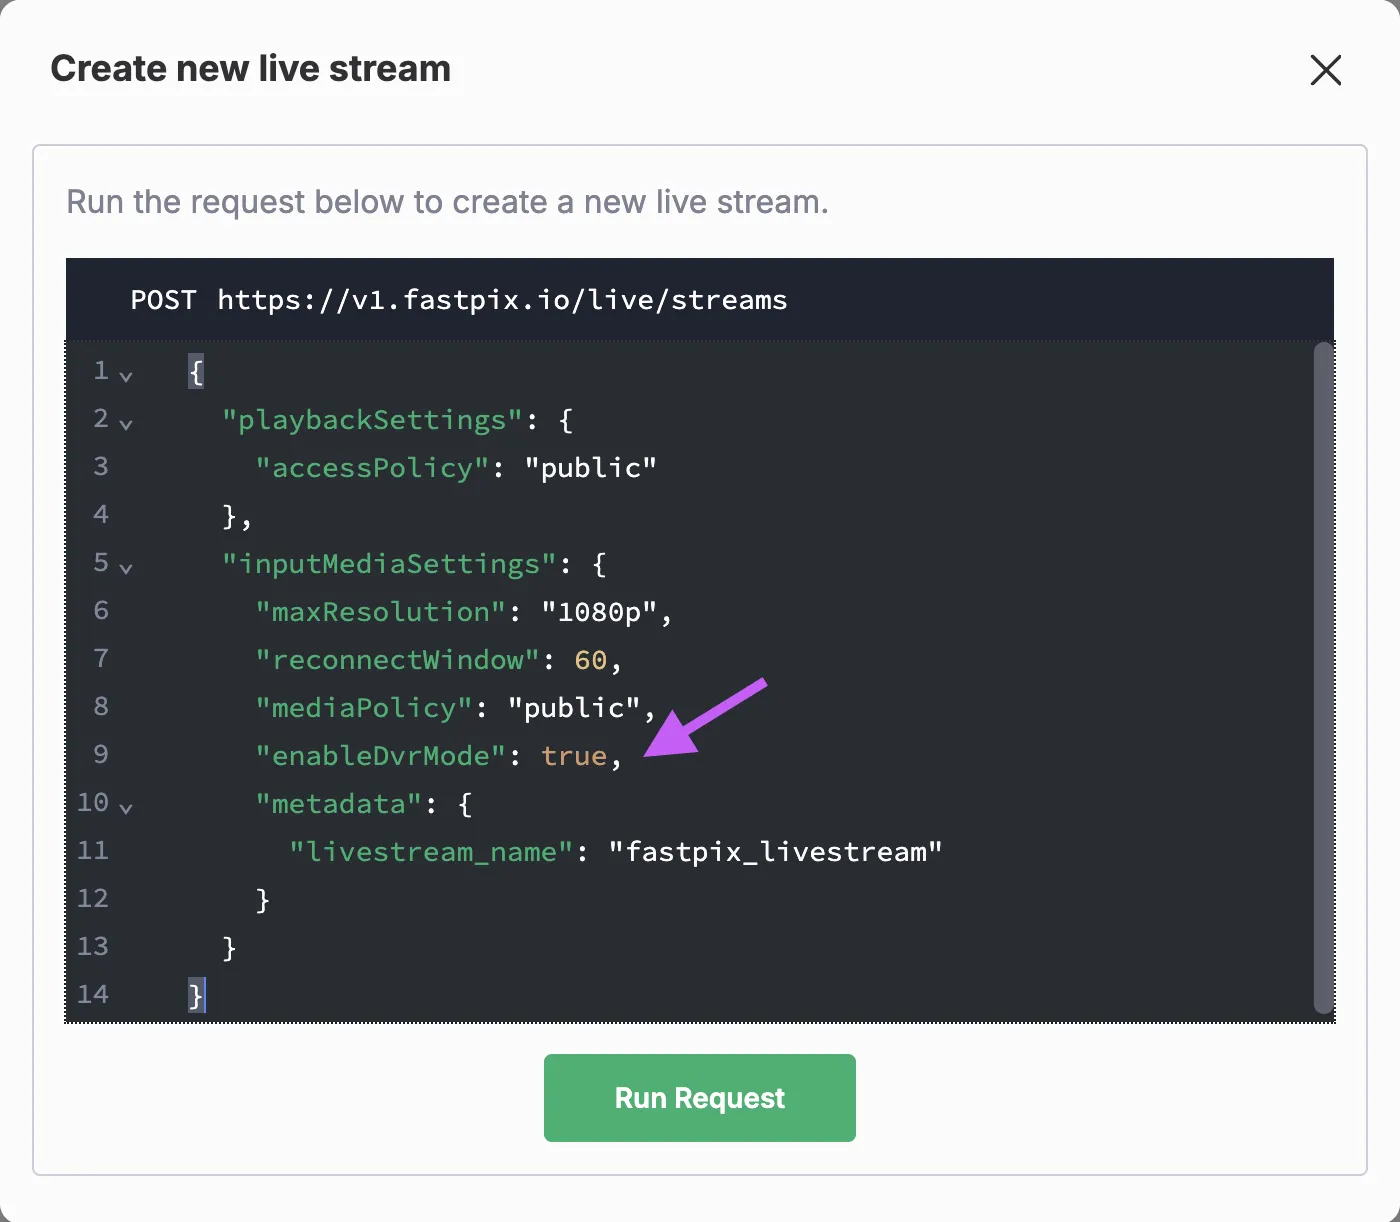
To enable DVR, include enableDvrMode: true when calling the livestream creation API.
Sample request
View DVR-enabled livestreams
To watch a DVR-enabled livestream with pause, rewind, and fast-forward controls, get its playback URL from the dashboard and append dvrMode=true.
-
In the dashboard, open your live stream and go to the Integrate tab.
-
Under Using other video players, copy the RTMPS playback URL. It looks like
https://stream.fastpix.com/{playbackId}.m3u8.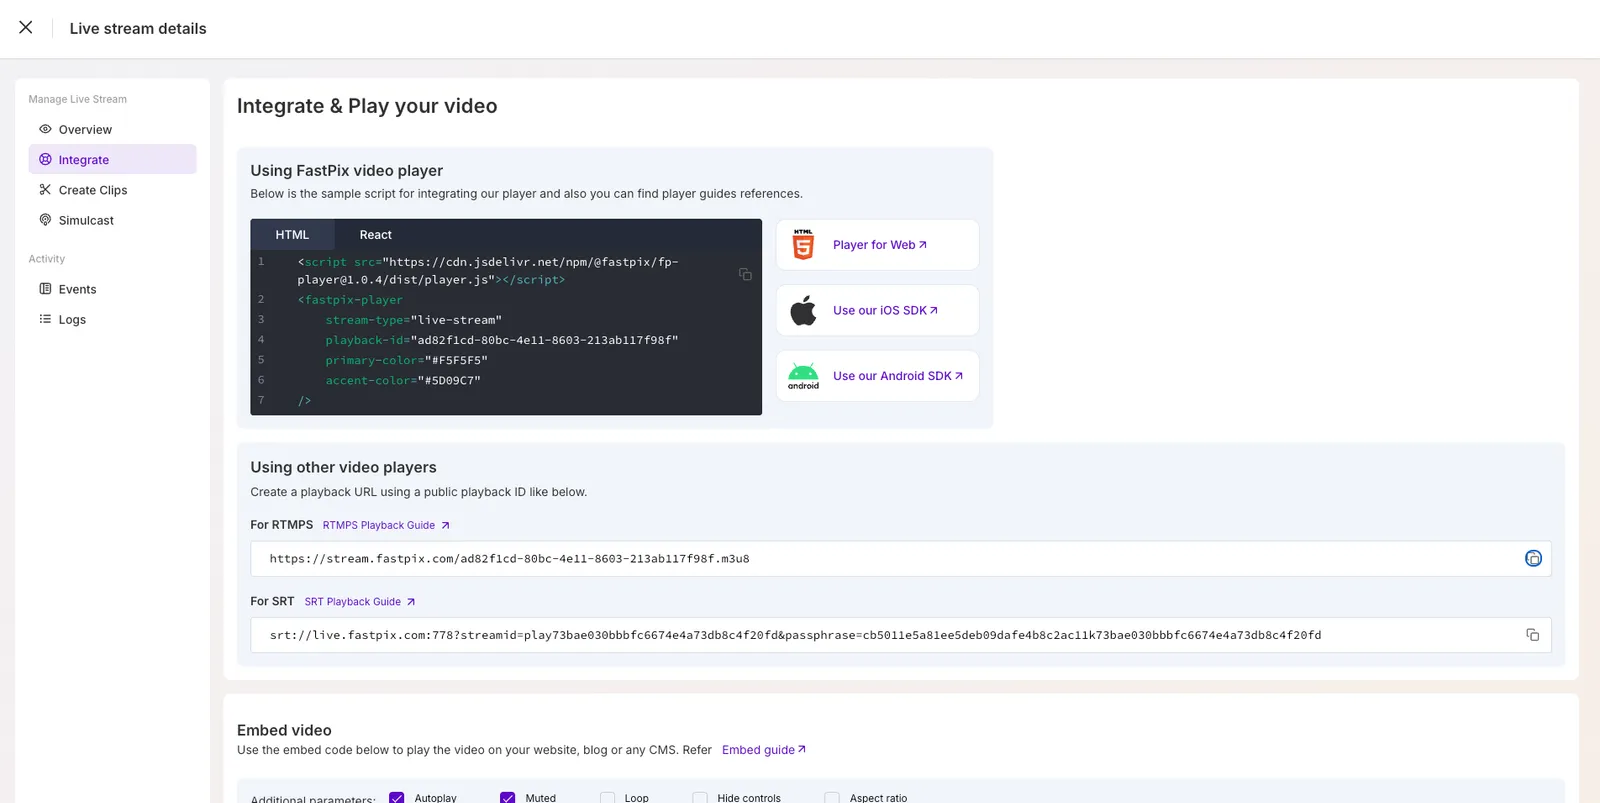
Append the query parameter dvrMode=true to the URL:
Replace {playbackId} with the actual playback ID from your livestream response. This URL works in any HLS-compatible player, which then shows the seek bar and the pause, rewind, and fast-forward controls. On a DVR-enabled stream, viewers can seek back through the buffered window; a stream without DVR keeps them near the live edge.
Note: This works only if the stream was created with "enableDvrMode": true.
Requirements for DVR playback experience
Most default video players do not support HLS DVR playback out of the box, especially when time-shifting is involved. To fully experience features like pausing, rewinding, and fast-forwarding a live stream with DVR enabled, here’s what you need:
- Use a player that supports HLS + DVR
- Use an HLS-compatible player like hls.js for browsers that do not natively support HLS (e.g., Chrome, Firefox).
- Use an HLS-compatible player like hls.js for browsers that do not natively support HLS (e.g., Chrome, Firefox).
- Ensure DVR mode is enabled on the stream
- The stream must be created with
"enableDvrMode": true. - The playback URL should include the query:
?dvrMode=true.
- The stream must be created with
- Set appropriate HLS.js configurations
Some key configurations in the player that improve DVR playback:backBufferLength: Controls how far back the viewer can seek.maxBufferLength: Adjusts how much content to buffer for smooth playback.lowLatencyMode: Ensures minimal lag between live and viewer experience.- Error recovery settings (manifestLoadingRetry, levelLoadingRetry, etc.) for robustness.
- Include seek controls in the player UI
- The player must expose a seek bar or navigation controls.
- Many embedded players hide or limit this by default ensure your player UI explicitly allows user control over the timeline.
- Browser compatibility
- HLS with DVR requires proper browser support.
- Use hls.js for non-Safari browsers.
- Safari supports it natively but does not expose all low-level DVR tuning options.